
agent-loadout MCP server
Commit Nov 4, 2026Configures and synchronizes Claude Code and Codex with a curated set of MCP servers, plugins, and rules for terminal and VS Code environments.
Also known as jonasyr/agent-loadout
- Stars
- 0
- Tools
- —
- Downloads, 30 days
- —
- Latest version
- —
- Last commit
- Nov 4, 2026
- License
- MIT
What is agent-loadout MCP?
agent-loadout configures and synchronizes Claude Code and Codex with a curated set of MCP servers, plugins, and rules for terminal and VS Code environments.
Summary generated from the project's README
About agent-loadout MCP server
Synchronizing development environments for AI agents is what agent-loadout enables for developers using Claude Code and Codex. It provides a unified way to configure, manage, and update a curated collection of MCP servers, plugins, and custom rules across both terminal and VS Code environments. By merging a shared kit with a personal layer, it ensures that your agent configurations remain consistent across different machines and do not suffer from version drift.
The system works locally on Linux, macOS, or WSL 2, requiring git and curl for the initial bootstrap. Users can manage their specific preferences through a private git repository, which the CLI pulls daily to keep tools current. The setup includes specialized tools like codebase-memory-mcp for code graphing, Serena for symbol editing, and Context7 for library documentation. It also integrates specialized plugins for UI work, security guidance, and automated commit commands to create a complete workflow from initial planning to final documentation sync.
What you can do with it
- 1Standardize agent environmentsConfigure Claude Code and Codex with the same set of tools and rules across multiple machines.
- 2Automate project onboardingPrepare a new repository for AI agents by running a command that sets up project-specific configurations.
- 3Perform health checksVerify that all required MCP servers and plugins are correctly installed and functioning in your environment.
Written from the project's README. Every use case is checked against a quote from it.
Automated checks
Ran Nov 16, 2026Full report →Not verified yet. A server needs a score of 80, no serious finding, and enough data for us to check. How checks work · What to fix for more points

- Source repository linked and reachablejonasyr/agent-loadout is public and reachablegithub.com/jonasyr/agent-loadout ↗Pass
- Package names this repository as its sourceNot checked
- Build provenance (Sigstore attestation)Not checked
- Open source license (OSI)MITspdx.org/licenses/MIT.html ↗Pass
- Commit or release in the last yearLast commit or release 2026-11-04github.com/jonasyr/agent-loadout ↗Pass
- OpenSSF ScorecardNot checked
- Package name not close to a popular packageNot checked
- No critical advisory in the package or its dependenciesNot checked
- No hidden instructions to the model0 tool descriptions and the README read; no override phrases, credential paths or hidden charactersPass
- Destructive tools are labelledNot checked
- Remote endpoint answers the MCP handshakeNot checked
README
View on GitHubagent-loadout
Claude Code and Codex, fully set up in one command.
The best plugins, MCP servers and rules, preconfigured to work together, in the terminal and in VS Code, on every machine, and kept up to date.




Quick start · What you get · Toolset · Trust · Docs
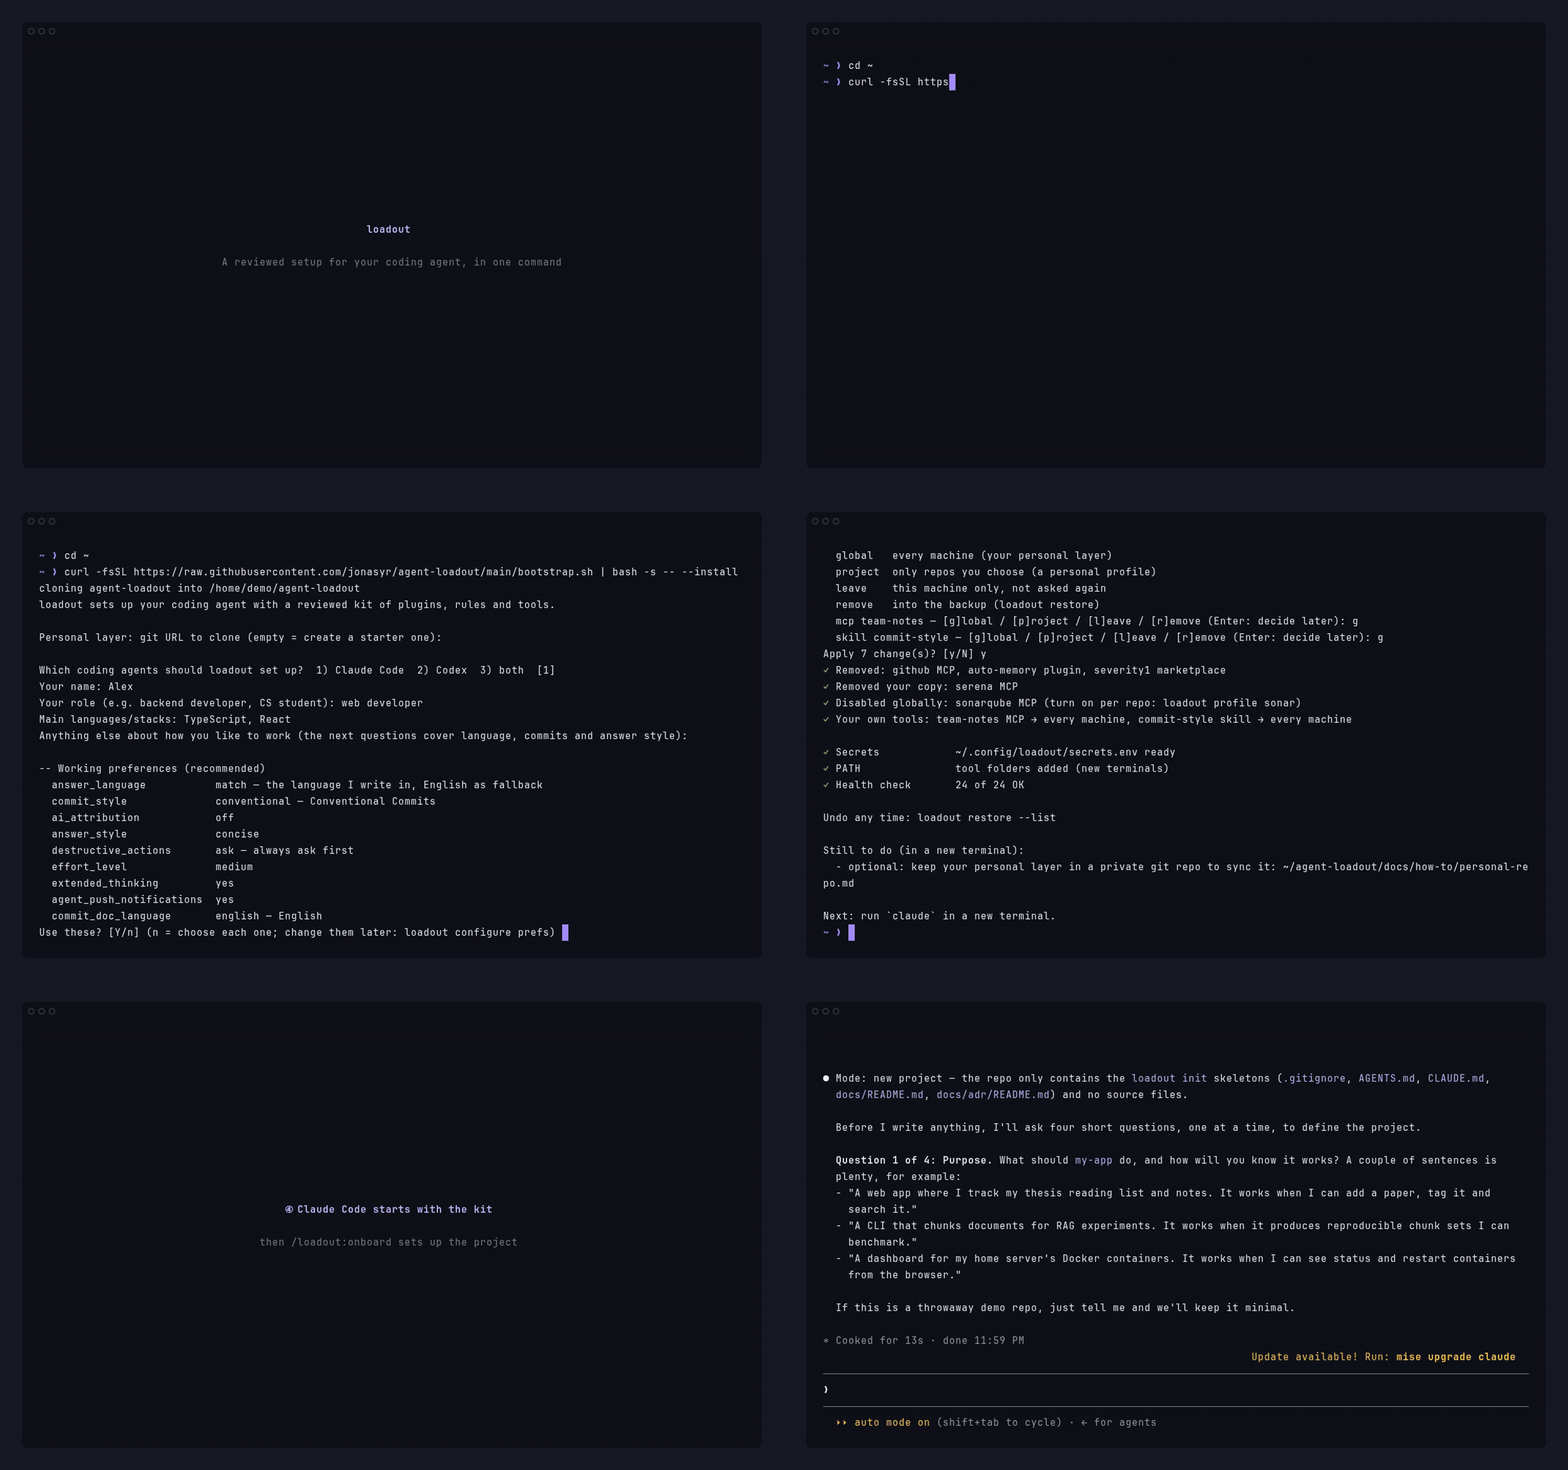
The Quick start below, on a machine that already has Claude Code. Recorded in a sandbox with fake data. The demo shows Claude Code; Codex gets the same setup.
Claude Code and Codex get much better with the right plugins, MCP servers and instructions, but setups drift: every machine ends up different, old tools linger and versions go stale. loadout is a reviewed shared kit (this repo) plus your personal layer (your own folder, ideally a private git repo); its CLI merges both into your agents' configuration (~/.claude, ~/.codex) and keeps them current (how it works).
Quick start
Recommended: Linux, macOS, or WSL 2 on Windows, with the CLI of each agent you use, also when you work in VS Code. That is what the steps below set up. For another platform, one agent only, or VS Code's extensions without their CLIs, Pick your setup and the setup matrix name one recommended path for each combination.
You need git and curl (how to get them); you log in to your agents and gh at the end.
[!NOTE] On Windows, use WSL 2 and read Use loadout on Windows with WSL 2 first. Start in your Linux home folder: a shell started from Windows opens in
/mnt/c.
1. Install
Both ways put the kit in an agent-loadout folder and run its setup.
Recommended: one command (clones into your home folder)
cd ~
curl -fsSL https://github.com/jonasyr/agent-loadout/releases/latest/download/bootstrap.sh | bash -s -- --install
Or clone it yourself (you choose the folder and can read the code first)
git clone https://github.com/jonasyr/agent-loadout
cd agent-loadout
./bootstrap.sh --install
Keep the folder where it is: the installed links point into it.
The command installs the newest release that has been out for 3 days (the stable channel; release channels). Until the first channels release, 0.2.0, has been out 3 days, a stable install stops and says so. For main, the maintainer's way: add --channel dev and use the script from main (https://raw.githubusercontent.com/jonasyr/agent-loadout/main/bootstrap.sh).
Or let your agent do it. If you already use Claude Code or Codex, paste this into it. It asks a few questions, shows the command and runs it after your yes (how):
Set up loadout for me by following https://raw.githubusercontent.com/jonasyr/agent-loadout/main/docs/how-to/install-with-an-agent.md
Bootstrap asks for your personal layer, the folder for your own preferences and tools: paste the URL of your private repo, or press Enter for a starter you can turn into one later. Then it asks which agents to set up (Claude Code, Codex or both) and a few preferences (what bootstrap asks).
It installs what is missing, in your home folder and without sudo: the agents you chose and every tool in the toolset. It never replaces a tool you already have (what runs when you ask). The one-liner clones into ./agent-loadout; --dir PATH chooses another folder.
With Claude Code on, it then reviews the setup you already have and asks about each change (your own tools); if it replaced anything, it names the undo command. It ends with the steps still open on your machine. Step by step: Getting started.
cd $HOME
& ([scriptblock]::Create((irm https://github.com/jonasyr/agent-loadout/releases/latest/download/bootstrap.ps1))) --install
Git for Windows is required (Git Bash runs the hooks of both agents). Details: Native Windows.
2. Log in
Open a new terminal (bootstrap added ~/.local/bin to your shell profile), then:
claude                                  # log in to Claude Code, then quit it
codex                                   # log in to Codex, if you chose it; trust loadout's hooks when it asks
gh auth login && gh auth setup-git      # log in to GitHub
In VS Code: the extensions read the same setup and login as the CLIs; with only an extension (no CLI), sign in from the extension when it asks. In WSL, open your repos with code . from the WSL terminal (Use loadout with VS Code).
3. Check
loadout check
A read-only health check: it prints Health check: N of M OK and names the fix for each problem.
4. Use it in a project
cd my-project
loadout init
loadout init asks which agents the repo is for, shows everything it would write and asks before it writes (details). Then open your agent there and run the onboard skill, which reads the project and writes its documentation: /loadout:onboard in Claude Code, $loadout:onboard in Codex. Codex reads the repo's .codex/config.toml only after you start codex there once and accept the trust question.
Questions or changes later
Ask your agent in plain words ("how do I undo yesterday's change?", "turn off Codex"). The loadout plugin answers from these docs and makes changes through the loadout commands after your yes (how it works).
What you get
- Both agents. Claude Code and Codex get the same rules, tools and preferences, from one kit and one personal layer; choose one or both at setup (Codex-only details).
- Terminal and VS Code. VS Code's Claude Code and Codex extensions read the same setup, and
loadout checksays what each extension lacks and how to fix it (VS Code). - Curated defaults. The toolset complements itself instead of overlapping, and every keep or drop decision has a written reason in
catalog.json. - Works on existing setups.
loadout adoptshows what it would change and why, asks first, and backs up what it replaces (your own tools). - Stays up to date by itself. loadout pulls the kit and your personal layer daily, re-applies what changed and tells you when tools have updates (the daily sync).
- Yours on top. Your preferences, own tools and profiles live in your personal layer, ideally a private git repo, so they follow you to every machine (set it up); change them with
loadout configureor by asking your agent (preferences). - Projects too.
loadout initprepares any repo for the agents you choose for it, profiles add domain tools only where needed, and three skills keep the docs true (documentation strategy).
The toolset
One workflow from idea to merged change: your agent plans before it builds, works with a code graph, current docs and a real browser, and ends every change with a review and docs that are still true.
| Job | Tools | Kind |
|---|---|---|
| Plan before building | superpowers (brainstorm, plan, test-driven build, debug, verify) · /loadout:execution-advisor (inline or subagents, per task) |
plugin · loadout skill |
| Understand the code | codebase-memory-mcp (code graph: callers, impact, dead code) · Serena (find, rename, edit symbols) · LSP plugins for Python, TypeScript, Rust (type errors after each edit: LSP plugins in Claude Code, a type-check hook in Codex) | MCP servers · plugins |
| Current docs | Context7 (libraries and frameworks) · Microsoft Learn (.NET, Azure, Windows) | MCP servers via plugins |
| UI that looks designed | frontend-design (direction) · playwright-cli (real browser checks) · impeccable (audit and polish) | plugins · CLI |
| Safe, documented changes | security-guidance (warnings and commit review) · /loadout:docs-sync, /loadout:docs-audit, /loadout:onboard (docs that match the code) · commit-commands (commit, push, PR) |
plugins · loadout skills |
| Fewer tokens | rtk (compact command output, applied by a hook) | CLI |
The code tools are used, not just installed: Serena and the code graph load in every session and subagent, Serena's reminder steps in when an agent drifts into grep, and the graph stays indexed (how, ADR 0039).
Domain tools (research, databases, SonarQube, Android) are added per project with profiles. How the pieces work together: The toolset. Every tool with its settings: Included tools.
Why you can trust it
- It updates itself, so you trust this repo. A daily background job runs
git pull --ff-onlyon this repo and your personal layer, and the next session runs the new code. Turn it off withLOADOUT_NO_AUTO_PULL=1, or point your clone at a fork you review (the daily sync). - What it replaces can be restored. Before loadout removes or replaces a tool, file or link you own, it moves it into a timestamped backup, and
loadout restoreputs it back. Writes in a repo (init,profile,configure new skill --to repo) are shown as a plan first and backed up too. The routine sync of the kit's own settings is not backed up (details). - Your tools never change without your answer.
loadout adoptis a dry run until--apply, then asks per group and once more before it applies; tools loadout does not know stay as they are, and binary updates show each command and ask first. - Secrets stay out of git. Keys live in
~/.config/loadout/secrets.env(readable only by you), and configs refer to them by name. Your own tools recorded into your personal layer pass a secret guard; values you set withconfigure set prefare not checked (secrets).
What runs automatically and where the trust boundary is: Security and trust. To report a vulnerability, see SECURITY.md.
Docs
The full index is docs/README.md.
| I want to | Read |
|---|---|
| Ask a question or change my setup | Ask your agent about loadout |
| Pick the install path for my platform, agents and VS Code | Pick your setup, setup matrix |
| Install step by step, per platform | Getting started |
| Decide what happens to tools I already have | Handle your own tools |
| I installed a skill or MCP server myself, or want to write a skill | You installed a tool yourself, Create a skill of your own |
| Undo something loadout changed | Undo what loadout changed |
| Change my preferences or add tools globally | Set your working preferences |
| Switch Codex on, or see what is Codex-only | Use loadout with Codex |
| Use VS Code's Claude Code or Codex extension | Use loadout with VS Code |
| Use my preferences and own tools on every machine | Keep your personal layer in a private git repo |
| Add domain tools to one repo | Write a personal profile, Profile format |
| Fix a problem | Troubleshooting |
| Look up a command, flag or exit code | CLI reference |
| See which tools are included and why | Included tools |
| See how the tools form one workflow | The toolset |
| Understand how the parts fit together | Architecture |
| Know why it was built this way | Decision records |
| Remove loadout | Uninstall loadout |
| Contribute | CONTRIBUTING.md |
Gemini CLI and Cursor are not supported yet; how Codex is set up and how others could follow is in Architecture.
Contributing
Contributions are very welcome. Please read CONTRIBUTING.md first and follow it: it covers setup, tests, the documentation rules and how to open a pull request. Everyone taking part follows the Code of Conduct.
License
agent-loadout MCP questions
Can I use my own custom tools and preferences?
Yes, you can use a personal layer, which is ideally a private git repo, to store your own preferences, tools, and profiles so they follow you to every machine.
How does it handle existing agent setups?
It installs missing tools without replacing what you already have, and it can review your existing setup to ask about specific changes.