
AIエージェントやターミナルから、iOSおよびAndroidデバイスのディスプレイボードへ、リアルタイムの更新情報やスタイリングされたコンテンツを送信します。
別名 pushtodisplay/cli, pushtodisplay
- スター
- 2
- ツール
- 8
- ダウンロード数(30日間)
- —
- 最新バージョン
- 0.1.14
- 最終コミット
- 2026年11月8日
- ライセンス
- MIT
PushToDisplay MCPとは
PushToDisplayはMCPサーバーです。 AIエージェントやターミナルから、iOSおよびAndroidデバイスのディスプレイボードへ、リアルタイムの更新情報やスタイリングされたコンテンツを送信します。. 8個のツールを提供しており、pushtodisplay_send_update, pushtodisplay_list_boards, pushtodisplay_get_boardなどがあります。
プロジェクトのREADMEから生成された概要
PushToDisplay MCP server について
このMCP serverを使用すると、AIエージェントからモバイルディスプレイボードへ、リアルタイムの更新情報やスタイリングされたコンテンツをプッシュできます。ターミナルや、Claude、Cursor、VS Code CopilotなどのAIクライアントからテキストや視覚的な更新情報を直接送信することで、iOSおよびAndroidデバイスをライブステータスダッシュボードとして活用できます。
ユーザーは、メッセージを配信するpushtodisplay_send_update、既存の設定を確認するpushtodisplay_list_boards、新しいレイアウトを作成するpushtodisplay_create_boardなど、いくつかの専用ツールを使用してディスプレイを管理できます。サーバーは既存のCLIセッションから認証を継承します。認証はブラウザログイン、またはSSHやコンテナなどのヘッドレス環境向けのデバイスコードを介して確立できます。自動化されたCI/CDパイプラインでは、pt_ プレフィックスで始まるAPIキーを使用して認証を行うことが可能です。
このサーバーは、画面上の情報の表示方法を細かく制御できます。テキストサイズ、フォントの太さ、16進数カラー、背景色を指定できるほか、マルチパネルレイアウト内の特定のパネルを対象にすることも可能です。JSONブロックによる複雑なスタイリングをサポートしており、モバイルデバイス上で情報が明確に表示されるよう、水平または垂直方向の配置を指定できます。
できること
- 1デプロイ状況の更新を配信ソフトウェアのデプロイが成功または失敗した際に、AIエージェントが特定のボードに通知を送信できます。
- 2インフラの健全性を視覚的に監視開発者はこのサーバーを使用して、稼働時間やAPIの健全性メトリクスを色分けしてモバイルダッシュボードにプッシュできます。
- 3ディスプレイボードの設定管理AIアシスタントが、さまざまな監視タスクを整理するために、異なるディスプレイボードの作成、一覧表示、削除を行うことができます。
- 4CI/CDにおけるステータス表示の自動化自動化スクリプトがAPIキーを使用することで、対話的なログインなしに、リアルタイムのログやビルド結果をモバイル画面に送信できます。
プロジェクトの README から作成されています。すべてのユースケースは、その引用と照らし合わせて確認されています。
PushToDisplay MCPのインストール方法
フォーマット検証日 2026年11月10日Cursor に追加Gooseに追加Claude CodeにPushToDisplay MCPをインストール
$ claude mcp add cli -- npx -y pushtodisplayCursorにPushToDisplay MCPをインストール
~/.cursor/mcp.json
{
  "mcpServers": {
    "cli": {
      "command": "npx",
      "args": [
        "-y",
        "pushtodisplay"
      ]
    }
  }
}VS CodeにPushToDisplay MCPをインストール
.vscode/mcp.json
{
  "servers": {
    "cli": {
      "type": "stdio",
      "command": "npx",
      "args": [
        "-y",
        "pushtodisplay"
      ]
    }
  }
}VS Code CLIにPushToDisplay MCPをインストール
$ code --add-mcp '{"name":"cli","type":"stdio","command":"npx","args":["-y","pushtodisplay"]}'Claude DesktopにPushToDisplay MCPをインストール
claude_desktop_config.json
{
  "mcpServers": {
    "cli": {
      "command": "npx",
      "args": [
        "-y",
        "pushtodisplay"
      ]
    }
  }
}CodexにPushToDisplay MCPをインストール
$ codex mcp add cli -- npx -y pushtodisplayCodex config.tomlにPushToDisplay MCPをインストール
~/.codex/config.toml
[mcp_servers.cli]
command = "npx"
args = ["-y", "pushtodisplay"]
Gemini CLIにPushToDisplay MCPをインストール
$ gemini mcp add -s user cli npx -- -y pushtodisplayGemini settings.jsonにPushToDisplay MCPをインストール
~/.gemini/settings.json
{
  "mcpServers": {
    "cli": {
      "command": "npx",
      "args": [
        "-y",
        "pushtodisplay"
      ]
    }
  }
}PushToDisplay MCPツール 8
READMEから検出pushtodisplay_send_updatepushtodisplay_list_boardspushtodisplay_get_boardpushtodisplay_create_boardpushtodisplay_update_boardpushtodisplay_set_default_boardpushtodisplay_delete_boardpushtodisplay_list_devices
| pushtodisplay_send_update | — | |
| pushtodisplay_list_boards | — | |
| pushtodisplay_get_board | — | |
| pushtodisplay_create_board | — | |
| pushtodisplay_update_board | — | |
| pushtodisplay_set_default_board | — | |
| pushtodisplay_delete_board | — | |
| pushtodisplay_list_devices | — |
設定
PTD_API_KEY
| 名前 | 説明 | 種類 |
|---|---|---|
| PTD_API_KEY | — |
自動チェック
実行日 2026年11月12日完全なレポート →自動チェックに合格しました。これはセキュリティ監査ではありません。コードを読み、サーバーに必要最小限のアクセス権を与えてください。 チェックの仕組み

- ソースリポジトリがリンクされており、アクセス可能合格
- オープンソースライセンス (OSI)合格
- 過去1年以内にコミットまたはリリースあり合格
- パッケージ名が有名なパッケージに酷似していない合格
- リモートエンドポイントがHTTPSを使用未チェック
- 破壊的なツールがラベル付けされている合格
- モデルへの隠れた指示がない合格
- パッケージおよびその依存関係に重大な勧告なし合格
README
GitHubで見るpushtodisplay
Command-line interface and MCP server for Push To Display — send real-time updates to display boards from your terminal or AI agents.
Get the app
Turn any screen into a live display board — get Push to Display on iOS and Android.


Install
Run directly with npx (no install needed):
npx pushtodisplay --help
Or install globally:
npm install -g pushtodisplay
Requires Node.js 18+. See the PushToDisplay documentation for guides, use cases, and API details.
Quick start
# Log in (opens browser)
pushtodisplay auth login

# Send an update (uses your default board)
pushtodisplay send "Hello, Display!"

# Send to a specific board
pushtodisplay send -b <board-id> "Deploy completed"

# List your boards
pushtodisplay boards list
Authentication
Log in with your Push To Display account — the same account you use in the mobile app.
Browser login (default)
pushtodisplay auth login
Opens your browser. Sign in and the CLI receives your credentials automatically.
Device code login (headless)
For machines without a browser — SSH sessions, containers, or remote servers:
pushtodisplay auth login --device-code
The CLI prints a URL and a one-time code. Open the URL on any device, enter the code, and approve the login.
Credentials are stored in your OS keychain (macOS Keychain, Linux libsecret, Windows Credential Manager). Falls back to ~/.config/pushtodisplay/ if the keychain is unavailable.
# Check auth status
pushtodisplay auth status

# Machine-readable status for scripts/agents (exit 0 = authenticated)
pushtodisplay auth status --json

# Log out (clear stored credentials)
pushtodisplay auth logout
auth status reports effective auth: an expired access token is still
reported as authenticated when a valid refresh token can renew it transparently
(a will refresh automatically note is shown instead of the raw token expiry).
It exits 0 when authenticated and 1 when not, so it is safe to gate
scripts on it.
{
  "authenticated": true,
  "method": "oauth",
  "accessTokenExpired": true,
  "canRefresh": true,
  "sessionExpiresAt": "2026-06-01T00:00:00.000Z"
}
Commands
send
Send a display update to a board.
# Simple text
pushtodisplay send -b my-board-id "Deploy succeeded"

# Styled text
pushtodisplay send -b my-board-id "Status" --size large --weight bold --color "#00FF00"

# Multiple inline runs — they stay on ONE line
pushtodisplay send -b my-board-id "Build:" "passing" --color "#22C55E"

# Panel targeting with layout options
pushtodisplay send -b my-board-id --panel 2 "Right panel content"
pushtodisplay send -b my-board-id --panel 1 --full-panel --density compact --align-x center "Alert"

# Per-run styling with JSON (repeatable)
pushtodisplay send -b my-board-id \
  --block '{"text": "API Health", "size": "large", "weight": "bold"}' \
  --block '{"text": "Uptime: 99.97%", "color": "#22C55E"}'

# Pipe a full JSON payload from stdin
echo '{"boardId":"my-board-id","blocks":[{"text":"From pipe"}]}' | pushtodisplay send --stdin
If no -b flag is provided, the server uses your default board.
How text renders
Blocks are inline runs, not lines. Think of <span>, not <p>. The blocks
of one message flow onto a single line in order, and wrap like a paragraph when
they run out of width:
pushtodisplay send -b my-board-id "Build:" "passing" --color "#22C55E"
renders as one line:
Build: passing
not as two lines. Each run keeps its own size, weight, colour, and background, so a message is one paragraph with styled runs inside it.
To put content on separate lines, send separate messages. Every send is its own entry in the panel's scrollable history, so multiple lines are multiple messages. Newlines inside a single message are not a layout mechanism.
--density sets the line height used when that paragraph wraps — it is not
the spacing between messages.
Note: in
--full-panelmode blocks are currently stacked on separate lines. That legacy behaviour is being removed so full-panel matches the inline model above.
Style flags
| Flag | Values | Description |
|---|---|---|
-s, --size |
small, medium, large |
Text size |
-w, --weight |
regular, semibold, bold |
Font weight |
-c, --color |
Hex color (#RRGGBB) |
Text color |
--background |
Hex color (#RRGGBB) |
Background color |
Panel flags
| Flag | Values | Description |
|---|---|---|
-p, --panel |
1–4 |
Target panel number |
--full-panel |
— | Enlarge to the whole board |
--density |
compact, standard, spacious |
Line height when text wraps |
--align-x |
start, center, end |
Horizontal alignment |
--align-y |
start, center, end |
Vertical alignment |
Other flags
| Flag | Description |
|---|---|
-b, --board |
Board ID |
--block <json> |
Inline styled run as JSON (repeatable) |
--stdin |
Read full JSON request from stdin |
boards
pushtodisplay boards list              # List all boards
pushtodisplay boards get <id>          # Get board details
pushtodisplay boards create -n "Name"  # Create a board
pushtodisplay boards create -n "Dash" -l 4  # Create with a layout
pushtodisplay boards delete <id>       # Delete a board
Create options:
| Flag | Description |
|---|---|
-n, --name |
Board name (required) |
-d, --description |
Board description |
-l, --layout |
Layout ID |
devices
pushtodisplay devices list # List active device-board streams
config
pushtodisplay config              # Show current configuration
pushtodisplay config show         # Same as above
JSON output
Add --json to any command for machine-readable output:
pushtodisplay boards list --json
pushtodisplay send -b my-board "test" --json
Configuration
Configuration is resolved in order: environment variables → config file → defaults.
| Env var | Description | Default |
|---|---|---|
PTD_API_URL |
API endpoint | https://api.pushtodisplay.com |
PTD_SERVICE_URL |
Service endpoint | https://services.pushtodisplay.com |
PTD_IDP_URL |
Identity provider | https://idp.pushtodisplay.com |
PTD_CONFIG_DIR |
Config directory | ~/.config/pushtodisplay |
MCP server
The CLI includes a built-in Model Context Protocol server, giving AI agents (Claude, Cursor, VS Code Copilot, and others) direct access to your display boards.
The MCP server inherits your CLI session — if you've run pushtodisplay auth login, it authenticates automatically.
Setup
Claude Code
claude mcp add pushtodisplay -- npx pushtodisplay mcp
Claude Desktop
Add to ~/Library/Application Support/Claude/claude_desktop_config.json (macOS) or %APPDATA%\Claude\claude_desktop_config.json (Windows):
{
  "mcpServers": {
    "pushtodisplay": {
      "command": "npx",
      "args": ["pushtodisplay", "mcp"]
    }
  }
}
Cursor
Open Settings → MCP Servers → Add Server, or edit .cursor/mcp.json:
{
  "mcpServers": {
    "pushtodisplay": {
      "command": "npx",
      "args": ["pushtodisplay", "mcp"]
    }
  }
}
VS Code (GitHub Copilot)
Add to .vscode/mcp.json:
{
  "servers": {
    "pushtodisplay": {
      "command": "npx",
      "args": ["pushtodisplay", "mcp"]
    }
  }
}
Other MCP clients
Any MCP client that supports stdio transport can use Push To Display. The server command is:
npx pushtodisplay mcp
Available MCP tools
| Tool | Description |
|---|---|
pushtodisplay_send_update |
Send content to a board |
pushtodisplay_list_boards |
List all boards |
pushtodisplay_get_board |
Get details of a board |
pushtodisplay_create_board |
Create a new board |
pushtodisplay_update_board |
Update a board's name, description, or layout |
pushtodisplay_set_default_board |
Set a board as your default |
pushtodisplay_delete_board |
Delete a board permanently |
pushtodisplay_list_devices |
List active device connections |
Commands at a glance
| Command | Description |
|---|---|
auth login |
Log in (browser or device code) |
auth logout |
Remove stored credentials |
auth status |
Show current auth status |
send [text...] |
Send a display update |
boards list |
List your boards |
boards get <id> |
Get board details |
boards create |
Create a new board |
boards delete <id> |
Delete a board |
devices list |
List active device connections |
config |
Show current configuration |
mcp |
Start the MCP server |
API key authentication
For CI/CD pipelines and scripts where interactive login isn't available, you can authenticate with an API key. Create one from the mobile app or the web portal. API keys start with pt_.
# Via environment variable
export PTD_API_KEY=pt_your_key_here
pushtodisplay send "From CI"

# Or store in keychain
pushtodisplay auth login --api-key pt_your_key_here
Note: API key auth only supports the
sendcommand. Useauth loginfor full access to boards, devices, and config management.
Screenshots
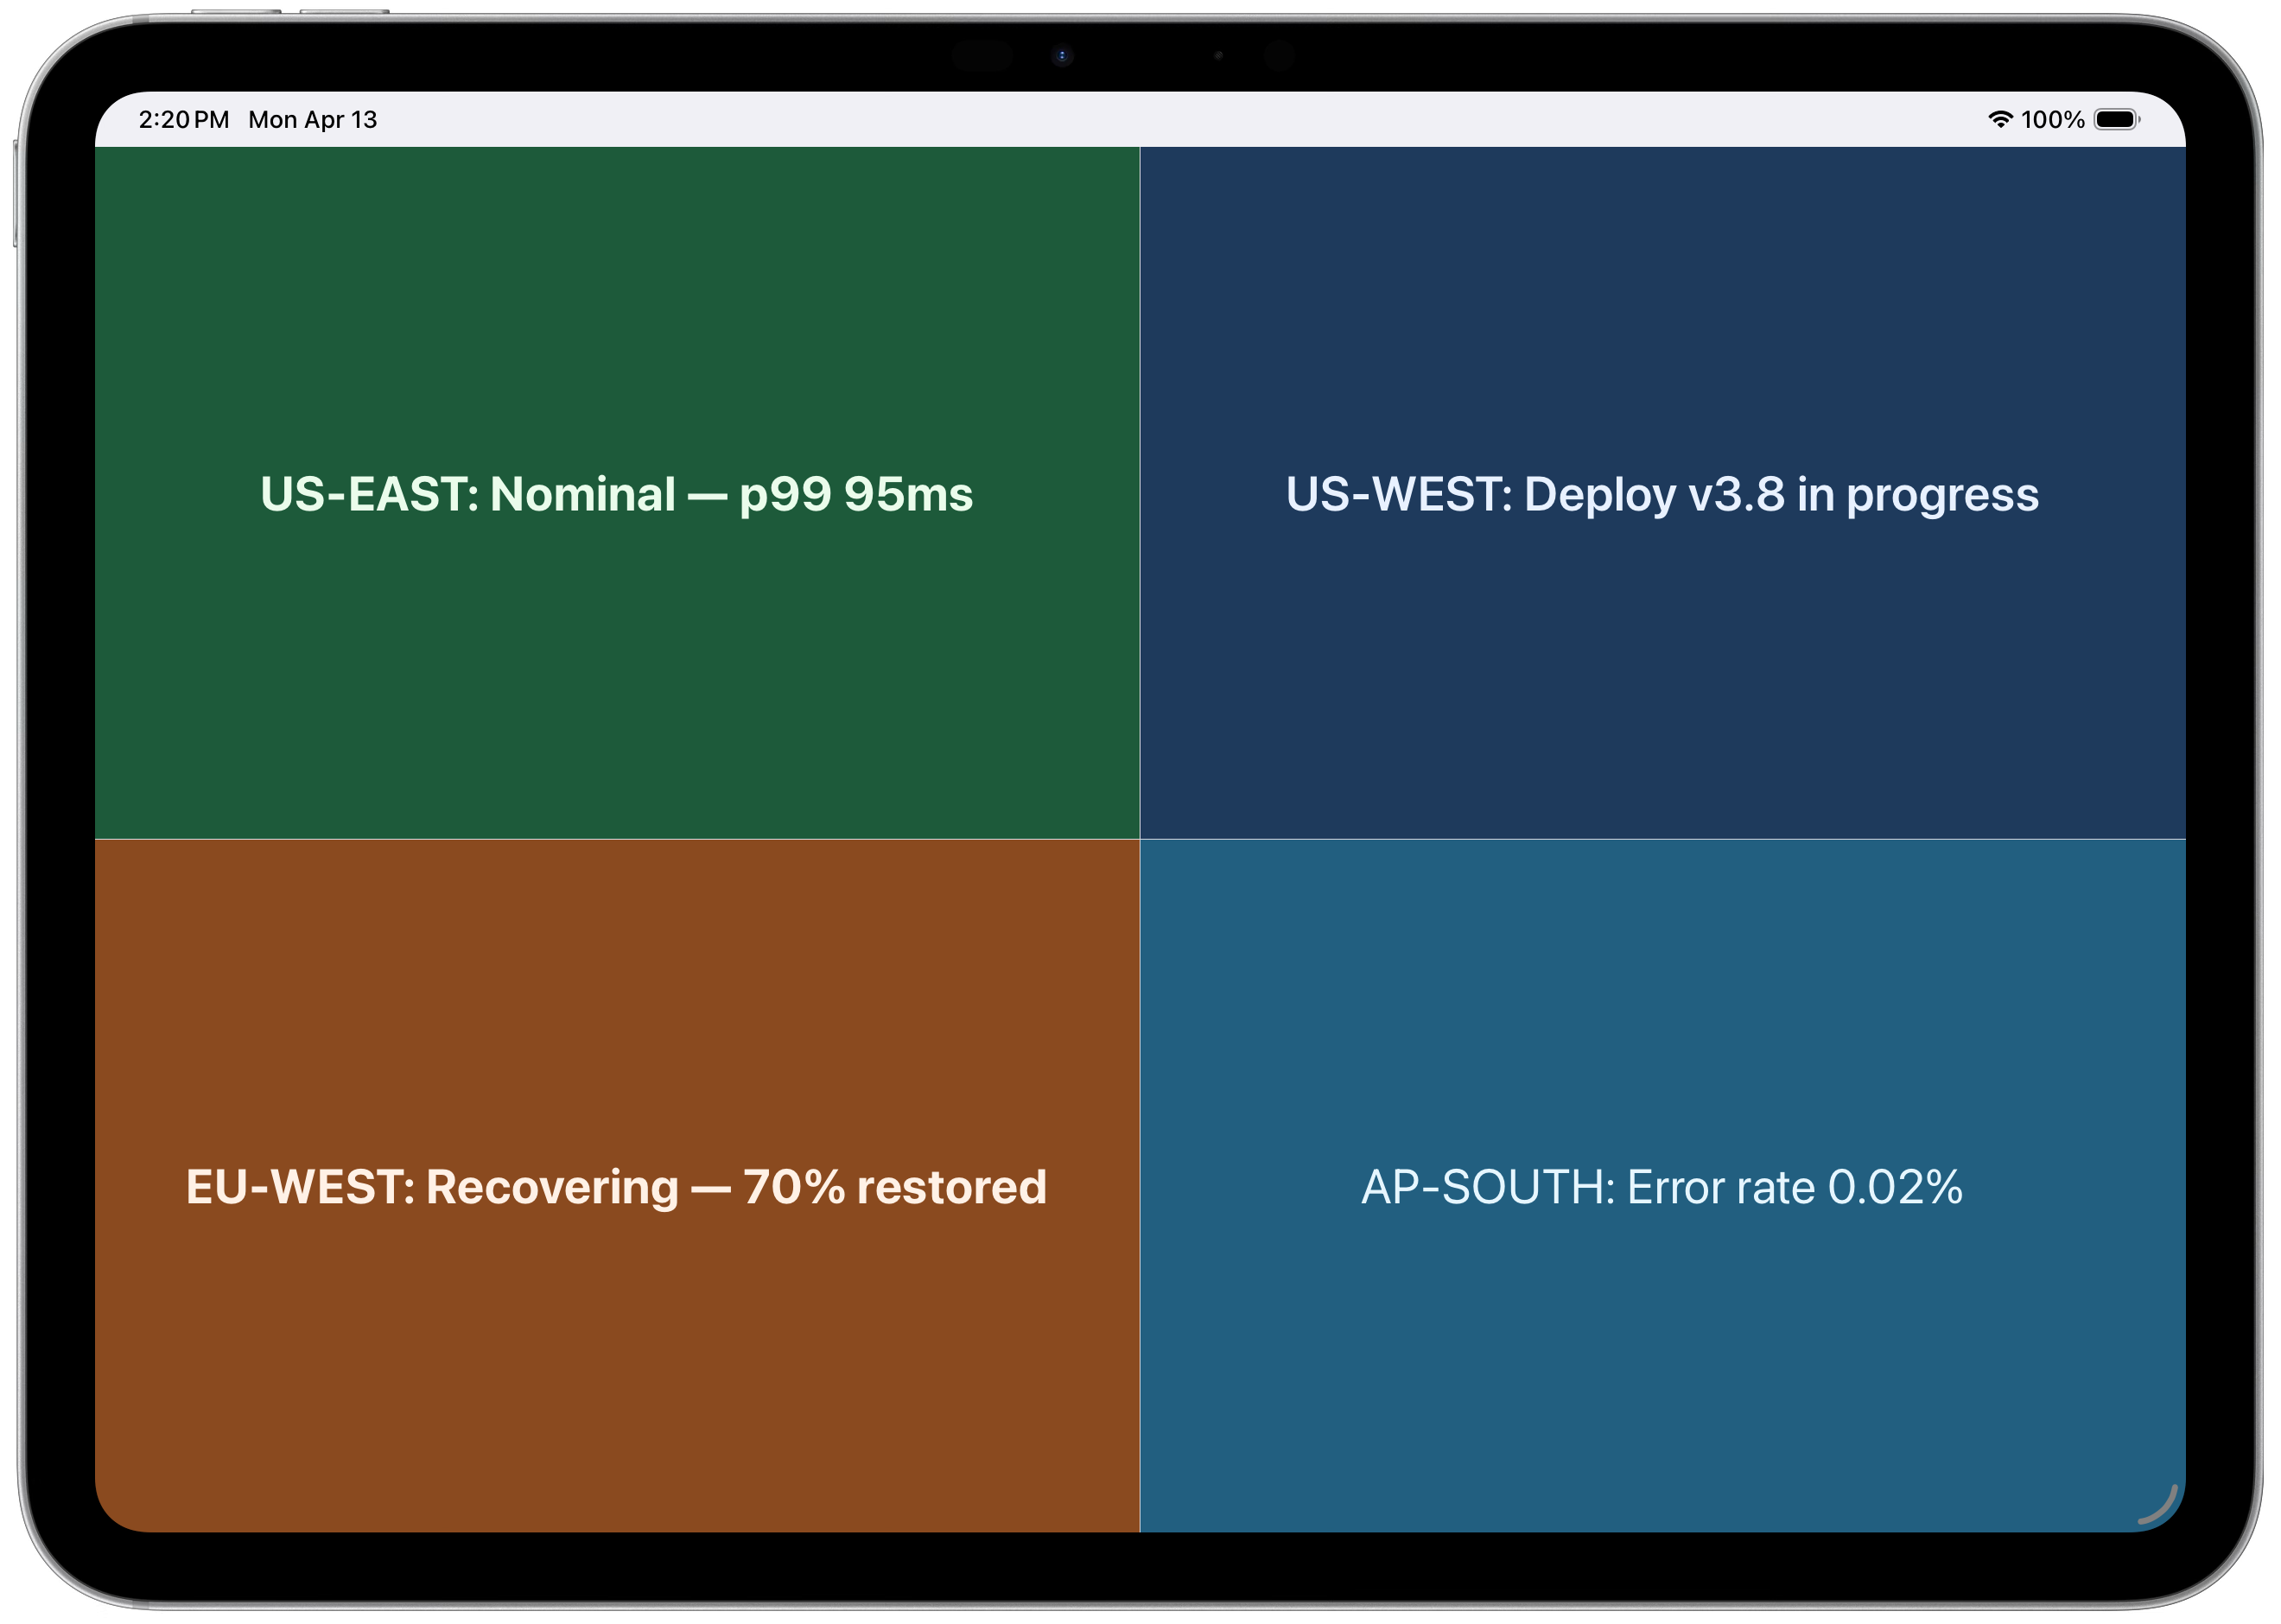
4-panel layout — regional status at a glance
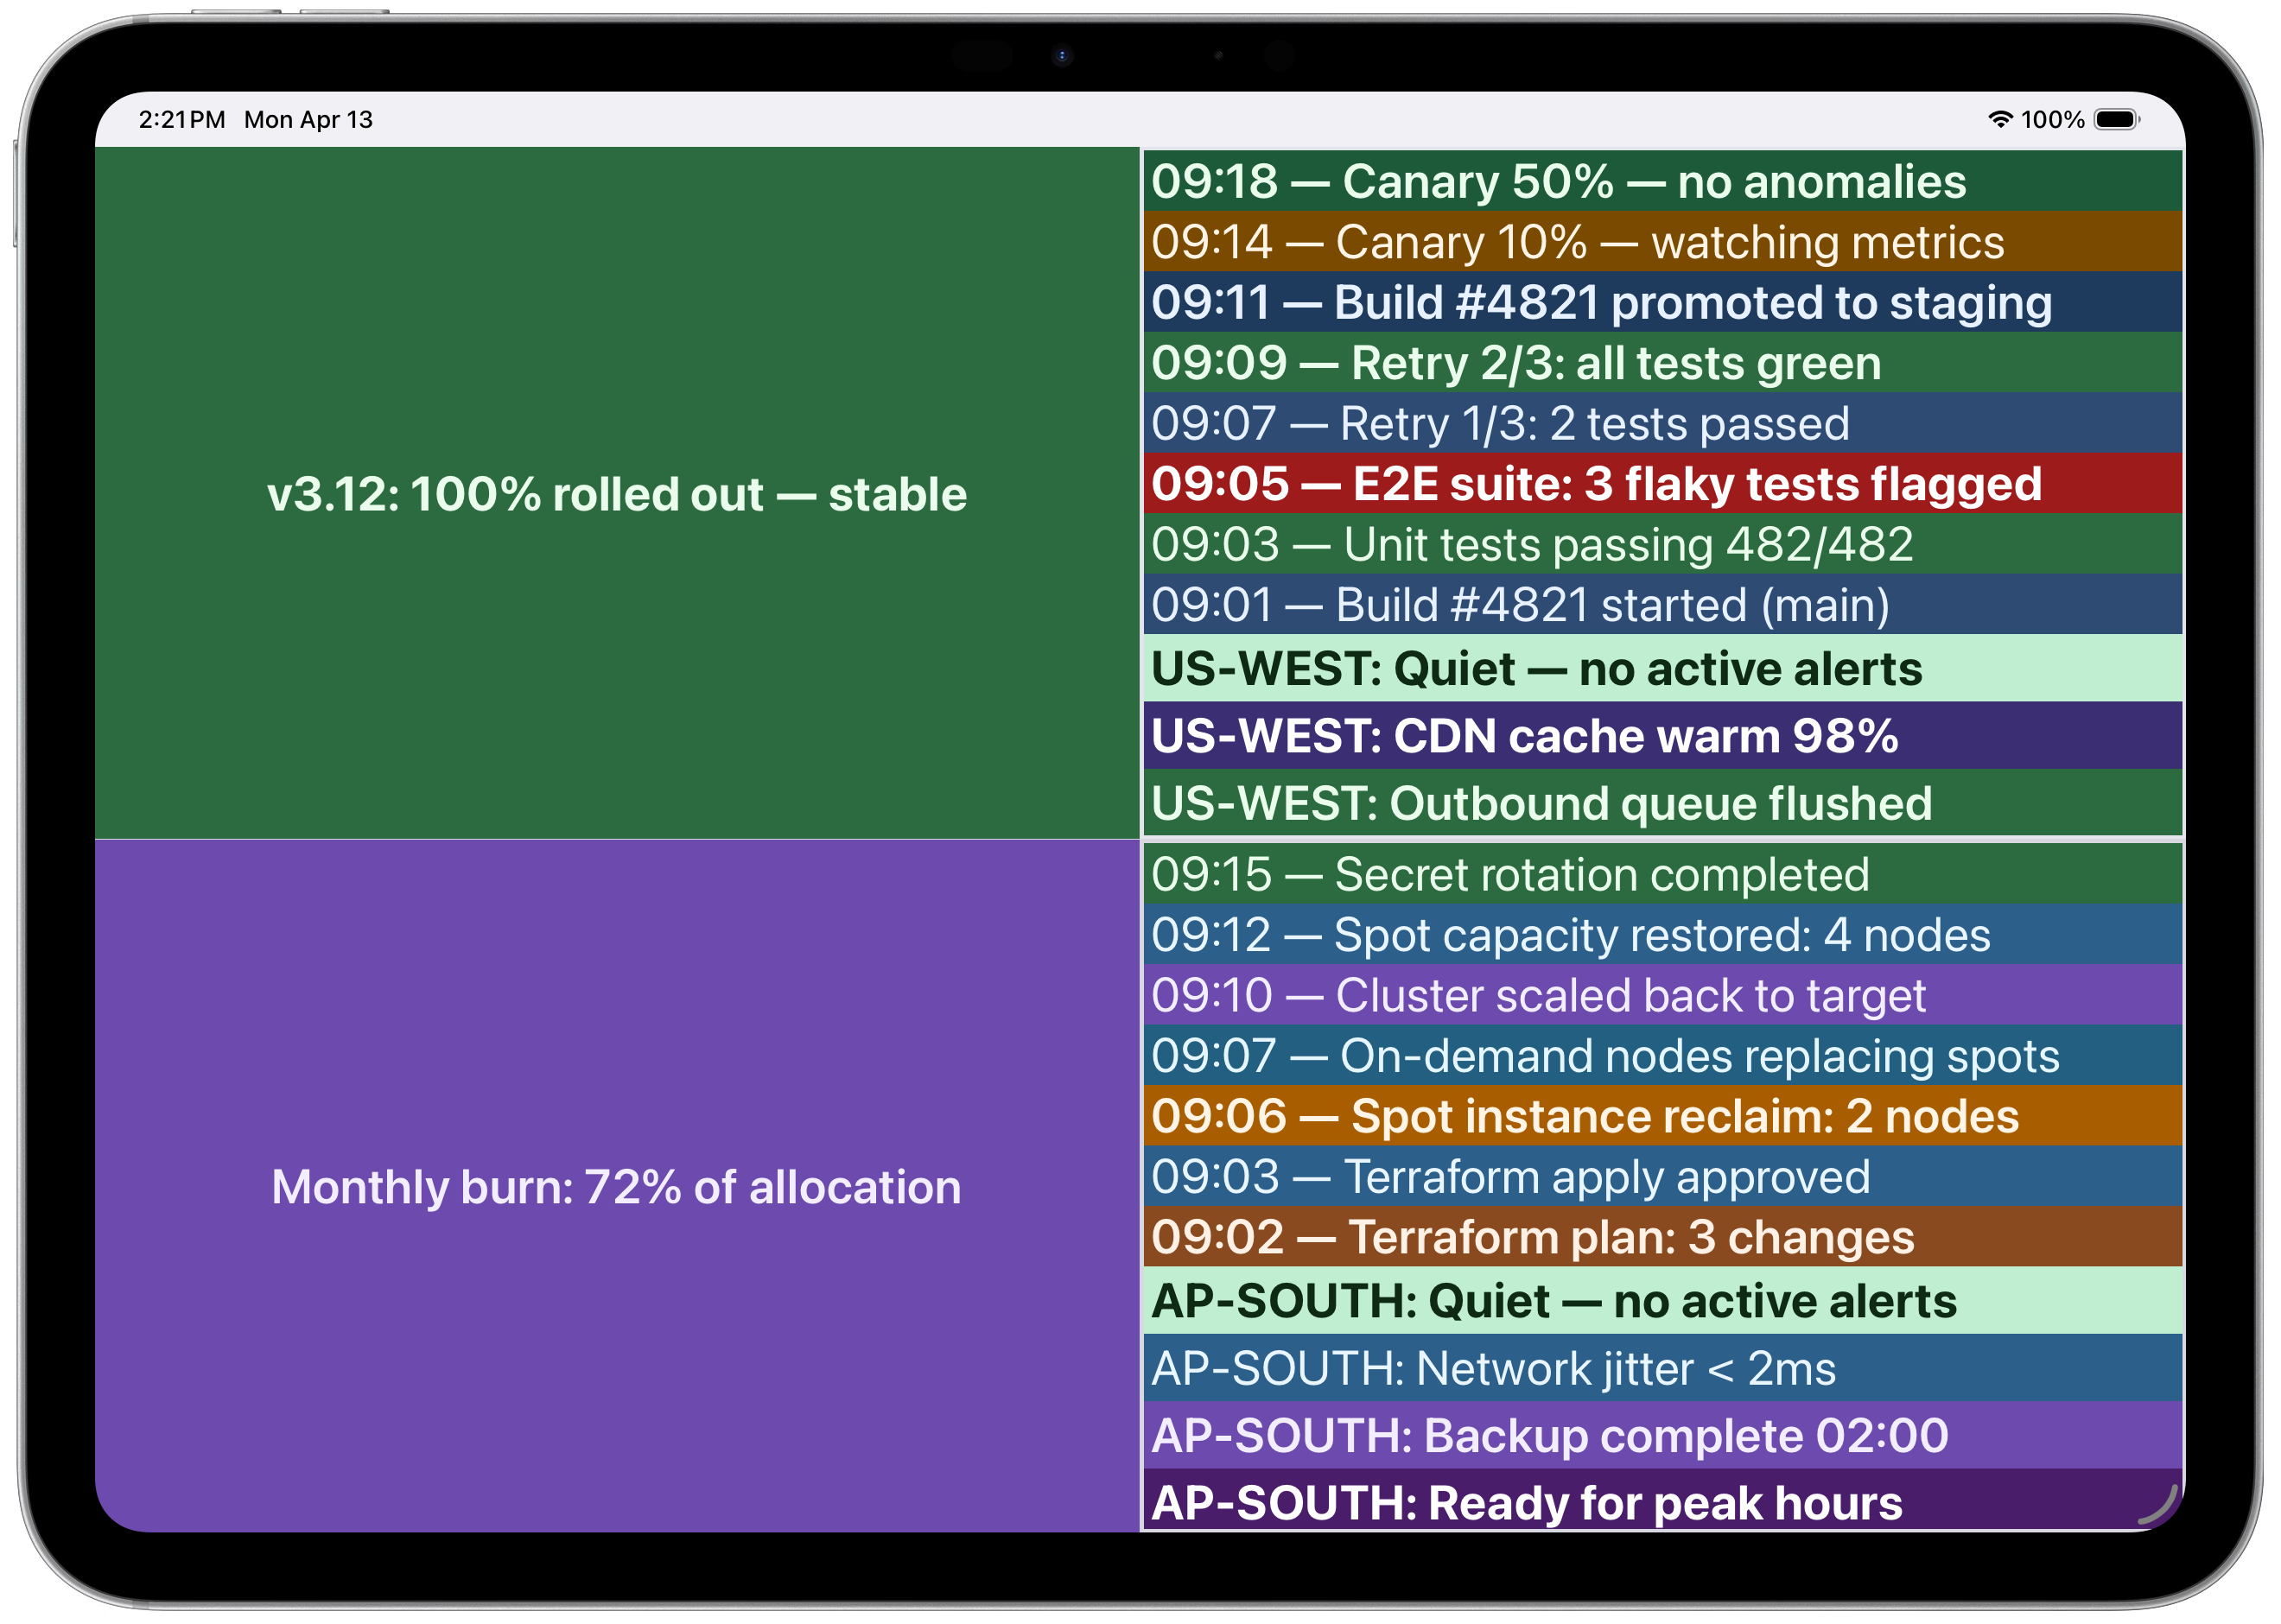 Multi-panel with CI/CD pipeline and infrastructure logs
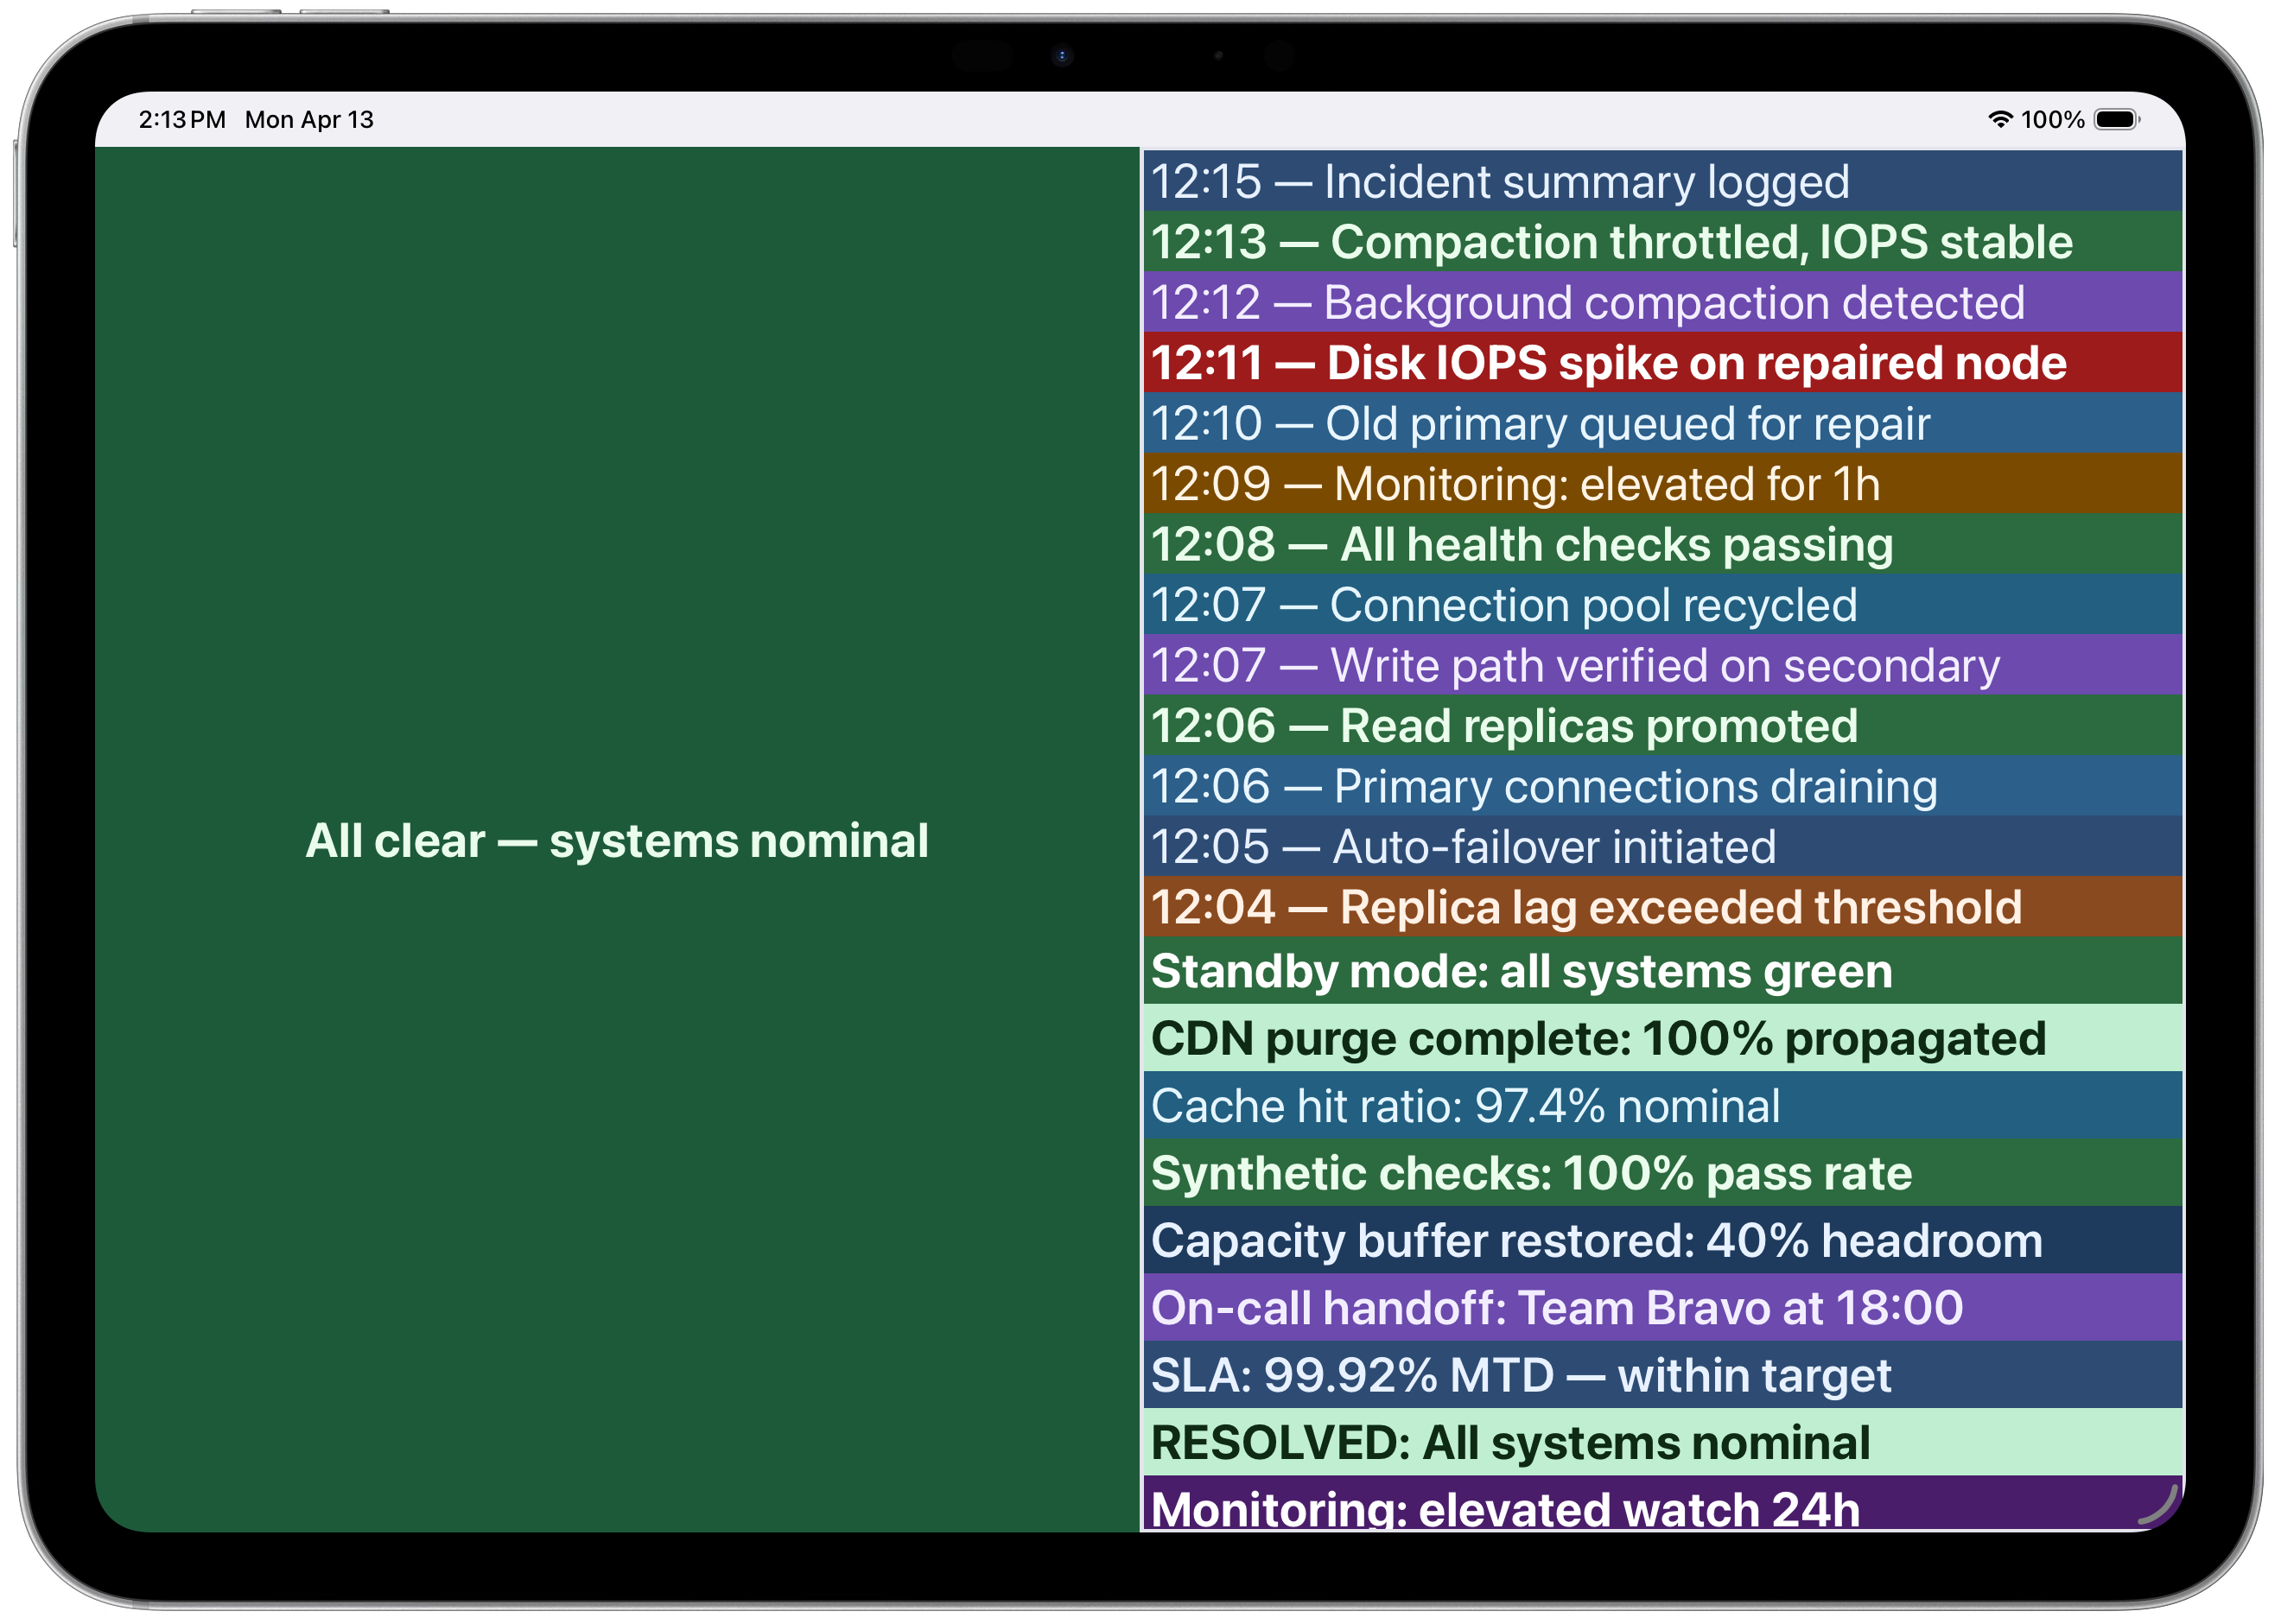 Incident timeline with color-coded severity
License
PushToDisplay MCPのよくある質問
PushToDisplay MCPをClaude Codeに追加するには
ターミナルでclaude mcp add cli -- npx -y pushtodisplayを実行します。すべてのプロジェクトで利用するには--scope userを追加します。
PushToDisplay MCPをCursorに追加するには
~/.cursor/mcp.jsonを開き、上記のインストールセクションに示すCursor設定を使ってmcpServersの下にサーバーを追加します。
PushToDisplay MCPが提供するツールは
8個のツールを提供しており、pushtodisplay_send_update, pushtodisplay_list_boards, pushtodisplay_get_board, pushtodisplay_create_board, pushtodisplay_update_boardなどがあります。
CI/CDパイプラインでAPIキーを使用できますか?
はい、環境変数またはCLI経由で 'pt_' から始まるAPIキーを使用して認証できます。ただし、APIキーによる認証はsendコマンドのみをサポートしています。
MCP serverはどのように認証を処理しますか?
このMCP serverは既存のCLIセッションを継承します。すでにCLI経由でログインしている場合は、自動的に認証されます。