
Envoie des mises à jour en temps réel et du contenu stylisé vers des tableaux d'affichage sur iOS et Android depuis un agent IA ou un terminal.
Aussi connu sous pushtodisplay/cli, pushtodisplay
- Étoiles
- 2
- Outils
- 8
- Téléchargements, 30 jours
- —
- Dernière version
- 0.1.14
- Dernier commit
- 8 nov. 2026
- Licence
- MIT
Qu'est-ce que PushToDisplay MCP ?
PushToDisplay est un serveur MCP. Envoie des mises à jour en temps réel et du contenu stylisé vers des tableaux d'affichage sur iOS et Android depuis un agent IA ou un terminal. Il expose 8 outils, comme pushtodisplay_send_update, pushtodisplay_list_boards, pushtodisplay_get_board.
Résumé généré à partir du README du projet
À propos du MCP server PushToDisplay
Ce MCP server permet de pousser des mises à jour en temps réel et du contenu stylisé vers des tableaux d'affichage mobiles depuis un agent IA. Il permet aux développeurs et aux systèmes automatisés de transformer des appareils iOS et Android en tableaux de bord de statut en direct en envoyant du texte et des mises à jour visuelles directement depuis un terminal ou un client IA comme Claude, Cursor ou VS Code Copilot.
Les utilisateurs peuvent gérer leurs affichages via plusieurs outils spécialisés, notamment pushtodisplay_send_update pour diffuser des messages, pushtodisplay_list_boards pour voir les configurations existantes, et pushtodisplay_create_board pour de nouvelles mises en page. Le serveur hérite de l'authentification de la session CLI existante, qui peut être établie via une connexion par navigateur ou un code d'appareil pour les environnements headless comme SSH ou les conteneurs. Pour les pipelines CI/CD automatisés, l'authentification peut être gérée à l'aide d'une clé API commençant par le préfixe pt_.
Ce serveur offre un contrôle granulaire sur l'apparence des informations à l'écran. Vous pouvez spécifier la taille du texte, la graisse de la police, les couleurs hexadécimales et les couleurs d'arrière-plan, ou cibler des panneaux spécifiques au sein d'une mise en page multi-panneaux. Il prend en charge un stylisage complexe via des blocs JSON et permet un alignement horizontal ou vertical pour garantir que les informations sont présentées clairement sur l'appareil mobile.
Ce que vous pouvez faire avec
- 1Diffuser les mises à jour de statut de déploiementUn agent IA peut envoyer une notification à un tableau spécifique lorsqu'un déploiement logiciel réussit ou échoue.
- 2Surveiller visuellement la santé de l'infrastructureLes développeurs peuvent utiliser le serveur pour pousser des métriques de disponibilité ou de santé d'API avec un code couleur vers un tableau de bord mobile.
- 3Gérer les configurations des tableaux d'affichageUn assistant IA peut créer, lister ou supprimer différents tableaux d'affichage pour organiser diverses tâches de surveillance.
- 4Automatiser les affichages de statut dans la CI/CDDes scripts automatisés peuvent utiliser une clé API pour envoyer des logs en temps réel ou des résultats de build vers un écran mobile sans connexion interactive.
Extrait du README du projet. Chaque cas d'utilisation est vérifié par rapport à une citation du document.
Comment installer PushToDisplay MCP
Formats vérifiés le 10 nov. 2026Ajouter à CursorAjouter à GooseInstaller PushToDisplay MCP dans Claude Code
$ claude mcp add cli -- npx -y pushtodisplayInstaller PushToDisplay MCP dans Cursor
~/.cursor/mcp.json
{
  "mcpServers": {
    "cli": {
      "command": "npx",
      "args": [
        "-y",
        "pushtodisplay"
      ]
    }
  }
}Installer PushToDisplay MCP dans VS Code
.vscode/mcp.json
{
  "servers": {
    "cli": {
      "type": "stdio",
      "command": "npx",
      "args": [
        "-y",
        "pushtodisplay"
      ]
    }
  }
}Installer PushToDisplay MCP dans VS Code CLI
$ code --add-mcp '{"name":"cli","type":"stdio","command":"npx","args":["-y","pushtodisplay"]}'Installer PushToDisplay MCP dans Claude Desktop
claude_desktop_config.json
{
  "mcpServers": {
    "cli": {
      "command": "npx",
      "args": [
        "-y",
        "pushtodisplay"
      ]
    }
  }
}Installer PushToDisplay MCP dans Codex
$ codex mcp add cli -- npx -y pushtodisplayInstaller PushToDisplay MCP dans Codex config.toml
~/.codex/config.toml
[mcp_servers.cli]
command = "npx"
args = ["-y", "pushtodisplay"]
Installer PushToDisplay MCP dans Gemini CLI
$ gemini mcp add -s user cli npx -- -y pushtodisplayInstaller PushToDisplay MCP dans Gemini settings.json
~/.gemini/settings.json
{
  "mcpServers": {
    "cli": {
      "command": "npx",
      "args": [
        "-y",
        "pushtodisplay"
      ]
    }
  }
}Outils MCP PushToDisplay 8
Détectés depuis le READMEpushtodisplay_send_updatepushtodisplay_list_boardspushtodisplay_get_boardpushtodisplay_create_boardpushtodisplay_update_boardpushtodisplay_set_default_boardpushtodisplay_delete_boardpushtodisplay_list_devices
| pushtodisplay_send_update | — | |
| pushtodisplay_list_boards | — | |
| pushtodisplay_get_board | — | |
| pushtodisplay_create_board | — | |
| pushtodisplay_update_board | — | |
| pushtodisplay_set_default_board | — | |
| pushtodisplay_delete_board | — | |
| pushtodisplay_list_devices | — |
Configuration
PTD_API_KEY
| Nom | Description | Type |
|---|---|---|
| PTD_API_KEY | — |
Vérifications automatisées
Exécuté le 12 nov. 2026Rapport complet →A passé nos vérifications automatisées. Il ne s'agit pas d'un audit de sécurité : lisez le code et donnez au serveur l'accès le plus restreint dont il a besoin. Fonctionnement des vérifications

- Dépôt source lié et accessibleRéussi
- Licence open source (OSI)Réussi
- Commit ou version publiée au cours de l'année écouléeRéussi
- Nom du package non proche d'un package populaireRéussi
- L'endpoint distant utilise HTTPSNon vérifié
- Les outils destructifs sont étiquetésRéussi
- Aucune instruction cachée destinée au modèleRéussi
- Aucun avis critique dans le package ou ses dépendancesRéussi
README
Voir sur GitHubpushtodisplay
Command-line interface and MCP server for Push To Display — send real-time updates to display boards from your terminal or AI agents.
Get the app
Turn any screen into a live display board — get Push to Display on iOS and Android.


Install
Run directly with npx (no install needed):
npx pushtodisplay --help
Or install globally:
npm install -g pushtodisplay
Requires Node.js 18+. See the PushToDisplay documentation for guides, use cases, and API details.
Quick start
# Log in (opens browser)
pushtodisplay auth login

# Send an update (uses your default board)
pushtodisplay send "Hello, Display!"

# Send to a specific board
pushtodisplay send -b <board-id> "Deploy completed"

# List your boards
pushtodisplay boards list
Authentication
Log in with your Push To Display account — the same account you use in the mobile app.
Browser login (default)
pushtodisplay auth login
Opens your browser. Sign in and the CLI receives your credentials automatically.
Device code login (headless)
For machines without a browser — SSH sessions, containers, or remote servers:
pushtodisplay auth login --device-code
The CLI prints a URL and a one-time code. Open the URL on any device, enter the code, and approve the login.
Credentials are stored in your OS keychain (macOS Keychain, Linux libsecret, Windows Credential Manager). Falls back to ~/.config/pushtodisplay/ if the keychain is unavailable.
# Check auth status
pushtodisplay auth status

# Machine-readable status for scripts/agents (exit 0 = authenticated)
pushtodisplay auth status --json

# Log out (clear stored credentials)
pushtodisplay auth logout
auth status reports effective auth: an expired access token is still
reported as authenticated when a valid refresh token can renew it transparently
(a will refresh automatically note is shown instead of the raw token expiry).
It exits 0 when authenticated and 1 when not, so it is safe to gate
scripts on it.
{
  "authenticated": true,
  "method": "oauth",
  "accessTokenExpired": true,
  "canRefresh": true,
  "sessionExpiresAt": "2026-06-01T00:00:00.000Z"
}
Commands
send
Send a display update to a board.
# Simple text
pushtodisplay send -b my-board-id "Deploy succeeded"

# Styled text
pushtodisplay send -b my-board-id "Status" --size large --weight bold --color "#00FF00"

# Multiple inline runs — they stay on ONE line
pushtodisplay send -b my-board-id "Build:" "passing" --color "#22C55E"

# Panel targeting with layout options
pushtodisplay send -b my-board-id --panel 2 "Right panel content"
pushtodisplay send -b my-board-id --panel 1 --full-panel --density compact --align-x center "Alert"

# Per-run styling with JSON (repeatable)
pushtodisplay send -b my-board-id \
  --block '{"text": "API Health", "size": "large", "weight": "bold"}' \
  --block '{"text": "Uptime: 99.97%", "color": "#22C55E"}'

# Pipe a full JSON payload from stdin
echo '{"boardId":"my-board-id","blocks":[{"text":"From pipe"}]}' | pushtodisplay send --stdin
If no -b flag is provided, the server uses your default board.
How text renders
Blocks are inline runs, not lines. Think of <span>, not <p>. The blocks
of one message flow onto a single line in order, and wrap like a paragraph when
they run out of width:
pushtodisplay send -b my-board-id "Build:" "passing" --color "#22C55E"
renders as one line:
Build: passing
not as two lines. Each run keeps its own size, weight, colour, and background, so a message is one paragraph with styled runs inside it.
To put content on separate lines, send separate messages. Every send is its own entry in the panel's scrollable history, so multiple lines are multiple messages. Newlines inside a single message are not a layout mechanism.
--density sets the line height used when that paragraph wraps — it is not
the spacing between messages.
Note: in
--full-panelmode blocks are currently stacked on separate lines. That legacy behaviour is being removed so full-panel matches the inline model above.
Style flags
| Flag | Values | Description |
|---|---|---|
-s, --size |
small, medium, large |
Text size |
-w, --weight |
regular, semibold, bold |
Font weight |
-c, --color |
Hex color (#RRGGBB) |
Text color |
--background |
Hex color (#RRGGBB) |
Background color |
Panel flags
| Flag | Values | Description |
|---|---|---|
-p, --panel |
1–4 |
Target panel number |
--full-panel |
— | Enlarge to the whole board |
--density |
compact, standard, spacious |
Line height when text wraps |
--align-x |
start, center, end |
Horizontal alignment |
--align-y |
start, center, end |
Vertical alignment |
Other flags
| Flag | Description |
|---|---|
-b, --board |
Board ID |
--block <json> |
Inline styled run as JSON (repeatable) |
--stdin |
Read full JSON request from stdin |
boards
pushtodisplay boards list              # List all boards
pushtodisplay boards get <id>          # Get board details
pushtodisplay boards create -n "Name"  # Create a board
pushtodisplay boards create -n "Dash" -l 4  # Create with a layout
pushtodisplay boards delete <id>       # Delete a board
Create options:
| Flag | Description |
|---|---|
-n, --name |
Board name (required) |
-d, --description |
Board description |
-l, --layout |
Layout ID |
devices
pushtodisplay devices list # List active device-board streams
config
pushtodisplay config              # Show current configuration
pushtodisplay config show         # Same as above
JSON output
Add --json to any command for machine-readable output:
pushtodisplay boards list --json
pushtodisplay send -b my-board "test" --json
Configuration
Configuration is resolved in order: environment variables → config file → defaults.
| Env var | Description | Default |
|---|---|---|
PTD_API_URL |
API endpoint | https://api.pushtodisplay.com |
PTD_SERVICE_URL |
Service endpoint | https://services.pushtodisplay.com |
PTD_IDP_URL |
Identity provider | https://idp.pushtodisplay.com |
PTD_CONFIG_DIR |
Config directory | ~/.config/pushtodisplay |
MCP server
The CLI includes a built-in Model Context Protocol server, giving AI agents (Claude, Cursor, VS Code Copilot, and others) direct access to your display boards.
The MCP server inherits your CLI session — if you've run pushtodisplay auth login, it authenticates automatically.
Setup
Claude Code
claude mcp add pushtodisplay -- npx pushtodisplay mcp
Claude Desktop
Add to ~/Library/Application Support/Claude/claude_desktop_config.json (macOS) or %APPDATA%\Claude\claude_desktop_config.json (Windows):
{
  "mcpServers": {
    "pushtodisplay": {
      "command": "npx",
      "args": ["pushtodisplay", "mcp"]
    }
  }
}
Cursor
Open Settings → MCP Servers → Add Server, or edit .cursor/mcp.json:
{
  "mcpServers": {
    "pushtodisplay": {
      "command": "npx",
      "args": ["pushtodisplay", "mcp"]
    }
  }
}
VS Code (GitHub Copilot)
Add to .vscode/mcp.json:
{
  "servers": {
    "pushtodisplay": {
      "command": "npx",
      "args": ["pushtodisplay", "mcp"]
    }
  }
}
Other MCP clients
Any MCP client that supports stdio transport can use Push To Display. The server command is:
npx pushtodisplay mcp
Available MCP tools
| Tool | Description |
|---|---|
pushtodisplay_send_update |
Send content to a board |
pushtodisplay_list_boards |
List all boards |
pushtodisplay_get_board |
Get details of a board |
pushtodisplay_create_board |
Create a new board |
pushtodisplay_update_board |
Update a board's name, description, or layout |
pushtodisplay_set_default_board |
Set a board as your default |
pushtodisplay_delete_board |
Delete a board permanently |
pushtodisplay_list_devices |
List active device connections |
Commands at a glance
| Command | Description |
|---|---|
auth login |
Log in (browser or device code) |
auth logout |
Remove stored credentials |
auth status |
Show current auth status |
send [text...] |
Send a display update |
boards list |
List your boards |
boards get <id> |
Get board details |
boards create |
Create a new board |
boards delete <id> |
Delete a board |
devices list |
List active device connections |
config |
Show current configuration |
mcp |
Start the MCP server |
API key authentication
For CI/CD pipelines and scripts where interactive login isn't available, you can authenticate with an API key. Create one from the mobile app or the web portal. API keys start with pt_.
# Via environment variable
export PTD_API_KEY=pt_your_key_here
pushtodisplay send "From CI"

# Or store in keychain
pushtodisplay auth login --api-key pt_your_key_here
Note: API key auth only supports the
sendcommand. Useauth loginfor full access to boards, devices, and config management.
Screenshots
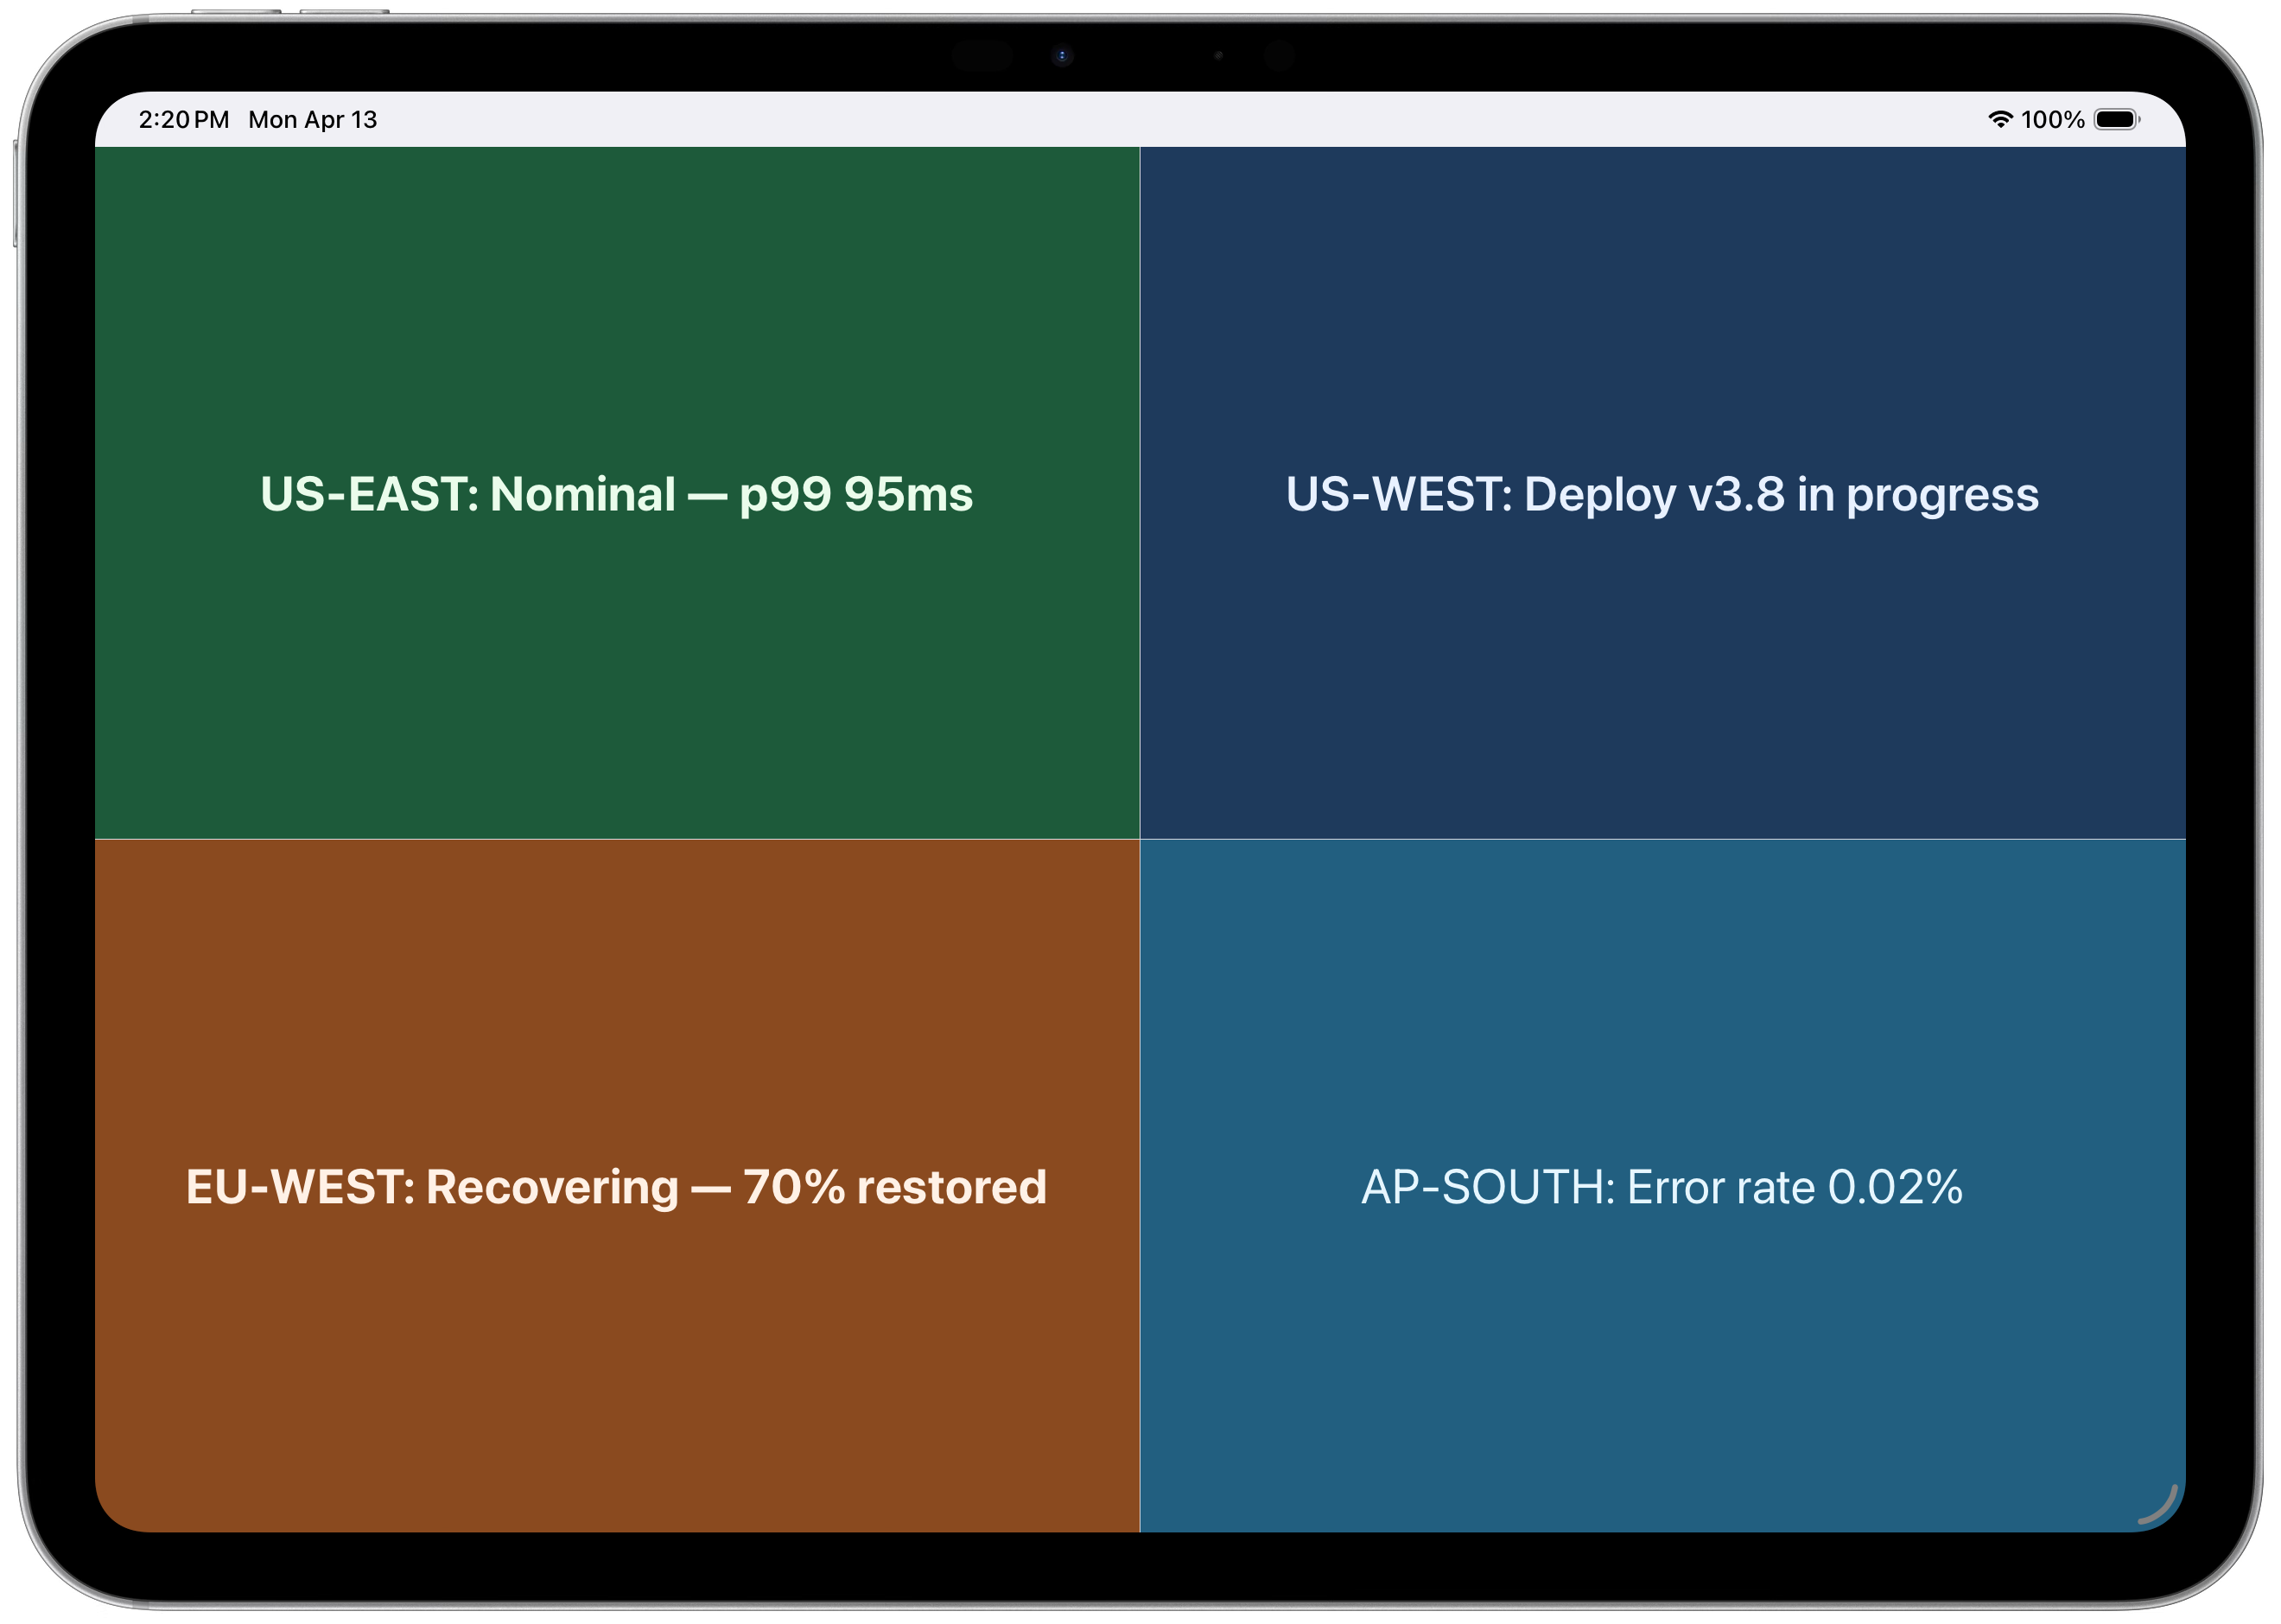
4-panel layout — regional status at a glance
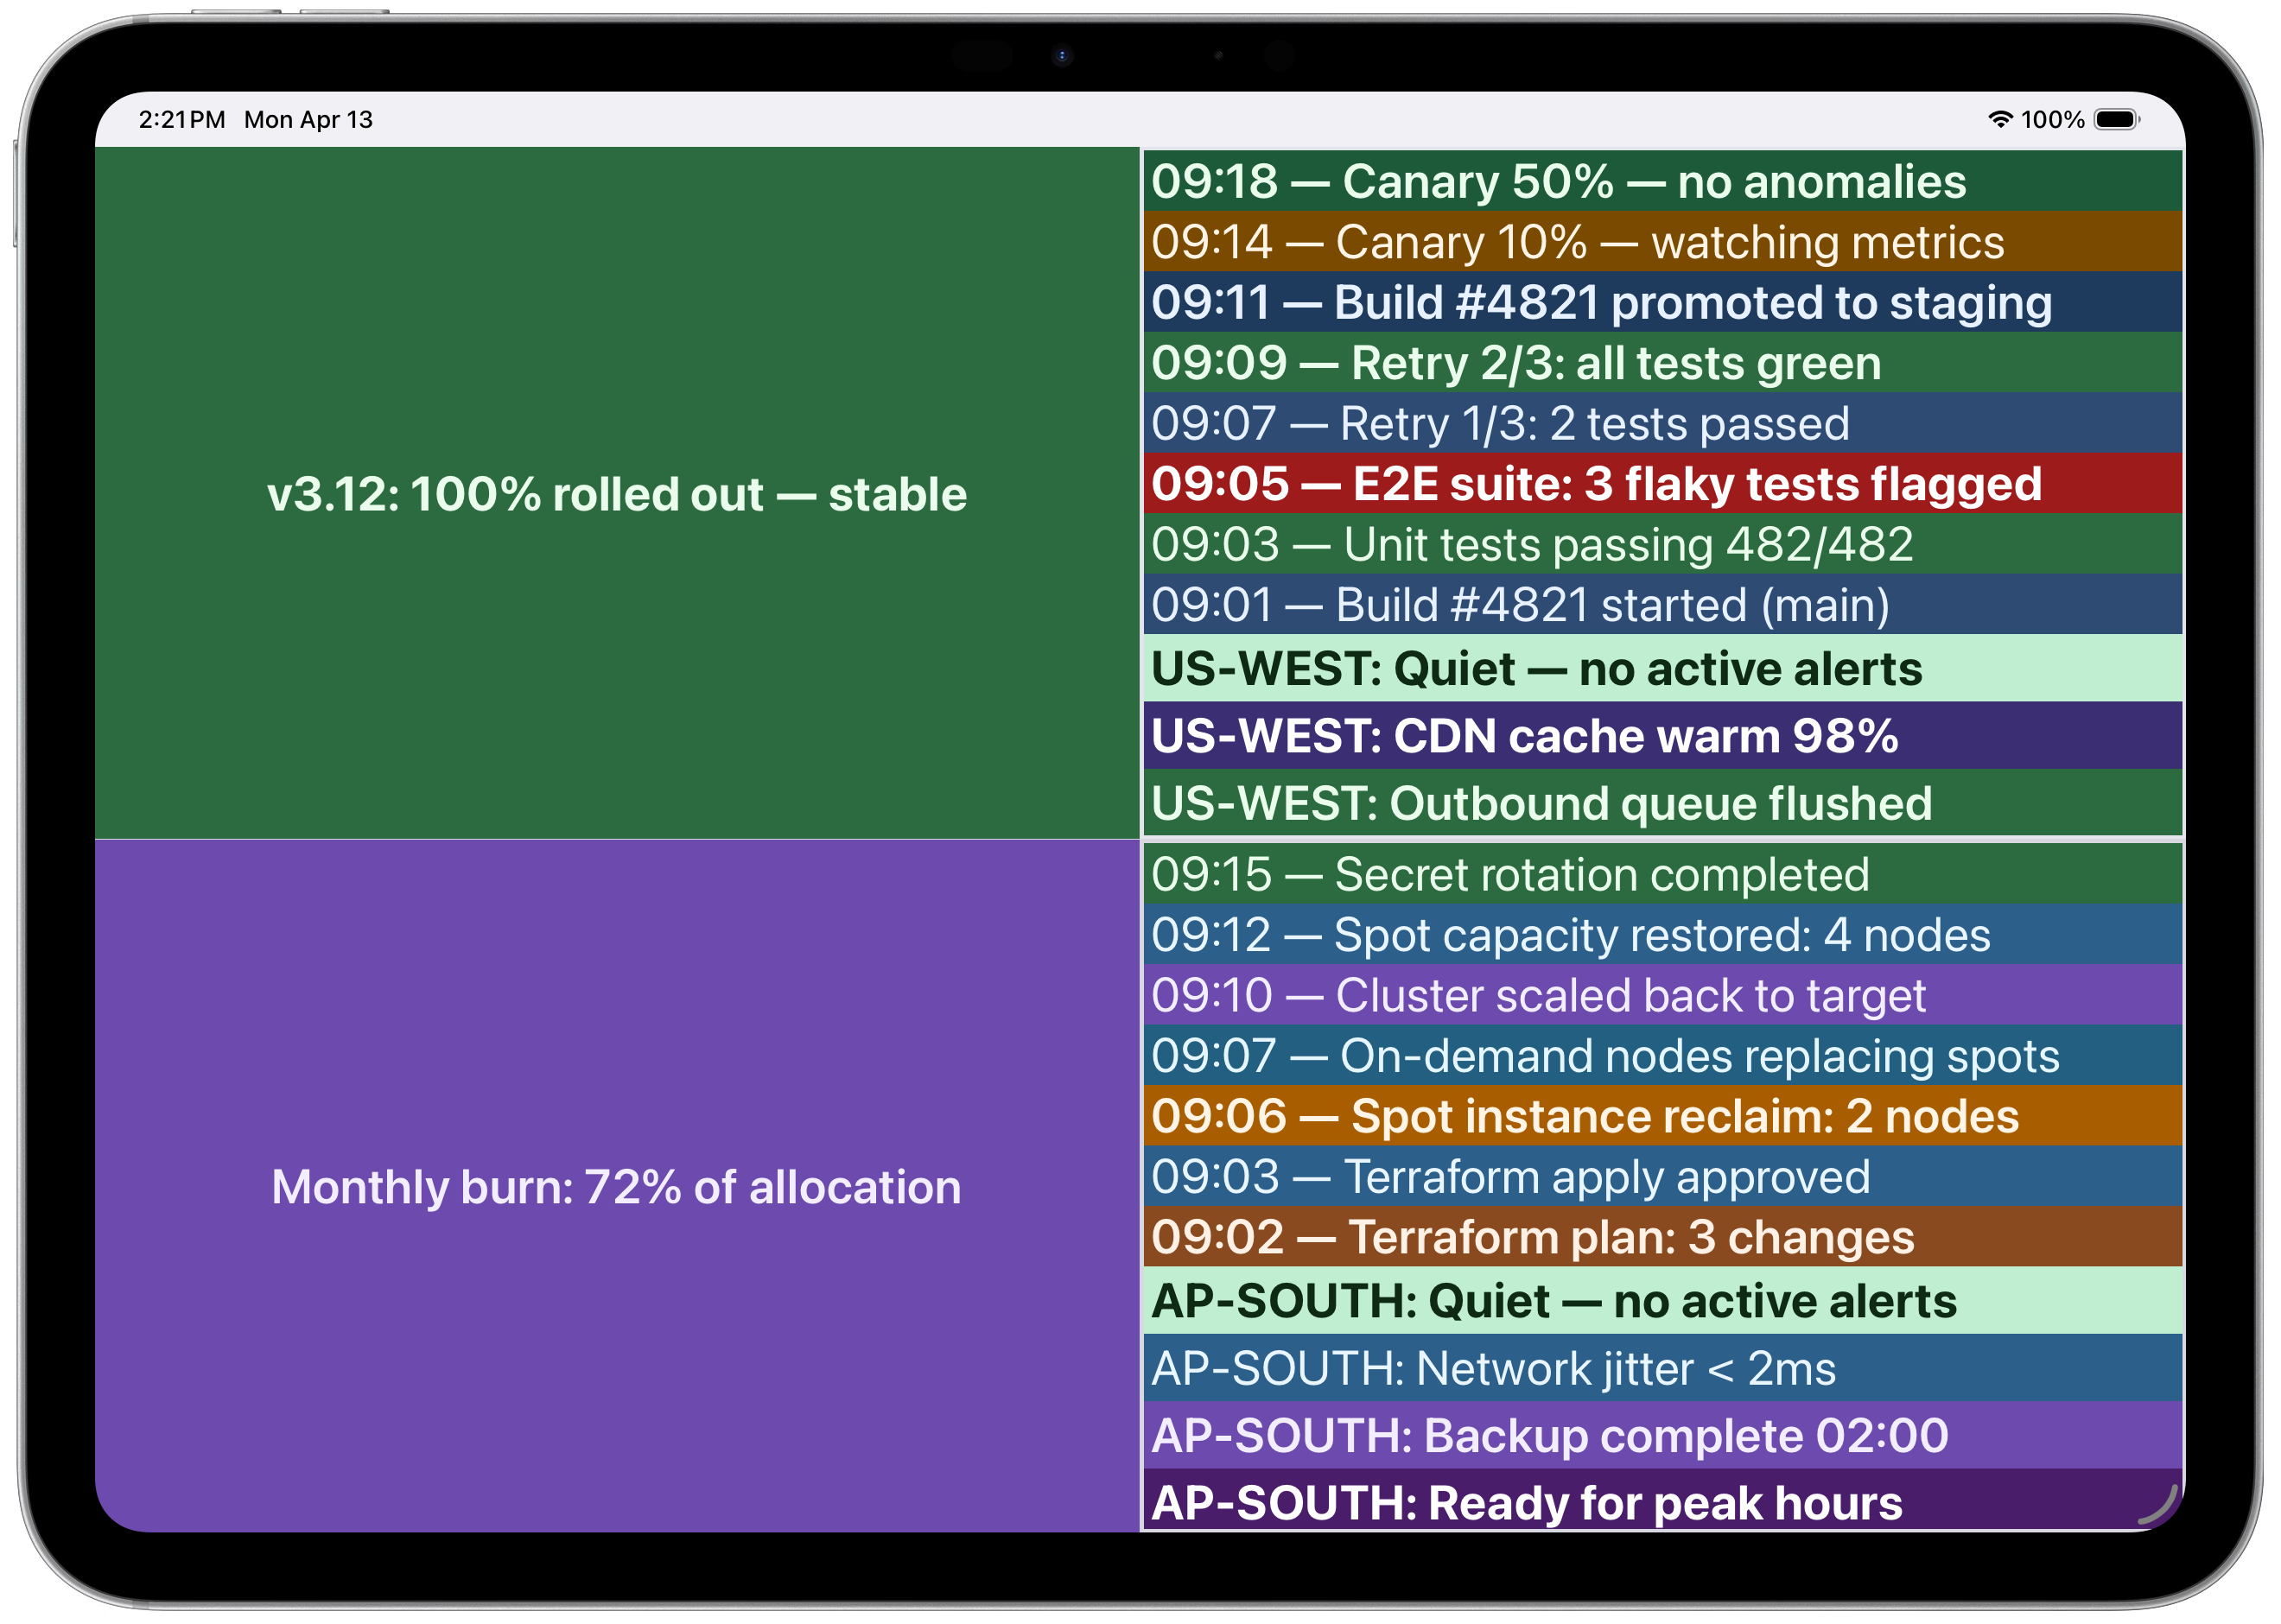 Multi-panel with CI/CD pipeline and infrastructure logs
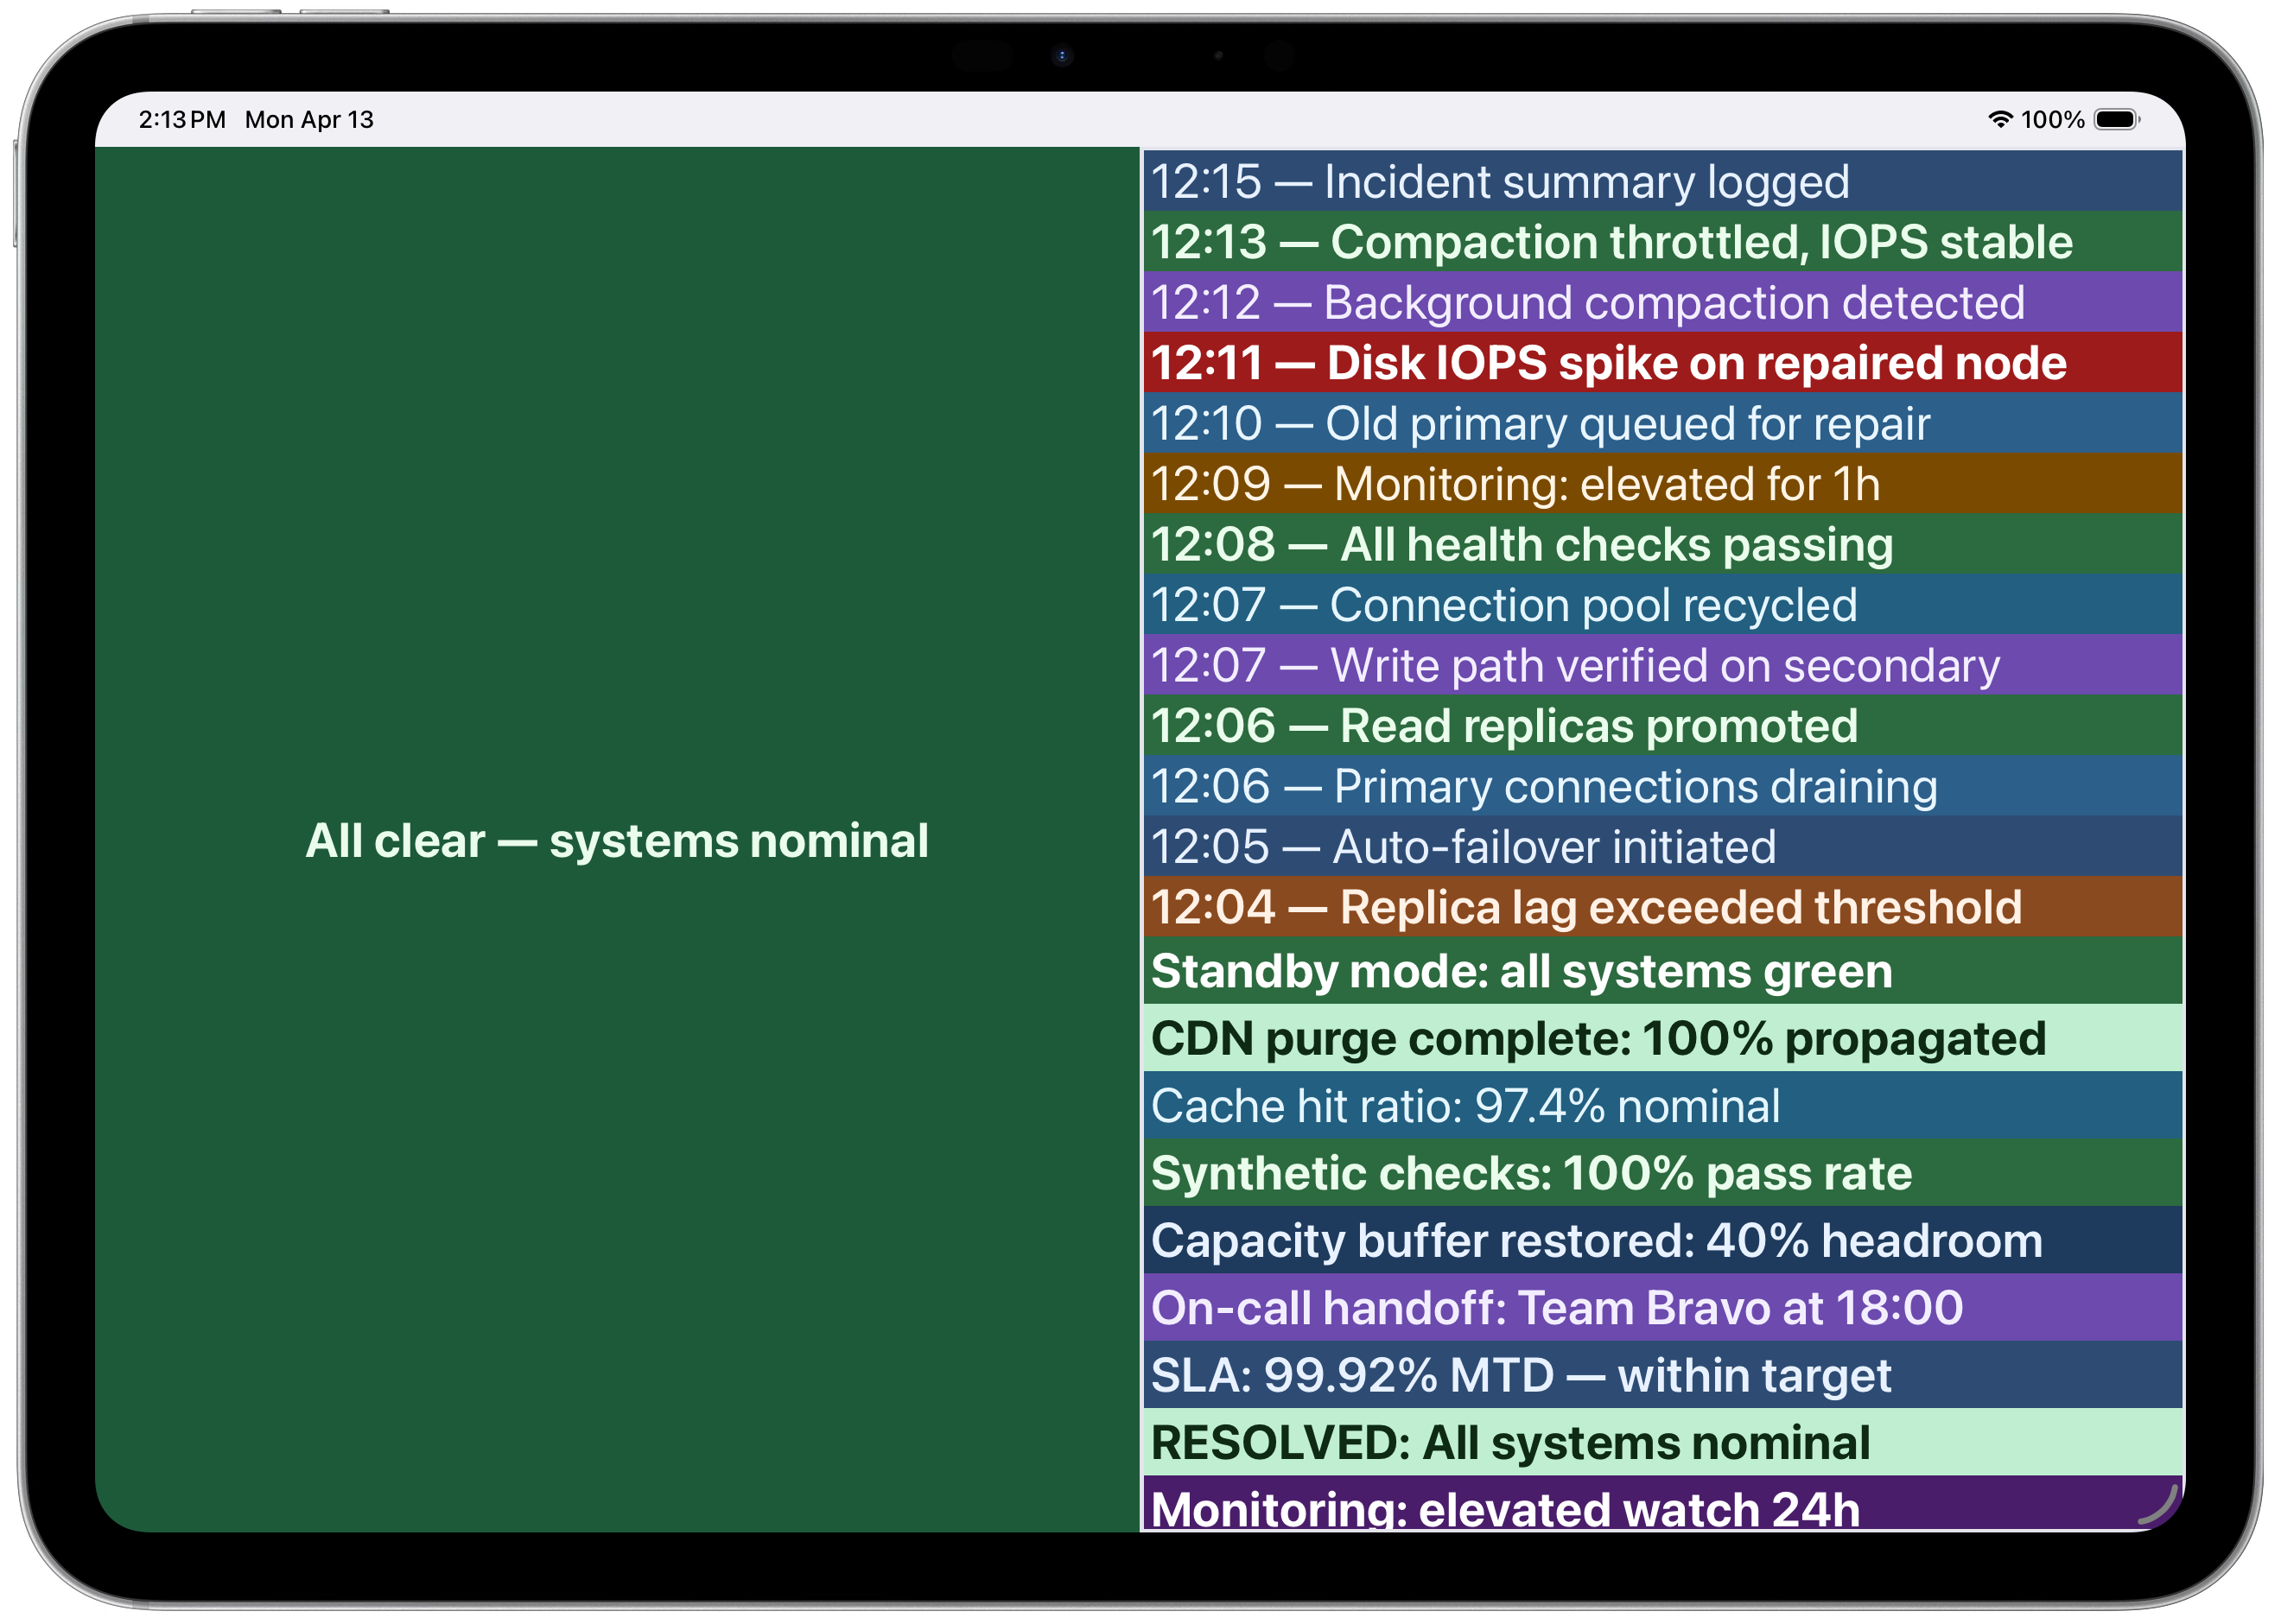 Incident timeline with color-coded severity
License
Questions sur PushToDisplay MCP
Comment ajouter PushToDisplay MCP à Claude Code ?
Exécutez claude mcp add cli -- npx -y pushtodisplay dans votre terminal. Ajoutez --scope user pour le rendre disponible dans tous les projets.
Comment ajouter PushToDisplay MCP à Cursor ?
Ouvrez ~/.cursor/mcp.json et ajoutez le serveur sous mcpServers, avec la configuration Cursor indiquée dans la section d'installation ci-dessus.
Quels outils PushToDisplay MCP fournit-il ?
Il expose 8 outils, dont pushtodisplay_send_update, pushtodisplay_list_boards, pushtodisplay_get_board, pushtodisplay_create_board, pushtodisplay_update_board.
Puis-je utiliser une clé API pour des pipelines CI/CD ?
Oui, vous pouvez vous authentifier à l'aide d'une clé API commençant par 'pt_' via une variable d'environnement ou le CLI, bien que l'authentification par clé API ne prenne en charge que la commande send.
Comment le MCP server gère-t-il l'authentification ?
Le MCP server hérite de votre session CLI existante ; si vous vous êtes déjà connecté via le CLI, l'authentification se fait automatiquement.