
shellwright MCP server
Commit 10. Sept. 2026Ermöglicht es AI Agents, Terminal-Automatisierung durchzuführen, Screenshots zu erstellen und Video- oder GIF-Sessions von Shell-Commands aufzunehmen.
Auch bekannt als dwmkerr/shellwright
- Stars
- 44
- Tools
- 2
- Downloads, 30 Tage
- —
- Neueste Version
- —
- Letzter Commit
- 10. Sept. 2026
- Lizenz
- —
Was ist shellwright MCP?
shellwright ist ein MCP server. Ermöglicht es AI Agents, Terminal-Automatisierung durchzuführen, Screenshots zu erstellen und Video- oder GIF-Sessions von Shell-Commands aufzunehmen. Er stellt 2 Tools bereit, etwa one-dark, one-light.
Zusammenfassung generiert aus dem README des Projekts
Über shellwright MCP server
shellwright ermöglicht es AI Agents, Terminal-Workflows zu automatisieren und visuelle Belege der Command-Ausführung zu erfassen. Es bietet LLM-Clients wie Claude Code oder Cursor eine Möglichkeit, mit einer PTY-Session zu interagieren, sodass sie Commands ausführen, Terminal-Buffer lesen und interaktive Anwendungen wie Vim oder htop verwalten können.
Nutzer können den Server via npx konfigurieren oder ihn für die lokale Entwicklung im HTTP-Modus ausführen. Der Server unterstützt verschiedene Terminal-Themes wie dracula, nord und solarized-dark und erlaubt die Anpassung von Schriftgröße, Font-Family und Terminal-Dimensionen. Er wurde entwickelt, um die Lücke zwischen textbasierter AI-Logik und der visuellen Realität einer Command Line Interface zu schließen.
Über die einfache Command-Ausführung hinaus enthält der Server spezialisierte Tools für die visuelle Dokumentation. Agents können shell_screenshot nutzen, um PNG- und SVG-Dateien zu generieren, oder shell_record_start und shell_record_stop verwenden, um GIF-Aufnahmen ihrer gesamten Session zu erstellen. Diese Dateien werden in einem lokalen Output-Verzeichnis gespeichert, was die Verifizierung der Ergebnisse automatisierter Tasks erleichtert.
Was du damit machen kannst
- 1Visualisierung der Nutzung von Terminal-AppsEin AI Agent kann demonstrieren, wie interaktive Tools wie htop oder k9s genutzt werden, indem er deren visuellen Zustand einfängt.
- 2Erstellung von Schritt-für-Schritt-TutorialsEntwickler können einen Agent anweisen, eine Sequenz von Aktionen in einem Editor durchzuführen und den Prozess als GIF aufzunehmen.
- 3Dokumentation der Ausführung automatisierter SkripteEin Agent kann ein Python-Skript gegen spezifische Daten ausführen und eine Videoaufnahme des Outputs zur Verifizierung bereitstellen.
- 4Erstellen von stylischen Terminal-ScreenshotsAgents können hochwertige Screenshots vom Terminal-Output mit benutzerdefinierten Fensterrahmen und Themes erstellen.
Geschrieben aus dem README des Projekts. Jeder Use Case wurde gegen ein Zitat daraus geprüft.
shellwright MCP tools 2
Erkannt aus dem READMEone-darkone-light
| one-dark | — | |
| one-light | — |
Automatisierte Checks
Geluften am 14. Nov. 2026Vollständiger Bericht →Noch nicht verifiziert. Ein Server benötigt einen Score von 80, keine kritischen Befunde und genug Daten für unsere Prüfung. Wie die Checks funktionieren · Was du für mehr Punkte verbessern kannst

- Source Repository verknüpft und erreichbardwmkerr/shellwright is public and reachablegithub.com/dwmkerr/shellwright ↗Bestanden
- Paket nennt dieses Repository als QuelleNicht geprüft
- Build-Provenienz (Sigstore-Attestierung)Nicht geprüft
- Open Source Lizenz (OSI)No licenseBefund
- Commit oder Release im letzten JahrLast commit or release 2026-09-10github.com/dwmkerr/shellwright ↗Bestanden
- OpenSSF ScorecardNicht geprüft
- Package-Name ähnelt keinem populären PackageNicht geprüft
- Keine kritischen Advisories im Paket oder seinen AbhängigkeitenNicht geprüft
- Keine versteckten Anweisungen an das Modell2 tool descriptions and the README read; no override phrases, credential paths or hidden charactersBestanden
- Destruktive Tools sind markiertNo tool named like delete, drop or execBestanden
- Remote-Endpoint beantwortet den MCP-HandshakeNicht geprüft
README
Auf GitHub ansehen
Quickstart
Configure your LLM, Claude Code, Cursor or whatever to use the Shellwright MCP server:
{
  "mcpServers": {
    "shellwright": {
      "command": "npx",
      "args": ["-y", "@dwmkerr/shellwright"]
    }
  }
}
Use a prompt such as:
Using shellwright, open Vim. Write a message saying how to close Vim. Close Vim. Give me a screenshot of each step and a GIF recording, save the screenshots and videos to './output'".
A video recording will be saved, as well as screenshots in multiple formats.
Check the Examples or Installation guide for more details. I also use this to create rich recordings for my book Effective Shell.
Running Locally
Run the MCP server in HTTP mode for local development:
npm install
npm run dev:http

# Or add parameters if needed...
npm run dev:http -- --font-size 32
The server runs at http://localhost:7498/mcp.
Testing with the MCP Inspector
Open the MCP Inspector in another terminal and connect to http://localhost:7498/mcp to list and test tools:
# Open MCP inspector in another terminal.
npx @modelcontextprotocol/inspector

# Now connect to:
# http://localhost:7498/mcp
Testing with an Agent
Run the demo.py program to chat to an agent that has the Shellwright tool. Note that you must have the Shellwright MCP sever running in HTTP mode (e.g. npm run dev:http):
# Optionally setup your .env to specify configuration.
# cp ./demo/.env.sample .env && vi .env

# Install requirements and run the agent.
pip install -r ./demo/requirements.txt
python ./demo/demo.py

# Output:
# User (enter message): Show me what the htop tool looks like showing me my resources.

# ...or provide a message directly.
python ./demo/demo.py -- "Run a shell command to show me the names \
of the folders in this directory and take a screenshot and give me its path"
You will see logs from the MCP server and the demo agent:
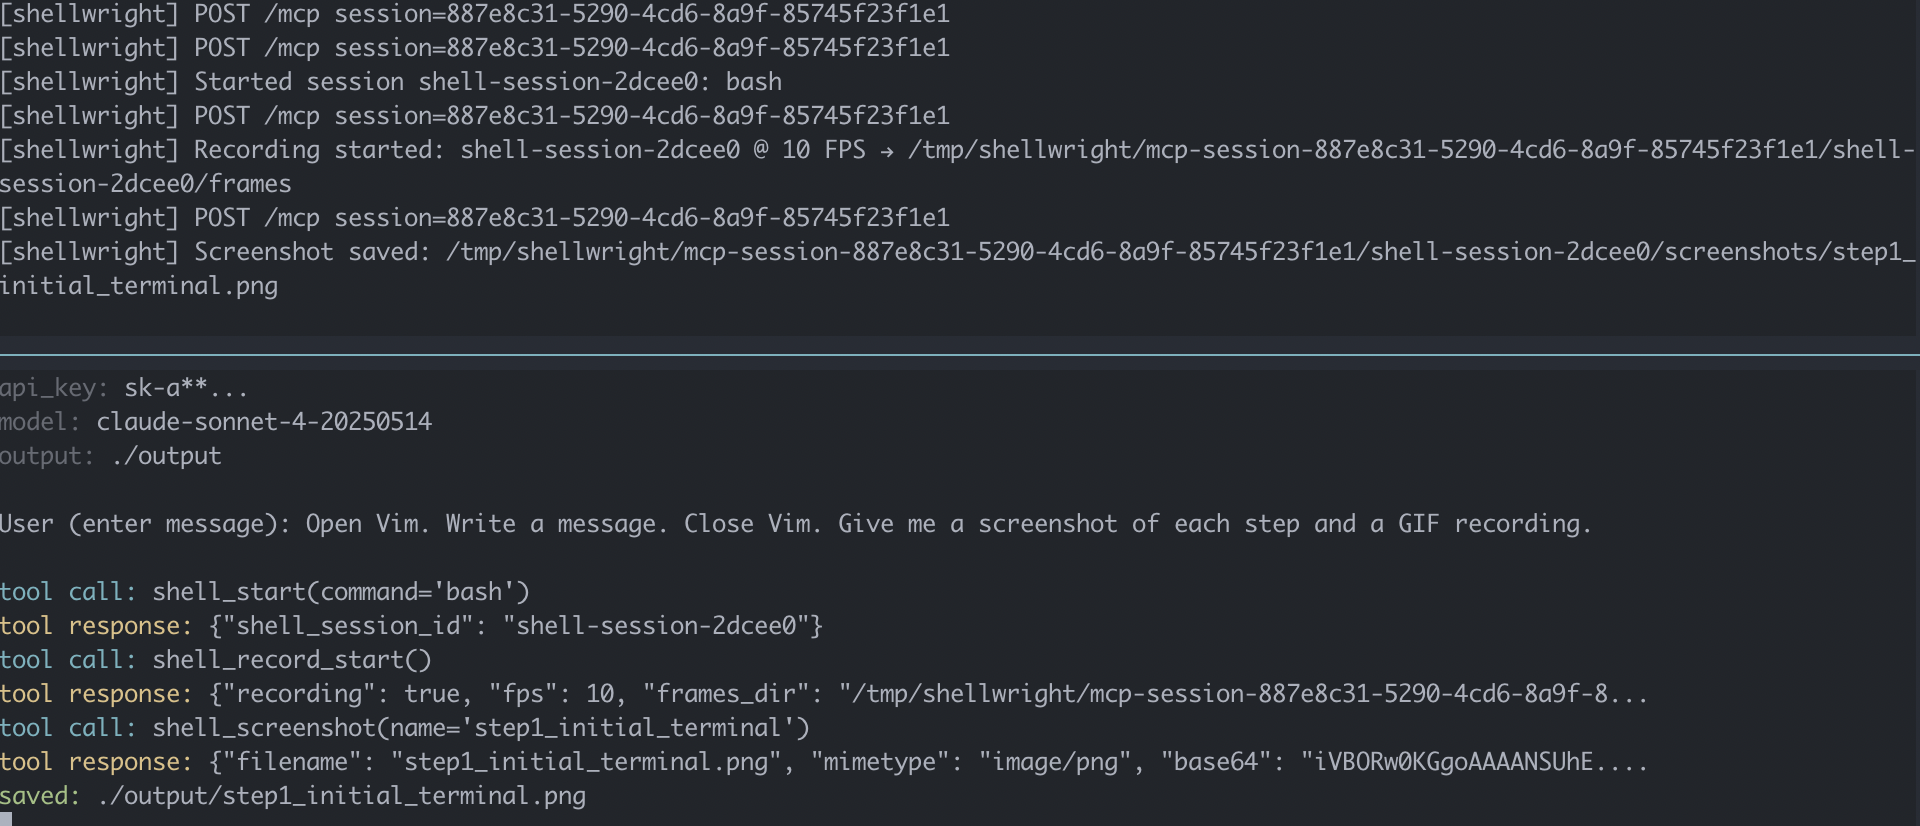
Screenshots and videos by default will be written to ./output.
Examples
Have fun with some prompts.
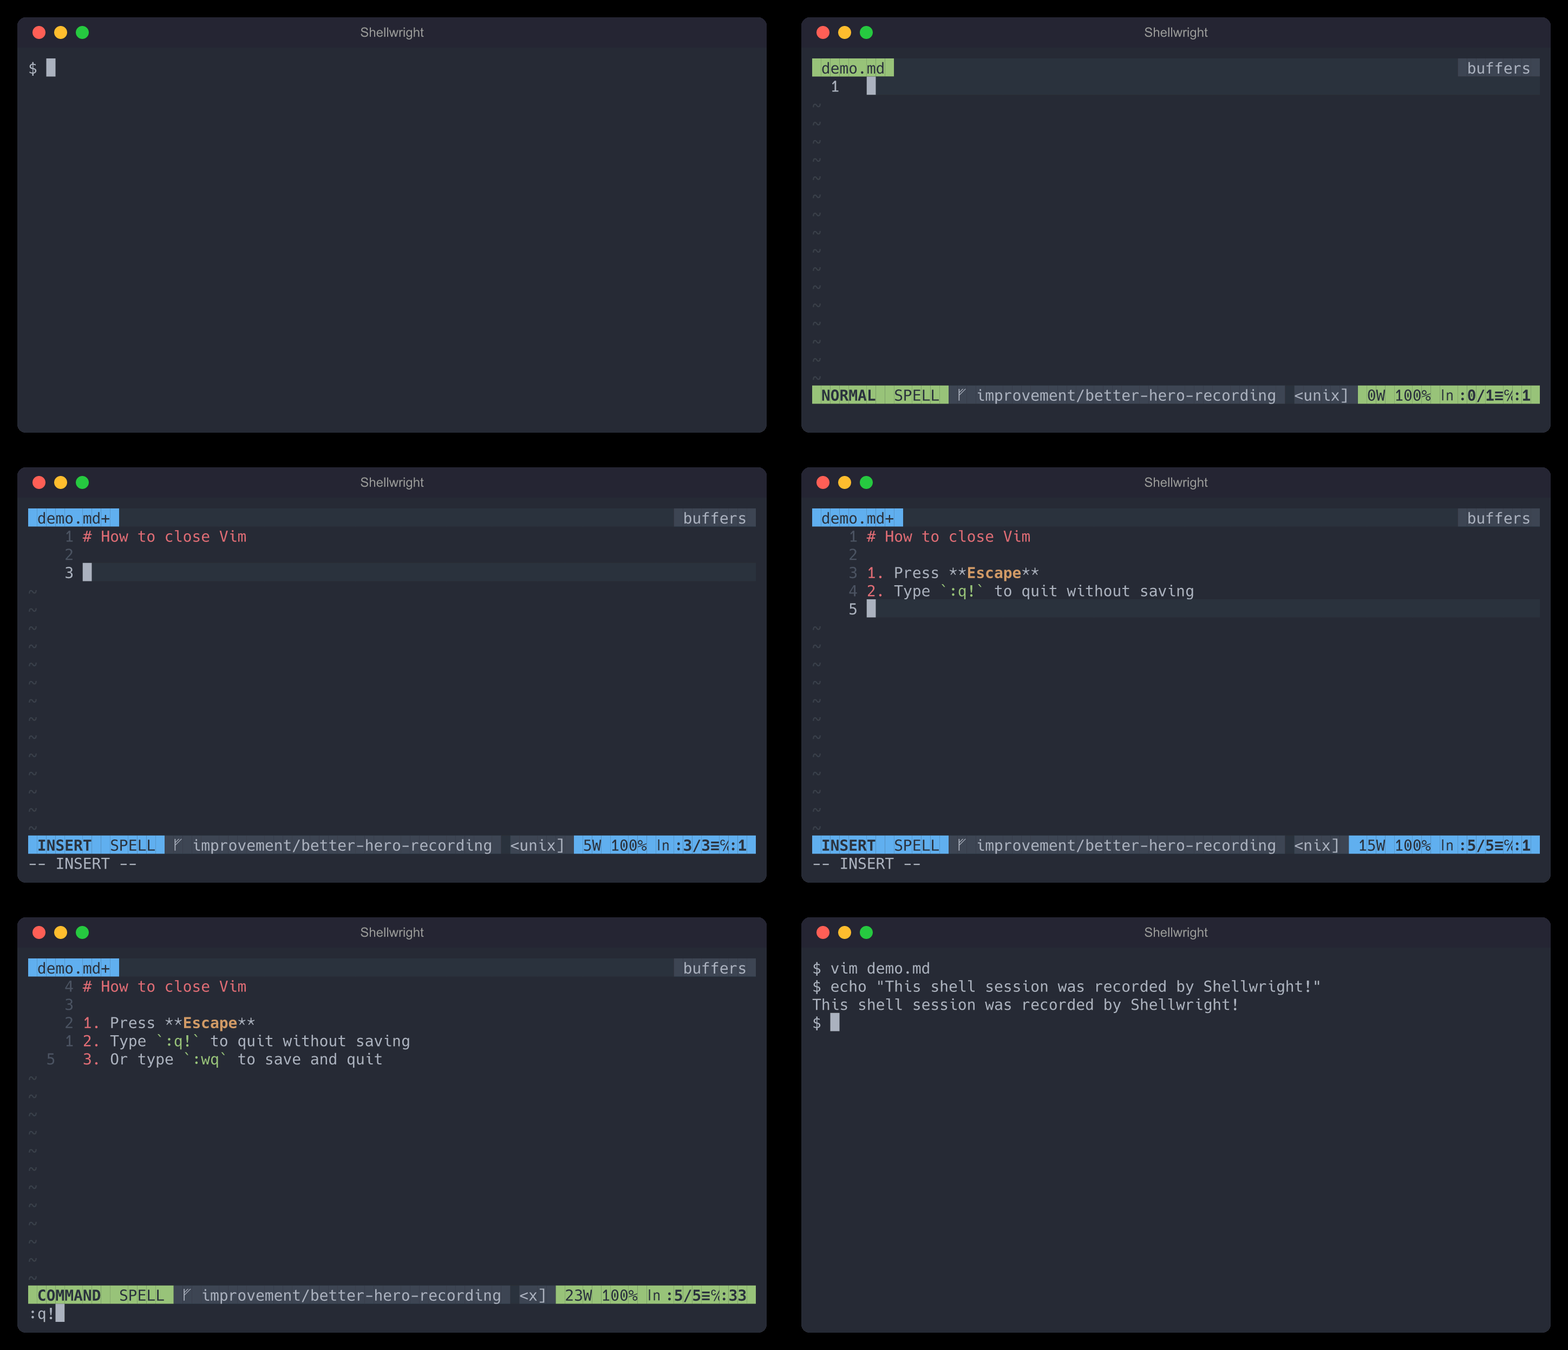
Do some Vim stuff:
Open Vim. Write a message saying how to close Vim. Close Vim. Give me a screenshot of each step and a GIF recording.
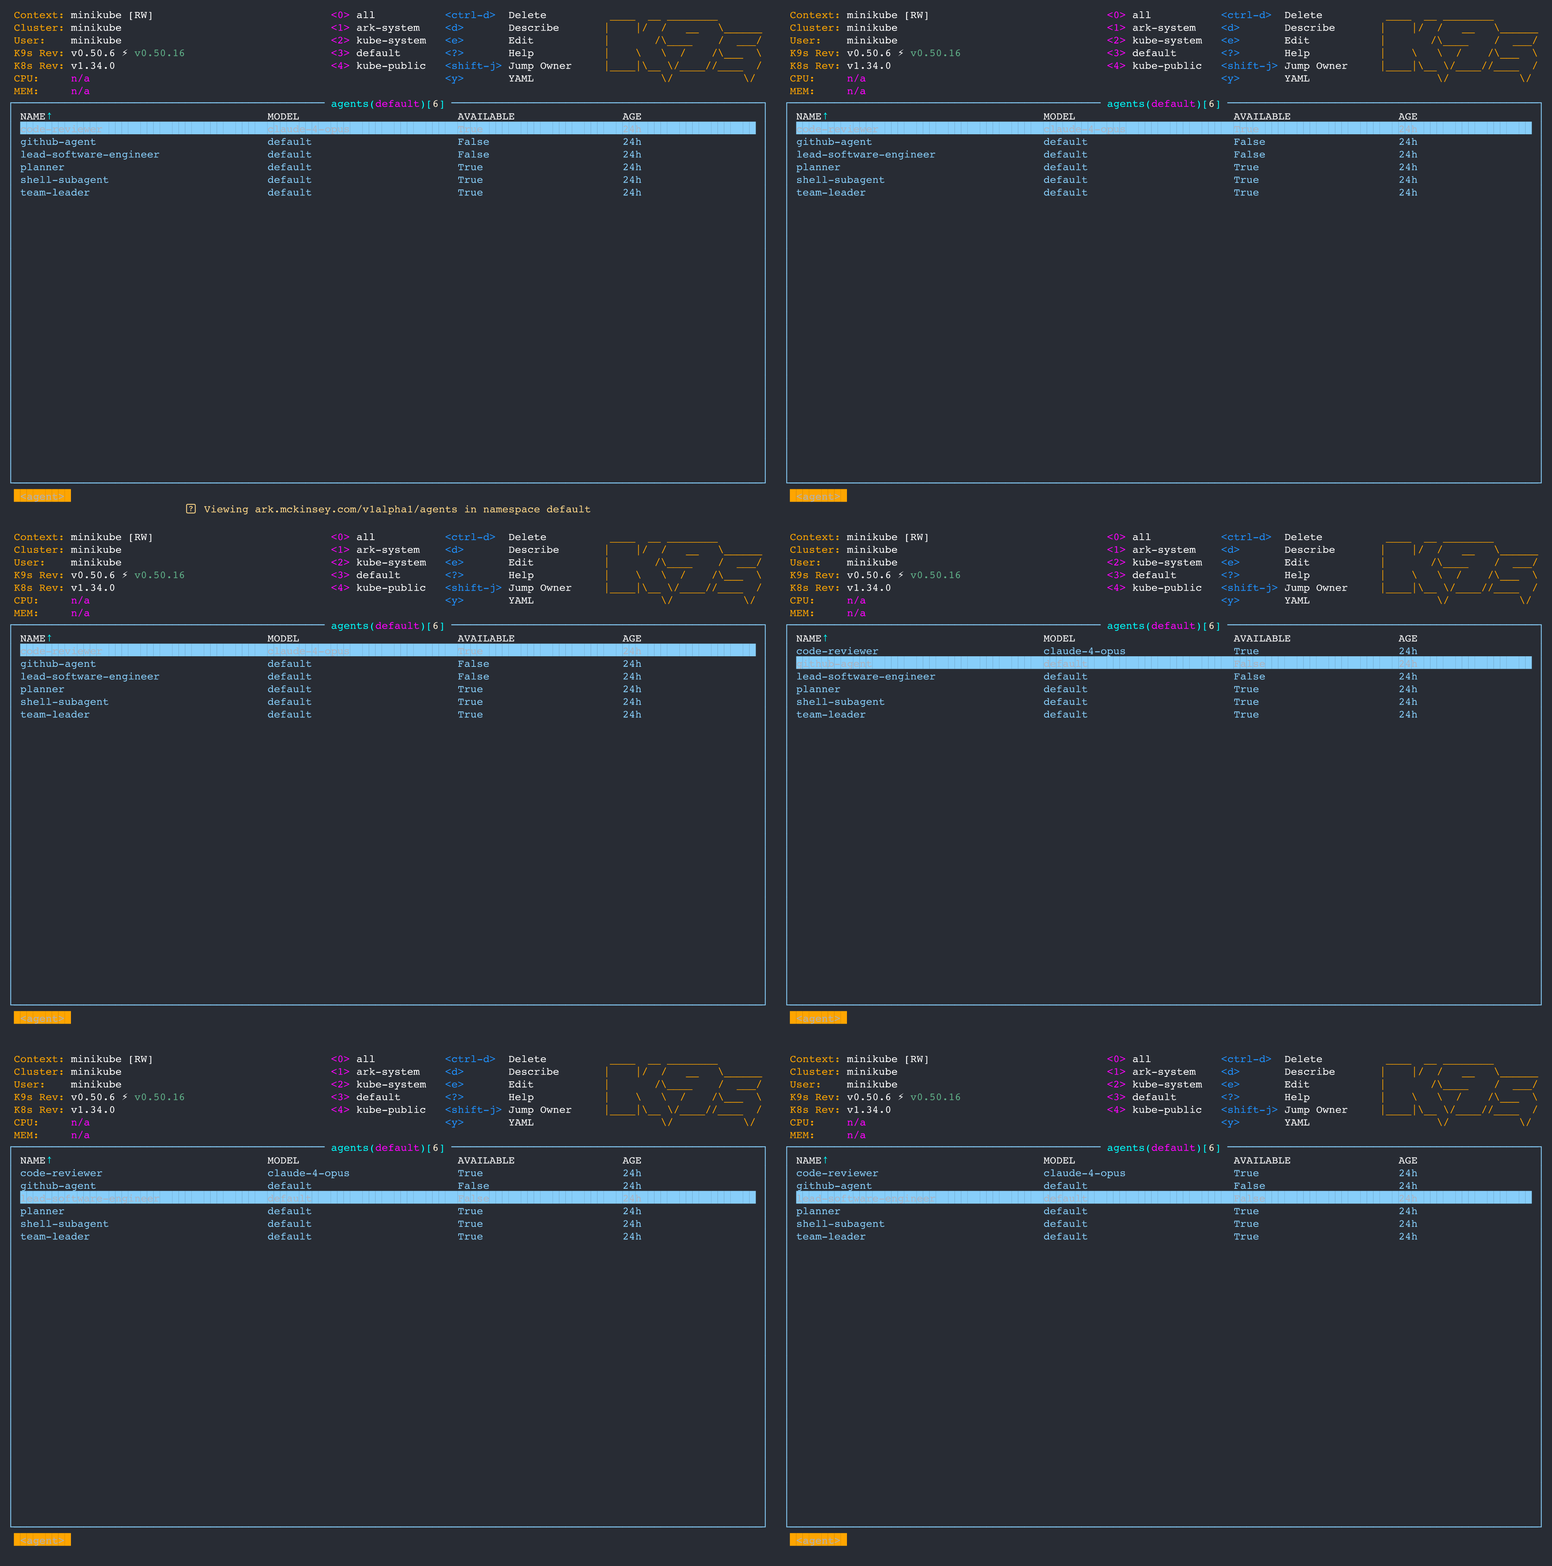
Open K9S. Check for resources of type 'agents'. Give me a GIF recording and take screenshots along the way.
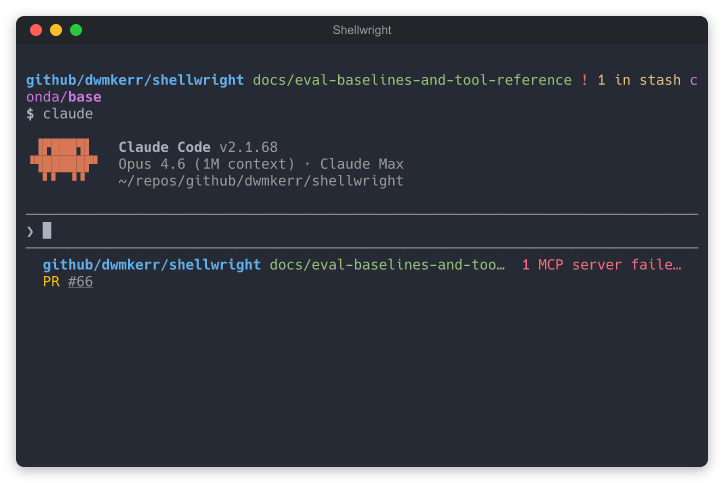
Take a bordered screenshot:
Open Claude Code. Take a screenshot with a macOS window border titled "Shellwright".
Use htop:
Open htop and show the most resource intensive process.
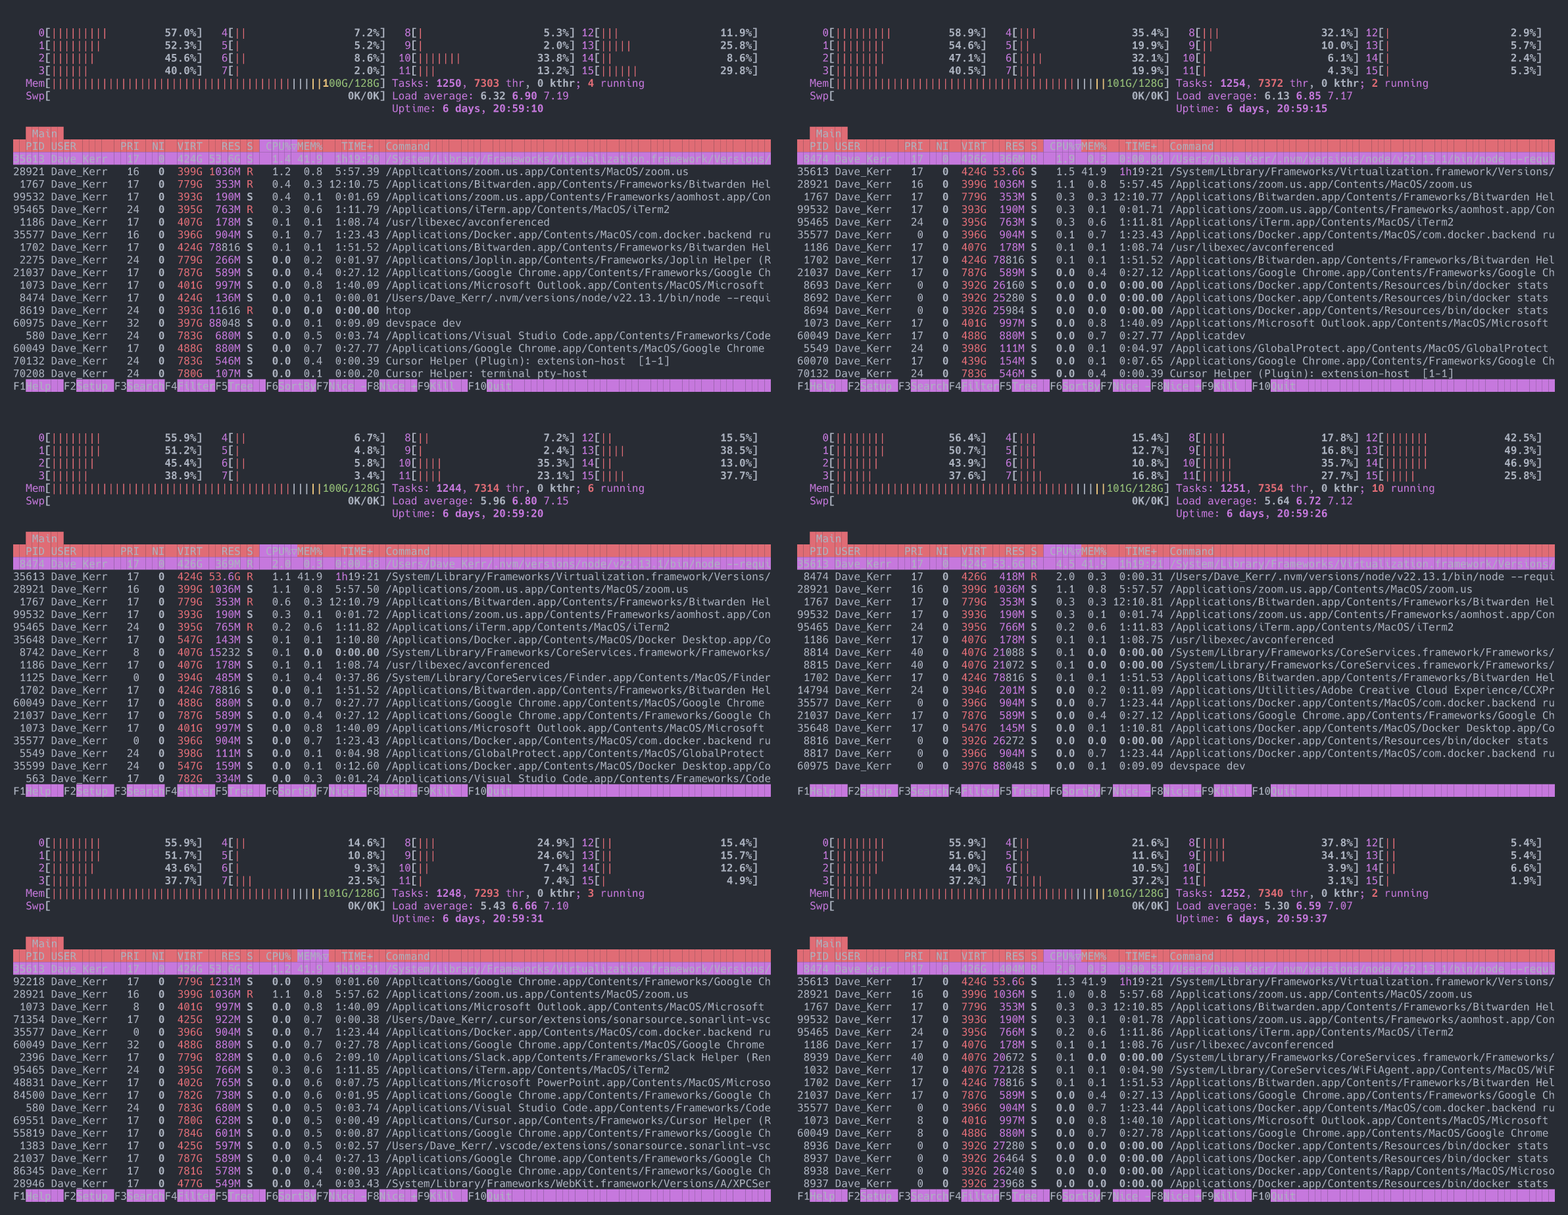
Open vim, create validate.py that checks if arguments are UK postcodes. Print ✓ or ✗ for each. Then run: python3 validate.py on a set of UK postcodes (valid and invalid) such as "SW1A 1AA" "INVALID" "M1 1AA". Record as a video. Take 2-3 screenshots along the way.

Installation
Claude Code
# Install for current project. Use '--scope user' for for user-wide.
claude mcp add --scope project shellwright -- npx -y @dwmkerr/shellwright

# Configure via command line parameters (or env vars) if needed.
claude mcp add --scope project shellwright -- npx -y @dwmkerr/shellwright \
  --log-path /tmp/shellwright/log.jsonl

# Uninstall. Same comment on 'scope'.
claude mcp remove --scope project shellwright
Cursor / VS Code / Other MCP Clients
Add to your MCP configuration file:
{
  "mcpServers": {
    "shellwright": {
      "command": "npx",
      "args": ["-y", "@dwmkerr/shellwright"]
    }
  }
}
Configuration
| Variable | Parameter | Default | Description |
|---|---|---|---|
PORT |
--port, -p |
7498 |
Server port ("SWRT" on a phone keypad) |
THEME |
--theme, -t |
one-dark |
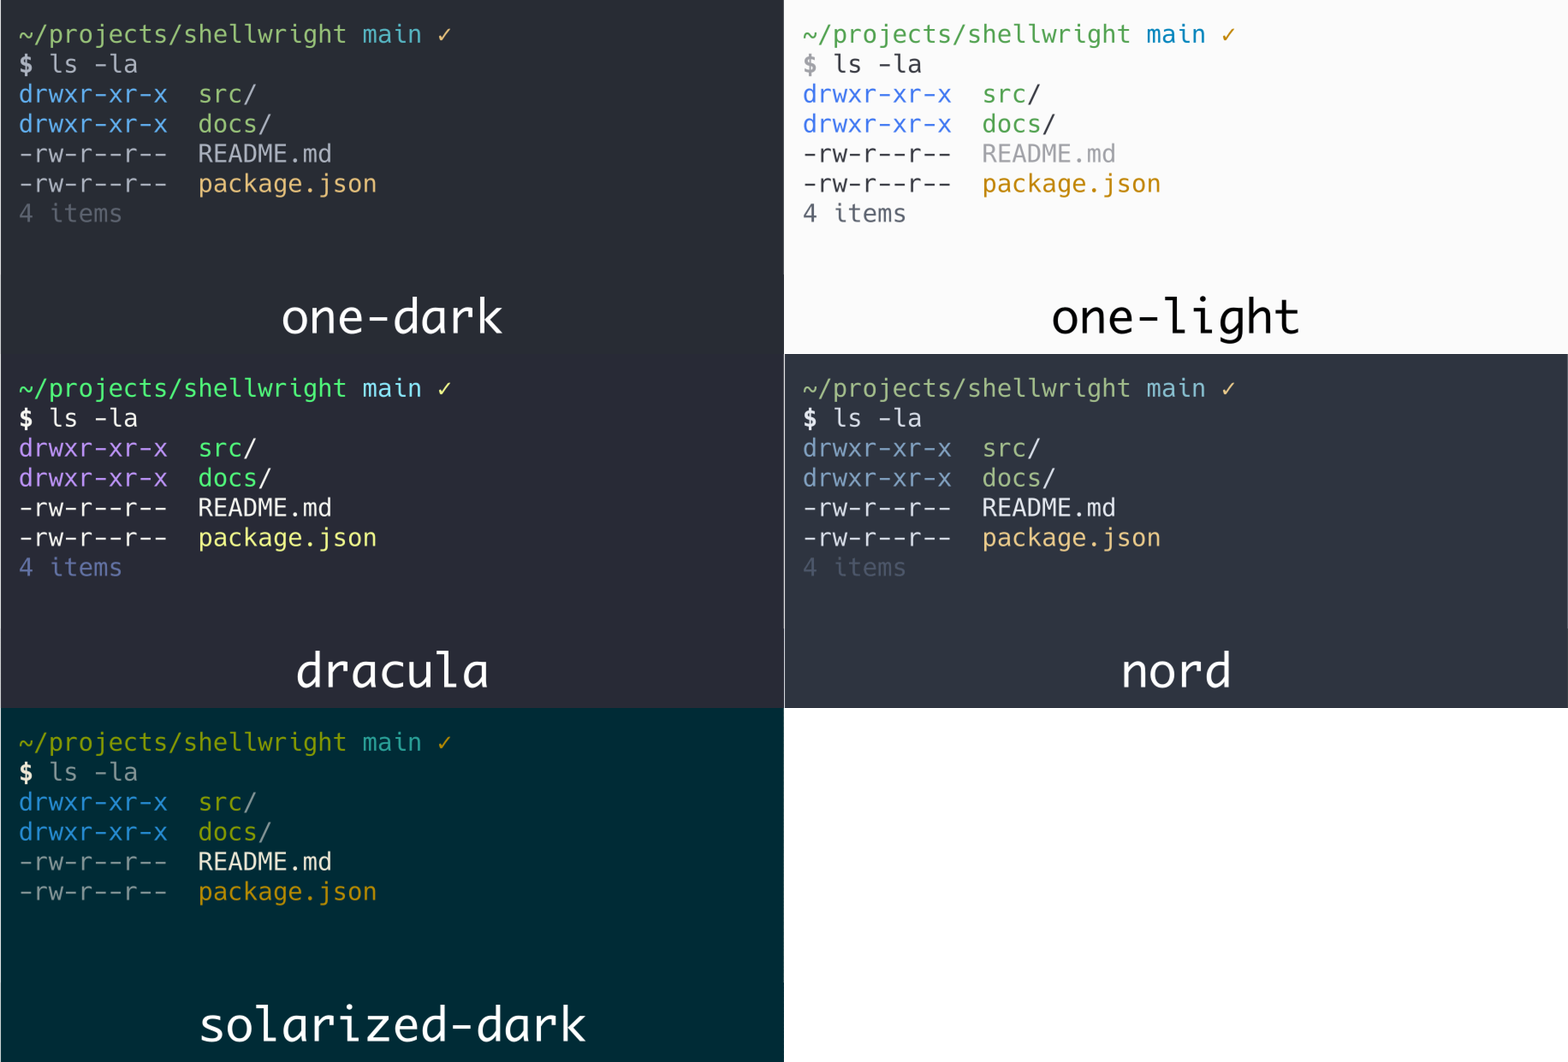
Color theme (one-dark, one-light, dracula, solarized-dark, nord, etc... |
TEMP_DIR |
--temp-dir |
/tmp/shellwright |
Directory for recording frames |
FONT_SIZE |
--font-size |
14 |
Font size in pixels for screenshots/recordings |
FONT_FAMILY |
--font-family |
Hack, Monaco, Courier, monospace |
Font family for screenshots/recordings (use a font with bold variant for bold text support) |
| - | --cols |
120 |
Default terminal columns |
| - | --rows |
40 |
Default terminal rows |
| - | --http |
false |
Use HTTP transport instead of stdio |
| - | --log-path |
- | Log tool calls to JSONL file (one JSON object per line) |
Some configuration can also be provided by the LLM, simply prompt for it:
- Terminal Dimensions: e.g: "Use a terminal that is 80x24 for the recording"
- Theme: e.g: "Use the dracula theme for this recording"
MCP Tools
| Tool | Description |
|---|---|
shell_start |
Start a new PTY session |
shell_send |
Send input to a session |
shell_read |
Read the terminal buffer |
shell_screenshot |
Capture terminal as PNG and SVG |
shell_record_start |
Start recording for GIF export |
shell_record_stop |
Stop recording and save GIF |
shell_stop |
Stop a PTY session |
shell_start
Start a new PTY session with a command. Columns, rows, and theme are optional and the defaults can be set in the Configuration:
Start a shell session running bash:
{
  "command": "bash",
  "cols": 80,
  "rows": 24
}
Start a session with an login mode shell and a specific theme:
{
  "command": "bash",
  "args": ["--login", "-i"],
  "theme": "dracula"
}
Available themes (see Theme Guide for previews):
| Theme | Type | Description |
|---|---|---|
one-dark |
Dark | Muted, balanced colors (default) |
one-light |
Light | Clean, readable colors |
dracula |
Dark | Vibrant purple theme |
solarized-dark |
Dark | Blue-green, easy on eyes |
nord |
Dark | Arctic-inspired, cool blue tones |
The response contains the shell session ID (as multiple shell sessions can be run) and theme:
{
  "shell_session_id": "shell-session-a1b2c3",
  "theme": "dracula"
}
shell_send
Send input to a PTY session. Returns the full terminal buffer (plain text, no ANSI codes) before and after sending input, so the LLM can see exactly what changed on screen:
{
  "session_id": "shell-session-a1b2c3",
  "input": "ls -la\n",
  "delay_ms": 100
}
The delay_ms parameter controls how long to wait after sending input before capturing bufferAfter (default: 100ms). Increase for slow commands.
The response includes the terminal buffer before and after the input was sent:
{
  "success": true,
  "bufferBefore": "$ _",
  "bufferAfter": "$ ls -la\ntotal 24\ndrwxr-xr-x  5 user staff ...\n$ _"
}
shell_read
Read the terminal contents (scrollback and screen) as plain text. Use raw: true for the raw output stream with ANSI escape codes:
{
  "session_id": "shell-session-a1b2c3",
  "raw": false
}
The response is the terminal content as plain text (truncated to 8KB to avoid context overflow):
total 24
drwxr-xr-x  5 user staff  160 Dec 18 10:00 .
drwxr-xr-x 10 user staff  320 Dec 18 09:00 ..
-rw-r--r--  1 user staff 1234 Dec 18 10:00 README.md
shell_screenshot
Capture terminal as PNG and SVG. Also saves ANSI and plain text versions. Pass name without extension (.png is added automatically). Optionally add a macOS-style window border (off by default):
{
  "session_id": "shell-session-a1b2c3",
  "name": "my-screenshot",
  "border": { "style": "macos", "title": "Terminal" }
}
The response contains download_png_url and download_svg_url for curl to save the files locally:
{
  "filename": "my-screenshot.png",
  "download_png_url": "http://localhost:7498/files/mcp-.../screenshots/my-screenshot.png",
  "download_svg_url": "http://localhost:7498/files/mcp-.../screenshots/my-screenshot.svg",
  "hint": "Use curl -o <filename> <url> to save the file"
}
shell_record_start
Start recording frames for GIF export. Frames are captured at the specified FPS (default 10, max 30, compression occurs by deduplicating identical frames). The optional border parameter (same as shell_screenshot) applies window chrome to every frame:
{
  "session_id": "shell-session-a1b2c3",
  "fps": 10,
  "border": { "style": "macos", "title": "Terminal" }
}
The response confirms recording has started:
{
  "recording": true,
  "fps": 10,
  "frames_dir": "/tmp/shellwright/.../frames"
}
shell_record_stop
Stop recording and render frames to GIF:
{
  "session_id": "shell-session-a1b2c3",
  "name": "my-recording"
}
The response contains a download_gif_url for curl to save the file locally:
{
  "filename": "my-recording.gif",
  "download_gif_url": "http://localhost:7498/files/mcp-.../recordings/my-recording.gif",
  "hint": "Use curl -o <filename> <url> to save the file",
  "frame_count": 42,
  "duration_ms": 4200
}
shell_stop
Stop a PTY session and clean up resources:
{
  "session_id": "shell-session-a1b2c3"
}
The response confirms the session was stopped:
{
  "success": true
}
MCP Prompts are also available for common workflows like vim editing and recording sessions. See src/prompts.ts.
Troubleshooting
The MCP server by default will write screenshots, video frames and the GIF (if requested) to a temporary location. This location includes the MCP session ID and the Shell session ID (one MCP session can have many shell sessions):
# Show the contents of an MCP and shell session.
tree /tmp/shellwright/mcp-session-16281bdf-7881-458a-8bee-475b02d000d2/shell-session-c66b8a

# Output:
# .
# ├── frames                         # Frames for the GIF recording. These are
# │   └── frame000000.png            # cleaned up at the end of the session.
# ├── recordings
# │   └── vim_tutorial_complete.gif  # The GIF recording (if requested).
# └── screenshots
# ├── step1_initial_terminal.ansi    # Individual screenshot w/ ansi color etc.
# ├── step1_initial_terminal.png     # Screenshot as PNG (ANSI->SVG->PNG).
# └── step1_initial_terminal.svg     # The SVG intermediate.
# └── step1_initial_terminal.txt     # Screenshot as plain text.
You can check raw txt files to troubleshoot the contents of screenshots. You can see the ansi content which contains formatting and color codes. Finally, you can open the png files - these are generated by converting the ansi to SVG (using themes defined in code) and then SVG is converted PNG. Check the plain text contents of a buffer, or raw ansi, or formatted like so:
# Show plain text. Make sure you are in the shell session temp directory.
cat ./k9s_initial_view.txt

# Show formatted ANSI. Good for troubleshooting color codes.
cat ./k9s_initial_view.ansi
Developer Guide
To test local changes with Cursor, VS Code, or other MCP clients, first build the project then configure them to use your local build:
npm run build
{
  "mcpServers": {
    "shellwright-dev": {
      "command": "node",
      "args": ["/path/to/shellwright/dist/index.js"]
    }
  }
}
Run npm run build after making changes, then restart your MCP client.
For HTTP mode development with hot-reload:
npm run dev:http
Claude Code
To test local development changes with Claude Code, add the local build as an MCP server:
# From the shellwright repo root - build first!
npm run build
claude mcp add shellwright-dev --scope project -- node "${PWD}/dist/index.js"
This registers your local build so you can test changes before publishing.
Contributors
Thanks to all contributors!
This project follows the all-contributors specification. Contributions of any kind welcome!
License
MIT
openspec-flow
This repo uses openspec-flow to drive spec-driven development from GitHub issues.
- Open an issue describing the feature, fix, or task.
- Add the
openspec:golabel. - openspec-flow opens a spec PR (
openspec:spec). Review, comment, iterate (addopenspec:goto the PR to re-run). Merge when happy. - openspec-flow opens an impl PR (
openspec:impl). Review, iterate, merge. The originating issue closes automatically.
Required Actions secret: ANTHROPIC_API_KEY.
shellwright MCP Fragen
Welche Tools bietet shellwright MCP?
Er stellt 2 Tools bereit, darunter one-dark, one-light.
Was kann shellwright für meinen AI Agent tun?
Es erlaubt AI Agents, Terminal-Automatisierung auszuführen, Screenshots in den Formaten PNG und SVG zu machen und GIF-Aufnahmen von Shell-Sessions zu erstellen.
Wo werden die Screenshots und Videos gespeichert?
Standardmäßig werden Screenshots und Videos im Verzeichnis './output' gespeichert.
Kann ich shellwright mit Claude Code nutzen?
Ja, du kannst es für Claude Code mit dem Befehl 'claude mcp add' installieren.