
데이터베이스, 사용자, 함수, 팀, 스토리지 등 Appwrite API를 AI 클라이언트를 위한 도구로 제공합니다.
다른 이름 appwrite/mcp-for-api, mcp-server-appwrite
- 스타
- 72
- Tools
- —
- 다운로드, 30일
- 334,841
- 최신 버전
- 0.2.8
- 마지막 커밋
- 2026년 11월 13일
- 라이선스
- MIT
Appwrite MCP란?
Appwrite은(는) MCP server입니다. 데이터베이스, 사용자, 함수, 팀, 스토리지 등 Appwrite API를 AI 클라이언트를 위한 도구로 제공합니다.
프로젝트 README에서 생성된 요약
Appwrite MCP server 정보
이 server는 개발자가 AI 클라이언트를 통해 Appwrite 백엔드 서비스를 관리할 수 있도록 지원합니다. 데이터베이스, 사용자, 함수, 팀, 스토리지 등 Appwrite API의 핵심 기능을 실행 가능한 도구로 노출합니다. 이 server를 연결하면 AI agent가 Appwrite 프로젝트와 직접 상호작용하여 관리 또는 개발 작업을 수행할 수 있습니다.
사용자는 원격 URL을 통해 호스팅된 Appwrite Cloud server에 연결하고 브라우저 기반 OAuth 흐름을 사용하여 인증할 수 있으므로 API key를 수동으로 복사할 필요가 없습니다. 자체 호스팅 Appwrite 인스턴스를 사용하는 경우, 프로젝트 API key를 사용하여 stdio를 통해 server를 로컬에서 실행할 수 있습니다. Claude Desktop, Cursor, VS Code, Windsurf, Zed 등 다양한 클라이언트와 호환됩니다. agent가 수행한 모든 변경 사항은 검토가 용이하도록 사유와 함께 Appwrite 감사 로그에 기록됩니다.
활용 사례
- 1백엔드 리소스 관리AI agent가 데이터베이스, 사용자, 함수, 팀, 스토리지와 직접 상호작용할 수 있습니다.
- 2agent 활동 감사프로젝트 활동 로그를 검토하여 AI가 특정 변경을 수행한 이유를 추적할 수 있습니다.
- 3환경 간 운영agent가 staging과 같은 특정 프로젝트 환경 내에서 작업을 수행할 수 있습니다.
- 4기술 문서 검색개발자는 agent를 사용하여 Appwrite 문서 내에서 정보를 찾을 수 있습니다.
프로젝트의 README를 바탕으로 작성되었습니다. 모든 활용 사례는 해당 내용의 인용문과 대조하여 확인합니다.
Appwrite MCP 설치 방법
형식 확인: 2026년 11월 10일Claude Code에 Appwrite MCP 설치
$ claude mcp add mcp-for-api -- uvx mcp-server-appwriteCursor에 Appwrite MCP 설치
~/.cursor/mcp.json
{
  "mcpServers": {
    "mcp-for-api": {
      "command": "uvx",
      "args": [
        "mcp-server-appwrite"
      ]
    }
  }
}VS Code에 Appwrite MCP 설치
.vscode/mcp.json
{
  "servers": {
    "mcp-for-api": {
      "type": "stdio",
      "command": "uvx",
      "args": [
        "mcp-server-appwrite"
      ]
    }
  }
}Claude Desktop에 Appwrite MCP 설치
claude_desktop_config.json
{
  "mcpServers": {
    "mcp-for-api": {
      "command": "uvx",
      "args": [
        "mcp-server-appwrite"
      ]
    }
  }
}Codex에 Appwrite MCP 설치
~/.codex/config.toml
[mcp_servers.mcp-for-api]
command = "uvx"
args = ["mcp-server-appwrite"]
Gemini CLI에 Appwrite MCP 설치
~/.gemini/settings.json
{
  "mcpServers": {
    "mcp-for-api": {
      "command": "uvx",
      "args": [
        "mcp-server-appwrite"
      ]
    }
  }
}자동 검사
2026년 11월 12일에 실행됨전체 보고서 →자동 검사를 통과했습니다. 이는 보안 감사가 아닙니다. 코드를 직접 읽고 서버에 필요한 최소한의 권한만 부여하십시오. 검사 방식

- 소스 저장소 연결 및 접근 가능통과
- 오픈 소스 라이선스 (OSI)통과
- 최근 1년 내 커밋 또는 릴리스통과
- 패키지 이름이 인기 패키지와 유사하지 않음통과
- 원격 엔드포인트가 HTTPS 사용검사되지 않음
- 파괴적인 도구에 라벨 표시됨검사되지 않음
- 모델에 대한 숨겨진 지침 없음통과
- 패키지와 의존성에 심각한 보안 권고 없음통과
README
GitHub에서 보기Appwrite MCP server

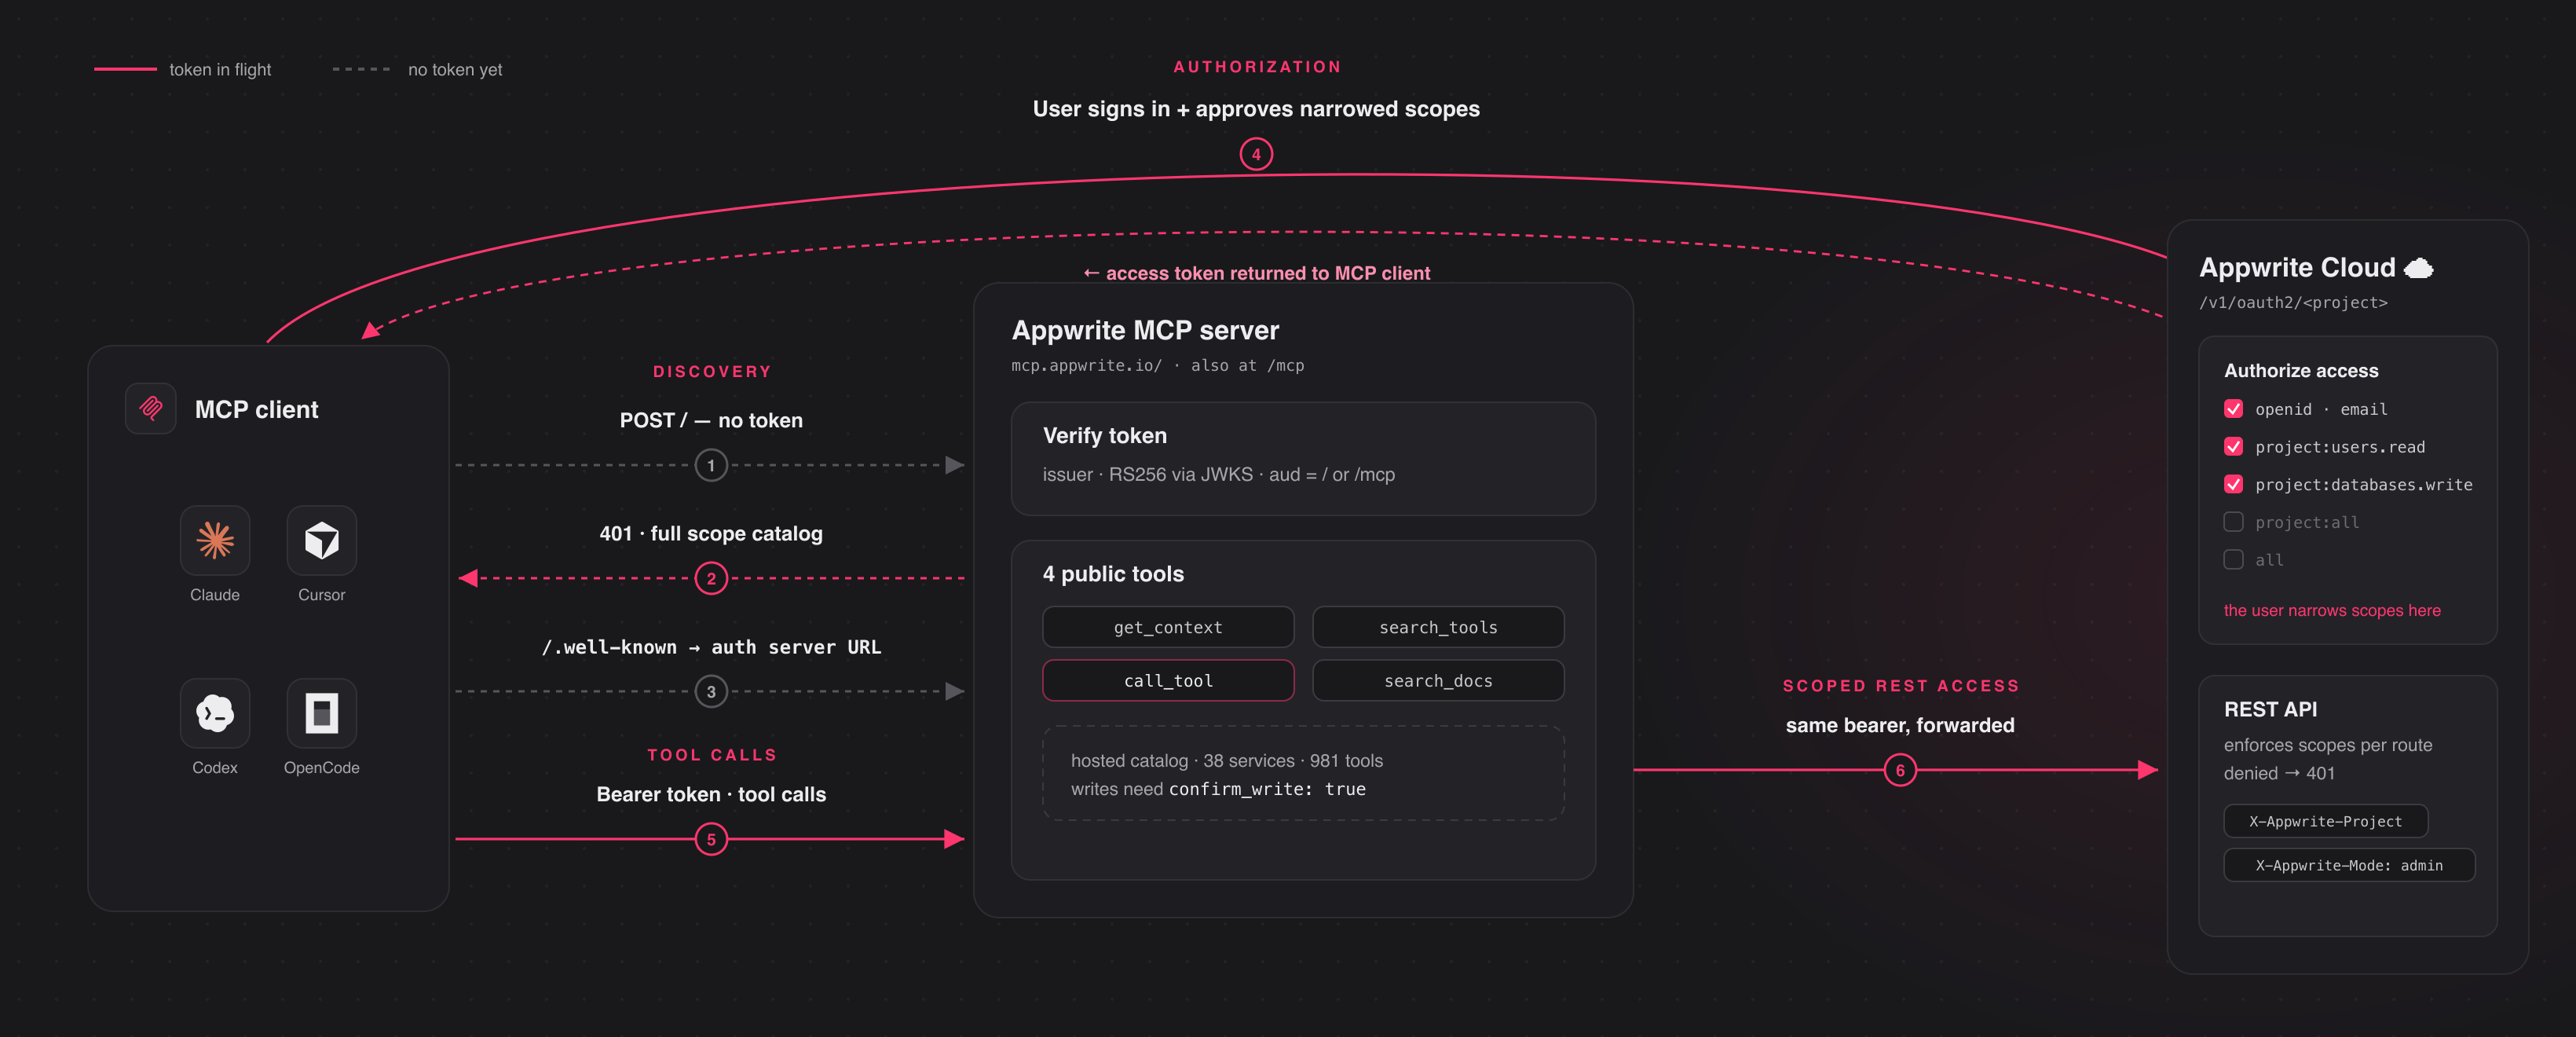
A Model Context Protocol server for Appwrite. It exposes Appwrite's API — databases, users, functions, teams, storage, and more — as tools your MCP client can call.
Connect to the hosted server at https://mcp.appwrite.io/ and authenticate
through your browser. The first time you connect, your client opens an Appwrite
consent screen; approve the scopes and you're connected. There are no keys to
copy. The conventional https://mcp.appwrite.io/mcp URL is also supported and
connects to the same server.
Connect your client
Pick your client below. Each adds the hosted Appwrite Cloud server.
claude mcp add --transport http appwrite https://mcp.appwrite.io/
Then, inside a Claude Code session, run /mcp, select appwrite, and follow
the browser prompt to authenticate.
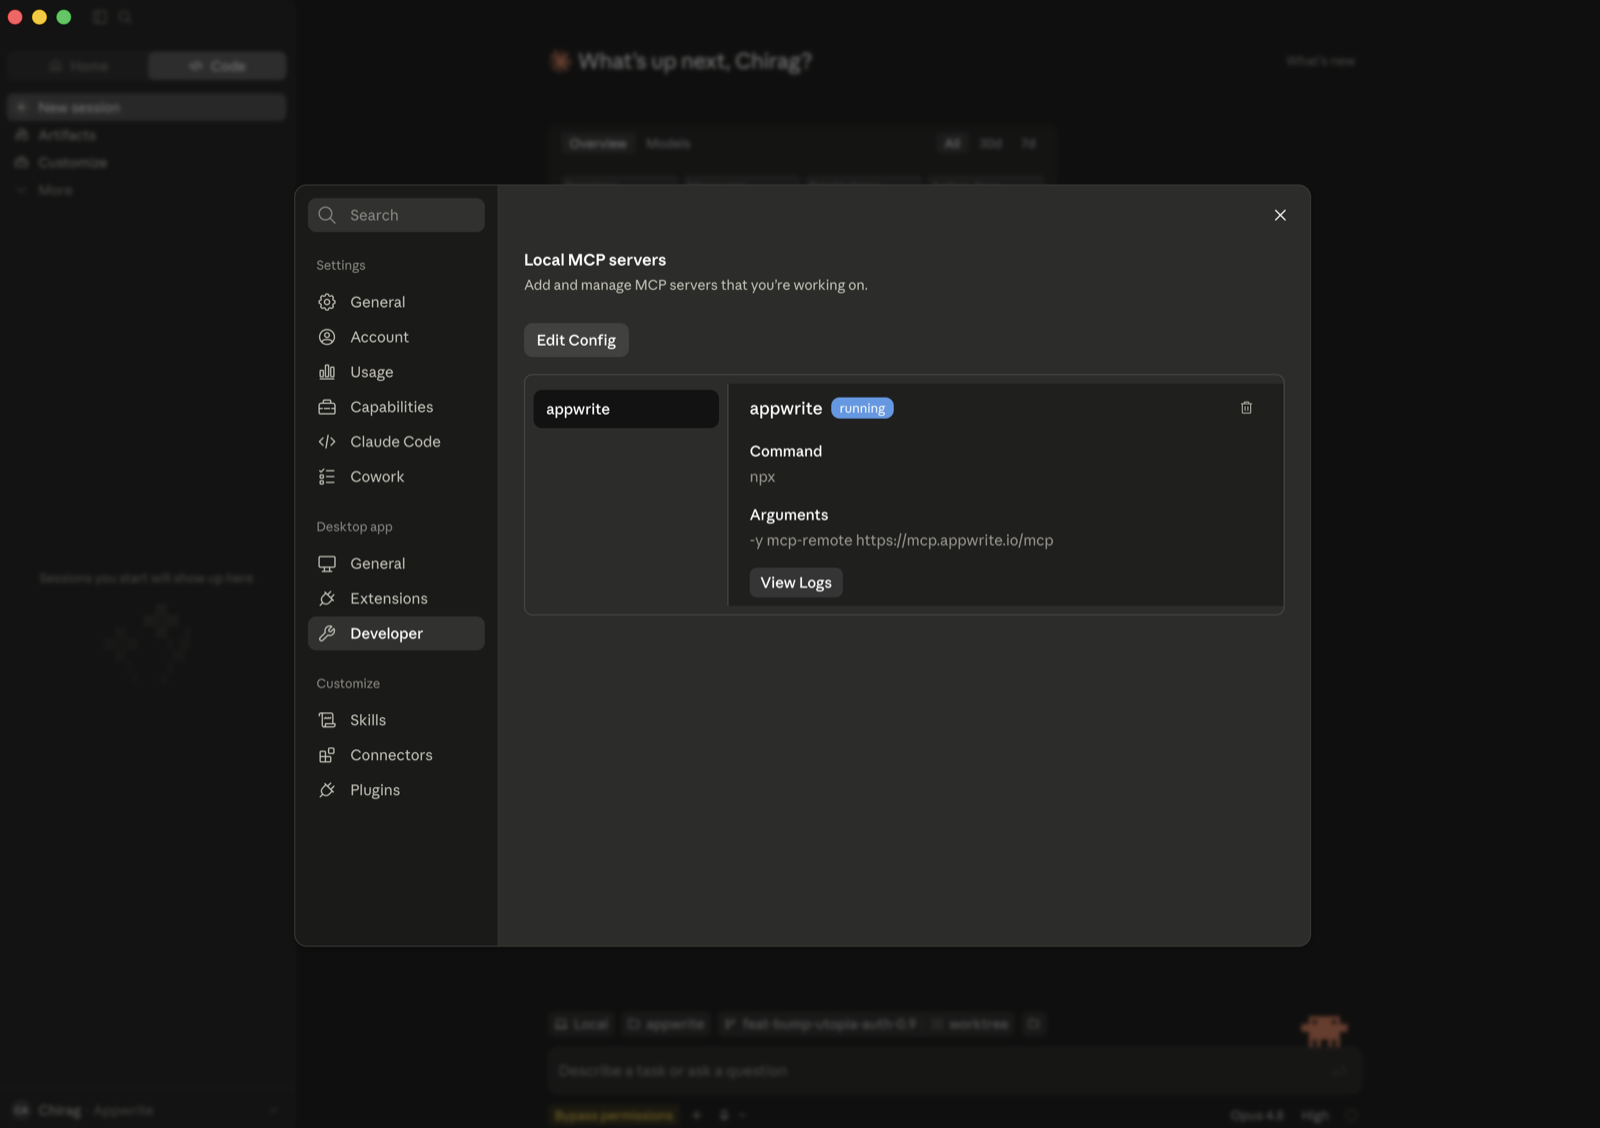
Go to Settings → Connectors → Add custom connector and paste
https://mcp.appwrite.io/. Available on Pro and Max plans; on Team and
Enterprise plans only an organization Owner can add custom connectors.
If you don't see that option (free plan, or a Team/Enterprise member), bridge the remote server through stdio instead (requires Node.js). Go to Settings → Developer → Local MCP servers, click Edit Config, and add:
{
  "mcpServers": {
    "appwrite": {
      "command": "npx",
      "args": ["-y", "mcp-remote", "https://mcp.appwrite.io/"]
    }
  }
}
Restart Claude Desktop; the server appears under Local MCP servers and a browser window opens to authenticate.
Edit ~/.cursor/mcp.json (global) or .cursor/mcp.json (project).
{
  "mcpServers": {
    "appwrite": {
      "url": "https://mcp.appwrite.io/"
    }
  }
}
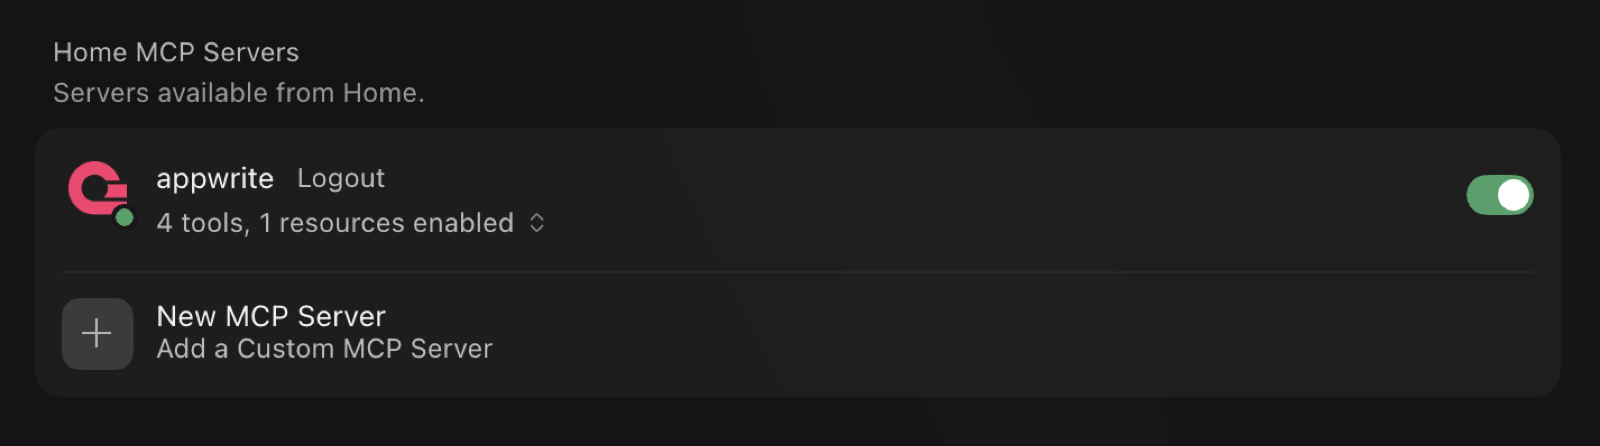
Cursor prompts you to log in through the browser; the server then shows up under Settings → MCP with its tools enabled.
Edit .vscode/mcp.json (workspace) or your user configuration via the Command
Palette → MCP: Open User Configuration.
{
  "servers": {
    "appwrite": {
      "type": "http",
      "url": "https://mcp.appwrite.io/"
    }
  }
}
Edit ~/.codex/config.toml.
[mcp_servers.appwrite]
url = "https://mcp.appwrite.io/"
Then authenticate from the terminal:
codex mcp login appwrite
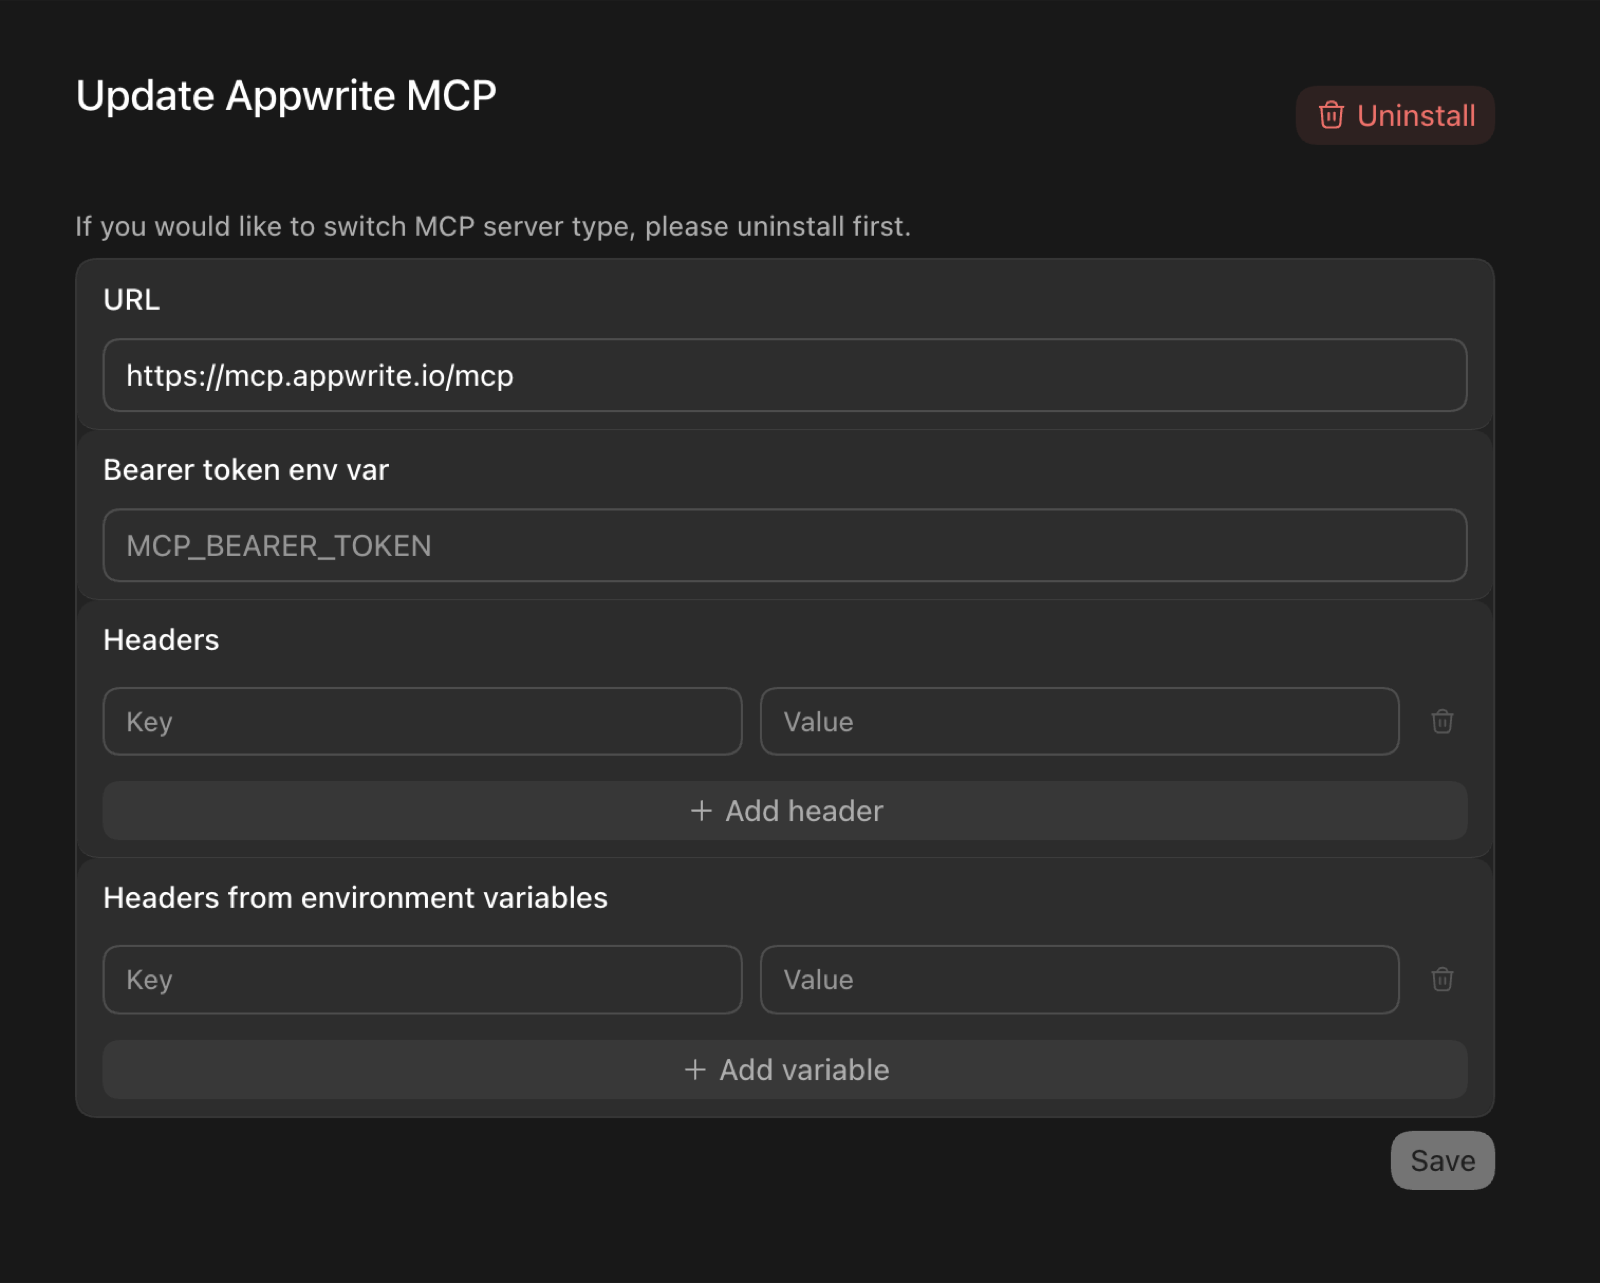
In the Codex GUI, you can instead add the server from the MCP settings —
set the URL to https://mcp.appwrite.io/ and leave the token and header
fields empty (authentication happens through the browser):
Edit opencode.json (project) or ~/.config/opencode/opencode.json (global).
{
  "$schema": "https://opencode.ai/config.json",
  "mcp": {
    "appwrite": {
      "type": "remote",
      "url": "https://mcp.appwrite.io/",
      "enabled": true
    }
  }
}
Edit ~/.codeium/windsurf/mcp_config.json.
{
  "mcpServers": {
    "appwrite": {
      "serverUrl": "https://mcp.appwrite.io/"
    }
  }
}
gemini mcp add --transport http appwrite https://mcp.appwrite.io/
Or edit ~/.gemini/settings.json (note the key is httpUrl, not url):
{
  "mcpServers": {
    "appwrite": {
      "httpUrl": "https://mcp.appwrite.io/"
    }
  }
}
Gemini CLI opens the browser OAuth flow automatically on first connect. To
re-authenticate, run /mcp auth appwrite inside a session.
Edit ~/.gemini/config/mcp_config.json (global) or .agents/mcp_config.json (project workspace).
{
  "mcpServers": {
    "appwrite": {
      "serverUrl": "https://mcp.appwrite.io/"
    }
  }
}
⚠️ Note: Antigravity strictly requires the
serverUrlkey for remote transport. Using legacy fields likeurlorhttpUrlwill cause tool registration to fail silently.
Antigravity opens the browser OAuth flow automatically on first connect. If you manually edit the JSON file, navigate to Settings → Customizations → Installed MCP Servers and click Refresh to reload the tool definitions.
copilot mcp add --transport http appwrite https://mcp.appwrite.io/
Or run /mcp add inside a session, or edit ~/.copilot/mcp-config.json:
{
  "mcpServers": {
    "appwrite": {
      "type": "http",
      "url": "https://mcp.appwrite.io/"
    }
  }
}
A browser window opens to authenticate on first connect. Check status with
/mcp.
Go to Settings → AI → MCP Servers → Add Server → Add Remote Server, or add
to your settings.json (zed: open settings):
{
  "context_servers": {
    "appwrite": {
      "url": "https://mcp.appwrite.io/"
    }
  }
}
Zed prompts you to authenticate through the browser on first connect.
Go to Settings → Agents → MCP servers → + Add, choose the URL-based
server type, and enter https://mcp.appwrite.io/.
Warp opens a browser window to authenticate on first connect.
JetBrains IDEs don't yet support OAuth for remote MCP servers, so bridge through stdio (requires Node.js). Go to Settings → Tools → AI Assistant → Model Context Protocol (MCP) → Add, switch to the JSON view, and paste:
{
  "mcpServers": {
    "appwrite": {
      "command": "npx",
      "args": ["-y", "mcp-remote", "https://mcp.appwrite.io/"]
    }
  }
}
A browser window opens to authenticate on first connect.
Cline doesn't yet support OAuth for remote MCP servers, so bridge through stdio (requires Node.js). In the Cline panel, open the MCP Servers icon → Configure tab → Configure MCP Servers, and add:
{
  "mcpServers": {
    "appwrite": {
      "command": "npx",
      "args": ["-y", "mcp-remote", "https://mcp.appwrite.io/"]
    }
  }
}
A browser window opens to authenticate on first connect.
Reasons and environments
Every write the agent makes carries a short reason (why it made the change).
Appwrite records it on the project's audit log, so you can review what your
agent changed, and why, in the project's Activity tab.
On Appwrite Cloud, the agent can act in a project's environments (for example
staging): appwrite_get_context lists them, and each call takes the
environment's ID as environment_id next to the project's project_id. See
Tool surface.
Self-hosted Appwrite
Running your own Appwrite instance? Run the MCP server locally over stdio and
authenticate with a project API key. See docs/self-hosted.md
for per-client setup.
Documentation
- Tool surface — the tools exposed to the model and the internal Appwrite catalog.
- How Cloud authentication works — the OAuth 2.1 flow.
- Documentation search — the in-process
appwrite_search_docstool and how to rebuild its index. - Events — MCP Events: webhook subscriptions to changes in your Appwrite project (in development, not available yet).
- Self-hosted Appwrite — run the server locally with a project API key.
- Local development — running, testing, and debugging the server locally.
- AGENTS.md — full contributor guide and pre-PR checklist.
License
This MCP server is licensed under the MIT License. See the LICENSE file for details.
Appwrite MCP 질문
Appwrite MCP를 Claude Code에 추가하려면 어떻게 하나요?
터미널에서 claude mcp add mcp-for-api -- uvx mcp-server-appwrite를 실행합니다. 모든 프로젝트에서 사용할 수 있게 하려면 --scope user를 추가합니다.
Appwrite MCP를 Cursor에 추가하려면 어떻게 하나요?
~/.cursor/mcp.json를 열고 mcpServers 아래에 서버를 추가합니다. 위 설치 섹션에 표시된 Cursor 구성을 사용합니다.
Appwrite MCP server 인증은 어떻게 하나요?
브라우저의 Appwrite 동의 화면을 통해 인증합니다. 호스팅 버전의 경우 복사할 키가 필요 없습니다.
자체 호스팅 중인 Appwrite 인스턴스에서도 사용할 수 있나요?
네, stdio를 통해 MCP server를 로컬에서 실행하고 프로젝트 API key를 사용하여 인증할 수 있습니다.
AI agent가 수행한 변경 사항을 어떻게 추적하나요?
모든 쓰기 작업에는 짧은 사유가 포함되며, 이는 Activity 탭에서 검토할 수 있도록 프로젝트의 Appwrite 감사 로그에 기록됩니다.