
Mengekspos API Appwrite termasuk database, users, functions, teams, dan storage sebagai tools untuk AI client.
Juga dikenal sebagai appwrite/mcp-for-api, mcp-server-appwrite
- Stars
- 72
- Tools
- —
- Unduhan, 30 hari
- 334.841
- Versi terbaru
- 0.2.8
- Commit terakhir
- 13 Nov 2026
- Lisensi
- MIT
Apa itu Appwrite MCP?
Appwrite adalah MCP server. Mengekspos API Appwrite termasuk database, users, functions, teams, dan storage sebagai tools untuk AI client.
Ringkasan dibuat dari README proyek
Tentang Appwrite MCP server
Server ini memungkinkan developer untuk mengelola layanan backend Appwrite melalui AI client. Server ini mengekspos fungsionalitas inti API Appwrite, termasuk databases, users, functions, teams, dan storage, sebagai tools yang dapat dieksekusi. Dengan menghubungkan server ini, AI agent dapat berinteraksi langsung dengan proyek Appwrite Anda untuk menjalankan tugas administratif maupun pengembangan.
User dapat terhubung ke server Appwrite Cloud yang di-host melalui remote URL dan melakukan autentikasi menggunakan alur OAuth berbasis browser, sehingga tidak perlu menyalin API keys secara manual. Bagi Anda yang menggunakan instance Appwrite self-hosted, server dapat dijalankan secara lokal melalui stdio menggunakan project API key. Server ini kompatibel dengan berbagai client seperti Claude Desktop, Cursor, VS Code, Windsurf, dan Zed. Setiap perubahan yang dilakukan oleh agent akan dicatat beserta alasannya di dalam audit log Appwrite agar mudah ditinjau.
Apa yang bisa Anda lakukan dengannya
- 1Mengelola resource backendAI agent dapat berinteraksi langsung dengan databases, users, functions, teams, dan storage Anda.
- 2Audit aktivitas agentAnda dapat melacak alasan mengapa AI melakukan perubahan spesifik dengan meninjau log aktivitas proyek.
- 3Operasi lintas environmentAgent dapat menjalankan aksi di dalam environment proyek tertentu seperti staging.
- 4Mencari dokumentasi teknisDeveloper dapat menggunakan agent untuk menemukan informasi di dalam dokumentasi Appwrite.
Ditulis berdasarkan README proyek. Setiap use case diperiksa terhadap kutipan dari README tersebut.
Cara menginstal Appwrite MCP
Format diverifikasi 10 Nov 2026Tambahkan ke CursorTambahkan ke GooseInstal Appwrite MCP di Claude Code
$ claude mcp add mcp-for-api -- uvx mcp-server-appwriteInstal Appwrite MCP di Cursor
~/.cursor/mcp.json
{
  "mcpServers": {
    "mcp-for-api": {
      "command": "uvx",
      "args": [
        "mcp-server-appwrite"
      ]
    }
  }
}Instal Appwrite MCP di VS Code
.vscode/mcp.json
{
  "servers": {
    "mcp-for-api": {
      "type": "stdio",
      "command": "uvx",
      "args": [
        "mcp-server-appwrite"
      ]
    }
  }
}Instal Appwrite MCP di VS Code CLI
$ code --add-mcp '{"name":"mcp-for-api","type":"stdio","command":"uvx","args":["mcp-server-appwrite"]}'Instal Appwrite MCP di Claude Desktop
claude_desktop_config.json
{
  "mcpServers": {
    "mcp-for-api": {
      "command": "uvx",
      "args": [
        "mcp-server-appwrite"
      ]
    }
  }
}Instal Appwrite MCP di Codex
$ codex mcp add mcp-for-api -- uvx mcp-server-appwriteInstal Appwrite MCP di Codex config.toml
~/.codex/config.toml
[mcp_servers.mcp-for-api]
command = "uvx"
args = ["mcp-server-appwrite"]
Instal Appwrite MCP di Gemini CLI
$ gemini mcp add -s user mcp-for-api uvx -- mcp-server-appwriteInstal Appwrite MCP di Gemini settings.json
~/.gemini/settings.json
{
  "mcpServers": {
    "mcp-for-api": {
      "command": "uvx",
      "args": [
        "mcp-server-appwrite"
      ]
    }
  }
}Pengecekan otomatis
Berjalan 12 Nov 2026Laporan lengkap →Lolos checks otomatis kami. Ini bukan audit keamanan: baca kodenya dan berikan server akses paling terbatas yang dibutuhkannya. Cara kerja checks

- Source repository terhubung dan dapat dijangkauLolos
- Lisensi open source (OSI)Lolos
- Ada commit atau release dalam satu tahun terakhirLolos
- Nama package tidak mirip dengan package populerLolos
- Remote endpoint menggunakan HTTPSTidak diperiksa
- Tools yang bersifat destruktif telah diberi labelTidak diperiksa
- Tidak ada instruksi tersembunyi untuk modelLolos
- Tidak ada advisory kritis pada paket atau dependensinyaLolos
README
Lihat di GitHubAppwrite MCP server

A Model Context Protocol server for Appwrite. It exposes Appwrite's API — databases, users, functions, teams, storage, and more — as tools your MCP client can call.
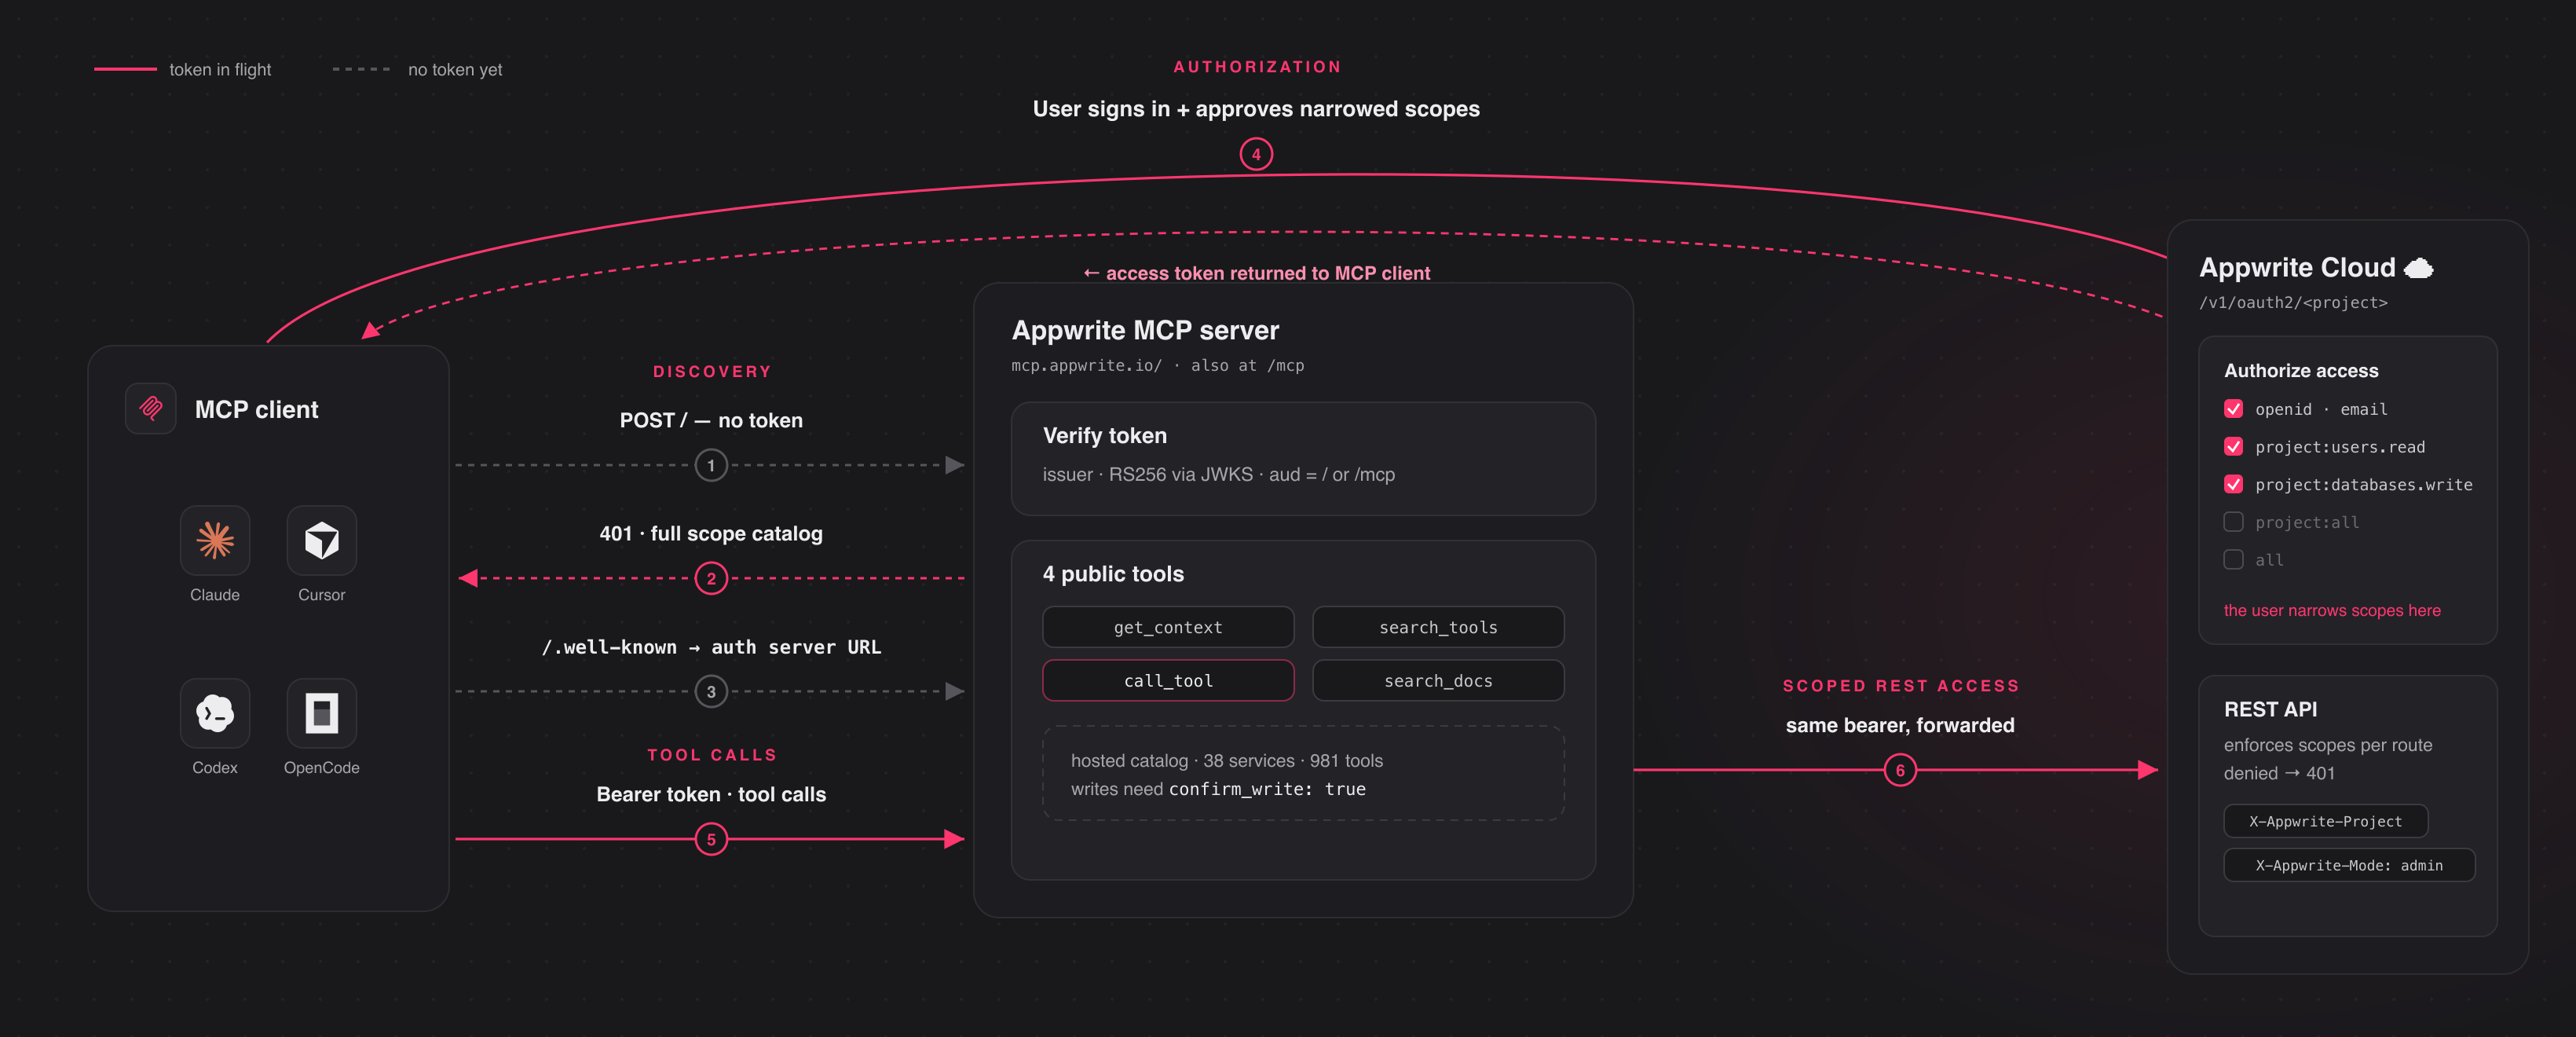
Connect to the hosted server at https://mcp.appwrite.io/ and authenticate
through your browser. The first time you connect, your client opens an Appwrite
consent screen; approve the scopes and you're connected. There are no keys to
copy. The conventional https://mcp.appwrite.io/mcp URL is also supported and
connects to the same server.
Connect your client
Pick your client below. Each adds the hosted Appwrite Cloud server.
claude mcp add --transport http appwrite https://mcp.appwrite.io/
Then, inside a Claude Code session, run /mcp, select appwrite, and follow
the browser prompt to authenticate.
Go to Settings → Connectors → Add custom connector and paste
https://mcp.appwrite.io/. Available on Pro and Max plans; on Team and
Enterprise plans only an organization Owner can add custom connectors.
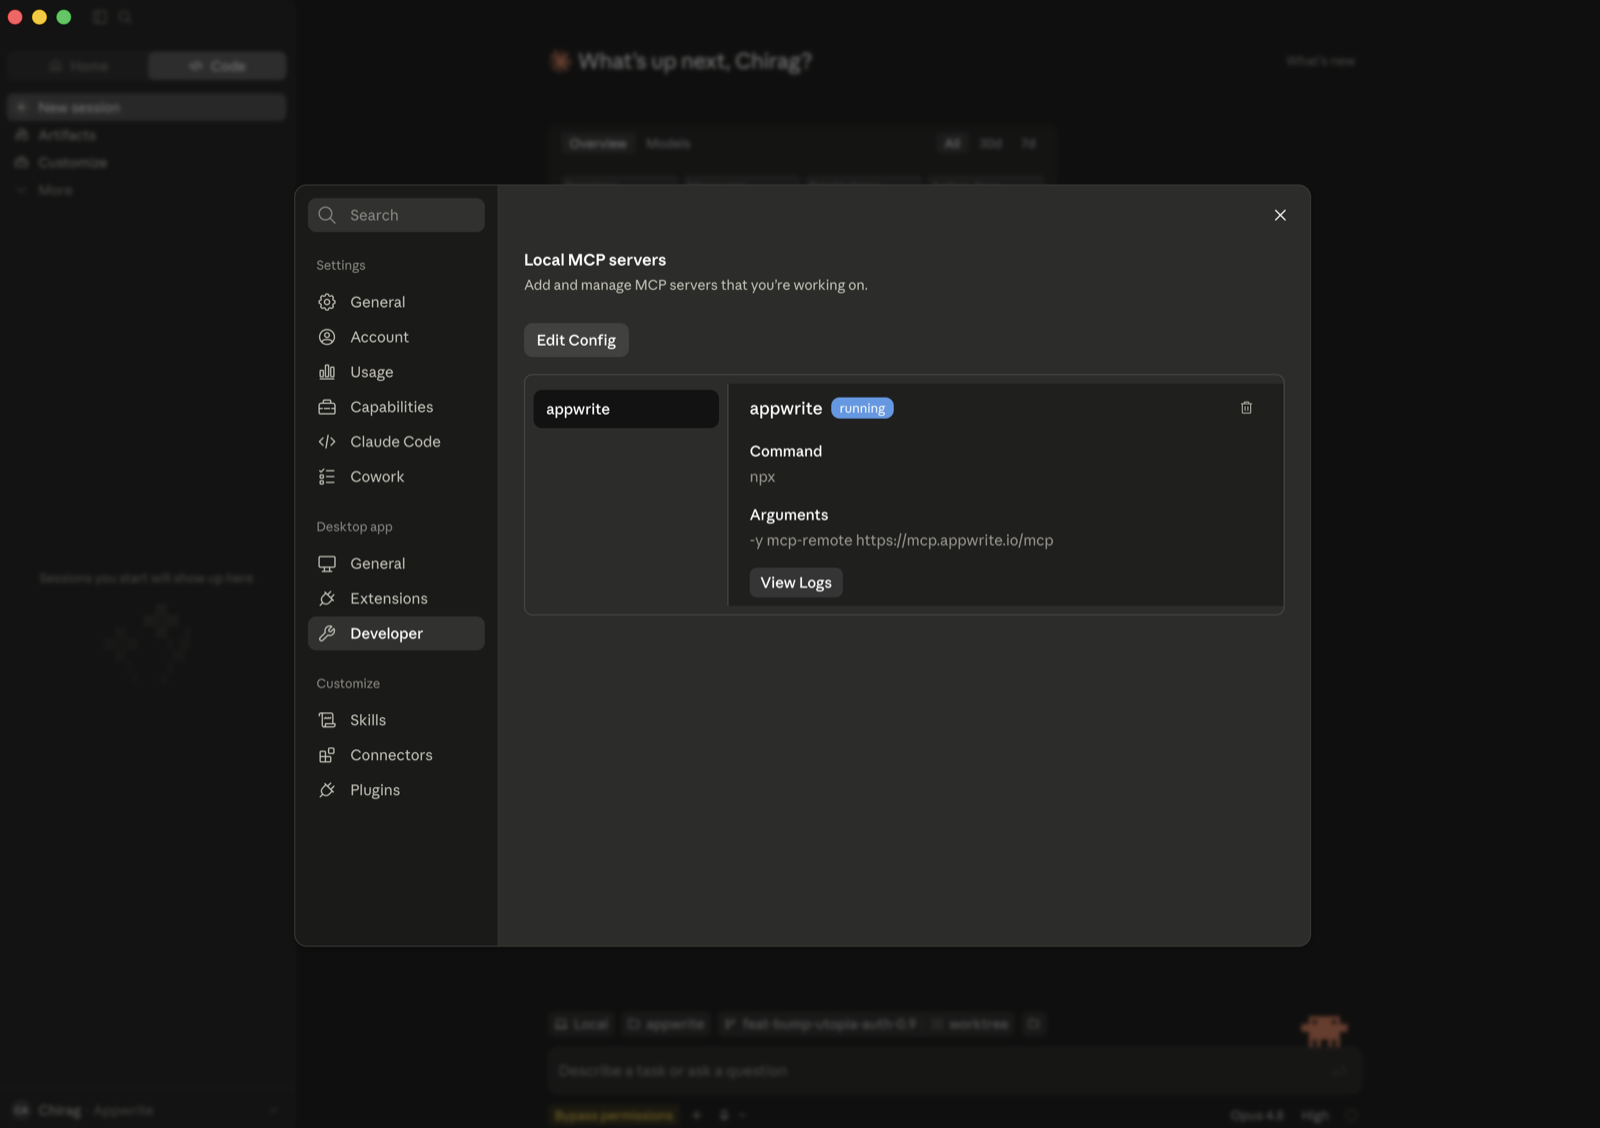
If you don't see that option (free plan, or a Team/Enterprise member), bridge the remote server through stdio instead (requires Node.js). Go to Settings → Developer → Local MCP servers, click Edit Config, and add:
{
  "mcpServers": {
    "appwrite": {
      "command": "npx",
      "args": ["-y", "mcp-remote", "https://mcp.appwrite.io/"]
    }
  }
}
Restart Claude Desktop; the server appears under Local MCP servers and a browser window opens to authenticate.
Edit ~/.cursor/mcp.json (global) or .cursor/mcp.json (project).
{
  "mcpServers": {
    "appwrite": {
      "url": "https://mcp.appwrite.io/"
    }
  }
}
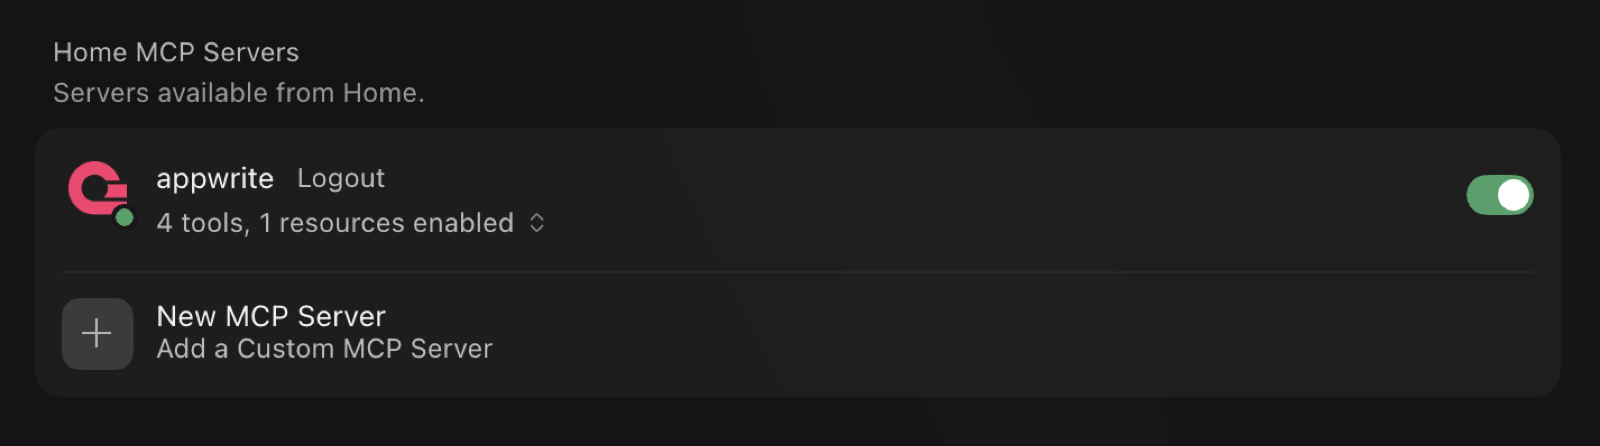
Cursor prompts you to log in through the browser; the server then shows up under Settings → MCP with its tools enabled.
Edit .vscode/mcp.json (workspace) or your user configuration via the Command
Palette → MCP: Open User Configuration.
{
  "servers": {
    "appwrite": {
      "type": "http",
      "url": "https://mcp.appwrite.io/"
    }
  }
}
Edit ~/.codex/config.toml.
[mcp_servers.appwrite]
url = "https://mcp.appwrite.io/"
Then authenticate from the terminal:
codex mcp login appwrite
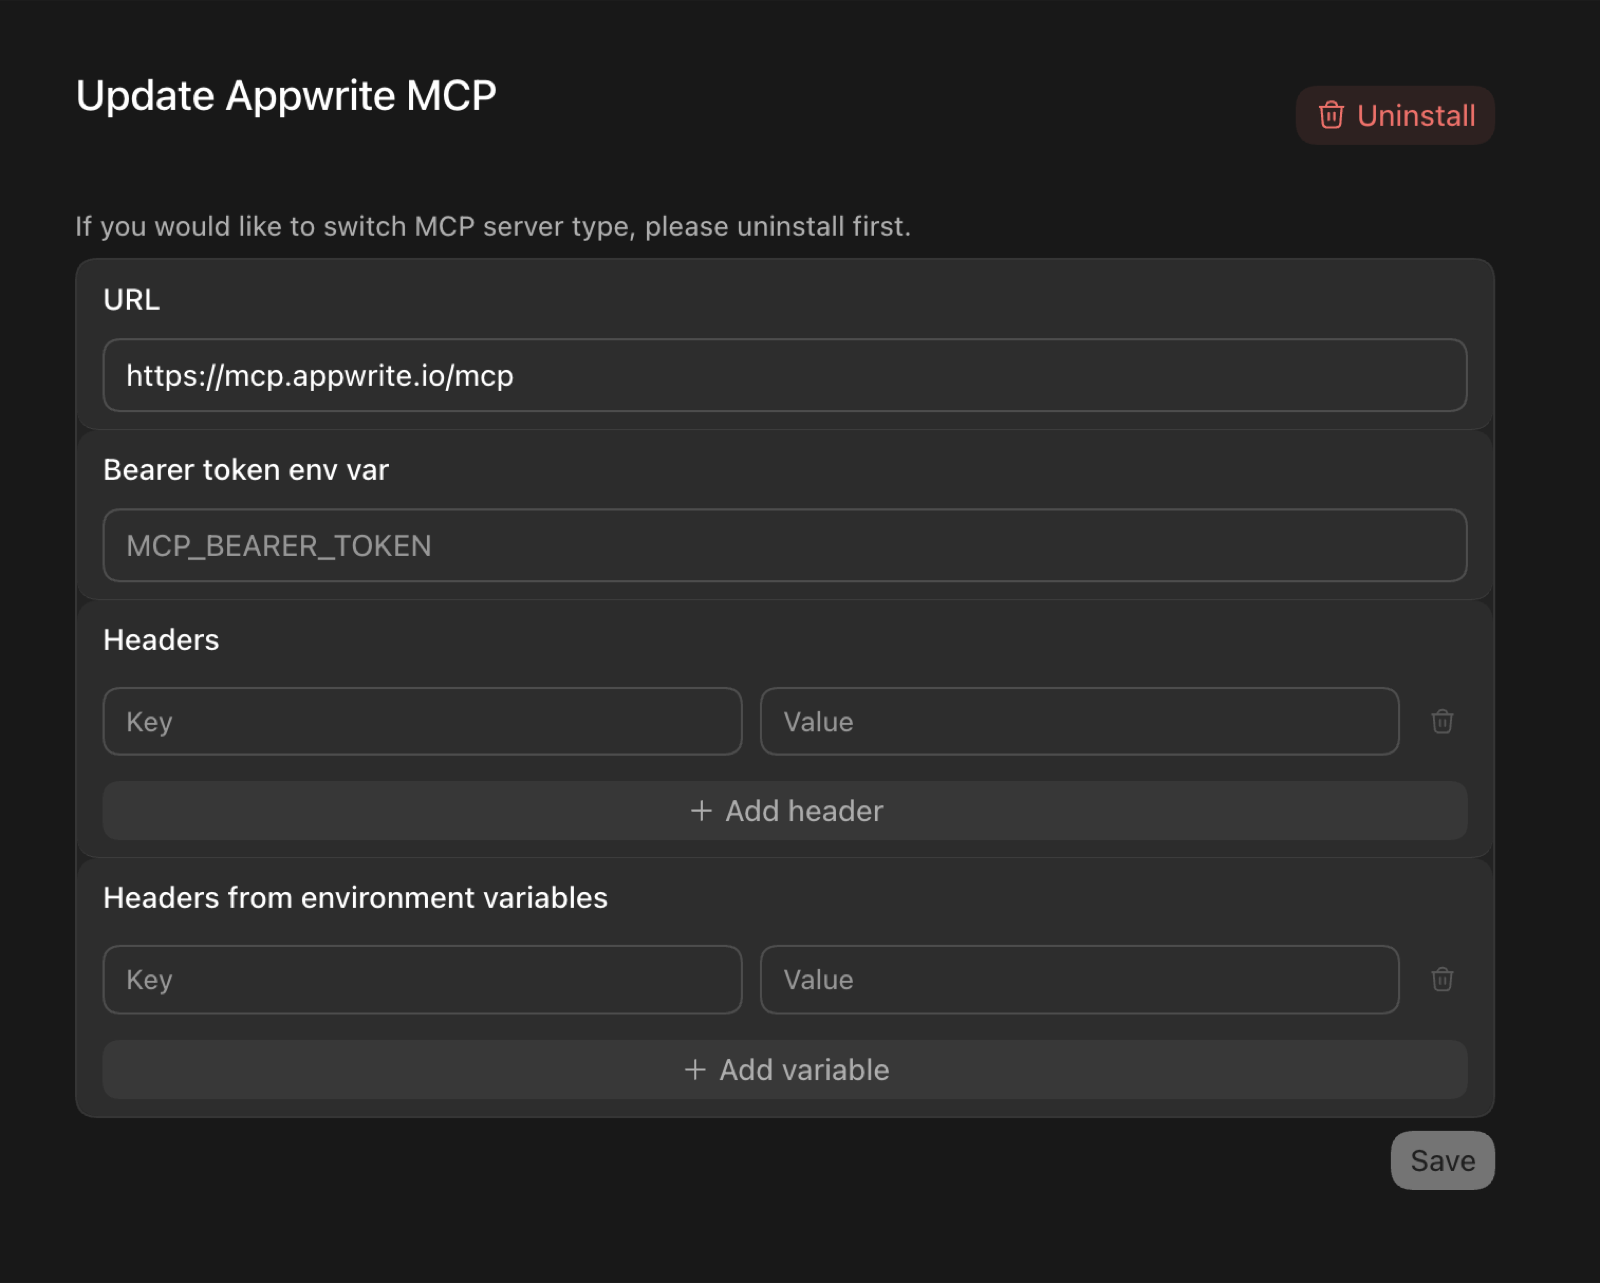
In the Codex GUI, you can instead add the server from the MCP settings —
set the URL to https://mcp.appwrite.io/ and leave the token and header
fields empty (authentication happens through the browser):
Edit opencode.json (project) or ~/.config/opencode/opencode.json (global).
{
  "$schema": "https://opencode.ai/config.json",
  "mcp": {
    "appwrite": {
      "type": "remote",
      "url": "https://mcp.appwrite.io/",
      "enabled": true
    }
  }
}
Edit ~/.codeium/windsurf/mcp_config.json.
{
  "mcpServers": {
    "appwrite": {
      "serverUrl": "https://mcp.appwrite.io/"
    }
  }
}
gemini mcp add --transport http appwrite https://mcp.appwrite.io/
Or edit ~/.gemini/settings.json (note the key is httpUrl, not url):
{
  "mcpServers": {
    "appwrite": {
      "httpUrl": "https://mcp.appwrite.io/"
    }
  }
}
Gemini CLI opens the browser OAuth flow automatically on first connect. To
re-authenticate, run /mcp auth appwrite inside a session.
Edit ~/.gemini/config/mcp_config.json (global) or .agents/mcp_config.json (project workspace).
{
  "mcpServers": {
    "appwrite": {
      "serverUrl": "https://mcp.appwrite.io/"
    }
  }
}
⚠️ Note: Antigravity strictly requires the
serverUrlkey for remote transport. Using legacy fields likeurlorhttpUrlwill cause tool registration to fail silently.
Antigravity opens the browser OAuth flow automatically on first connect. If you manually edit the JSON file, navigate to Settings → Customizations → Installed MCP Servers and click Refresh to reload the tool definitions.
copilot mcp add --transport http appwrite https://mcp.appwrite.io/
Or run /mcp add inside a session, or edit ~/.copilot/mcp-config.json:
{
  "mcpServers": {
    "appwrite": {
      "type": "http",
      "url": "https://mcp.appwrite.io/"
    }
  }
}
A browser window opens to authenticate on first connect. Check status with
/mcp.
Go to Settings → AI → MCP Servers → Add Server → Add Remote Server, or add
to your settings.json (zed: open settings):
{
  "context_servers": {
    "appwrite": {
      "url": "https://mcp.appwrite.io/"
    }
  }
}
Zed prompts you to authenticate through the browser on first connect.
Go to Settings → Agents → MCP servers → + Add, choose the URL-based
server type, and enter https://mcp.appwrite.io/.
Warp opens a browser window to authenticate on first connect.
JetBrains IDEs don't yet support OAuth for remote MCP servers, so bridge through stdio (requires Node.js). Go to Settings → Tools → AI Assistant → Model Context Protocol (MCP) → Add, switch to the JSON view, and paste:
{
  "mcpServers": {
    "appwrite": {
      "command": "npx",
      "args": ["-y", "mcp-remote", "https://mcp.appwrite.io/"]
    }
  }
}
A browser window opens to authenticate on first connect.
Cline doesn't yet support OAuth for remote MCP servers, so bridge through stdio (requires Node.js). In the Cline panel, open the MCP Servers icon → Configure tab → Configure MCP Servers, and add:
{
  "mcpServers": {
    "appwrite": {
      "command": "npx",
      "args": ["-y", "mcp-remote", "https://mcp.appwrite.io/"]
    }
  }
}
A browser window opens to authenticate on first connect.
Reasons and environments
Every write the agent makes carries a short reason (why it made the change).
Appwrite records it on the project's audit log, so you can review what your
agent changed, and why, in the project's Activity tab.
On Appwrite Cloud, the agent can act in a project's environments (for example
staging): appwrite_get_context lists them, and each call takes the
environment's ID as environment_id next to the project's project_id. See
Tool surface.
Self-hosted Appwrite
Running your own Appwrite instance? Run the MCP server locally over stdio and
authenticate with a project API key. See docs/self-hosted.md
for per-client setup.
Documentation
- Tool surface — the tools exposed to the model and the internal Appwrite catalog.
- How Cloud authentication works — the OAuth 2.1 flow.
- Documentation search — the in-process
appwrite_search_docstool and how to rebuild its index. - Events — MCP Events: webhook subscriptions to changes in your Appwrite project (in development, not available yet).
- Self-hosted Appwrite — run the server locally with a project API key.
- Local development — running, testing, and debugging the server locally.
- AGENTS.md — full contributor guide and pre-PR checklist.
License
This MCP server is licensed under the MIT License. See the LICENSE file for details.
Pertanyaan tentang Appwrite MCP
Bagaimana cara menambahkan Appwrite MCP ke Claude Code?
Jalankan claude mcp add mcp-for-api -- uvx mcp-server-appwrite di terminal Anda. Tambahkan --scope user agar tersedia di semua proyek.
Bagaimana cara menambahkan Appwrite MCP ke Cursor?
Buka ~/.cursor/mcp.json dan tambahkan server di bawah mcpServers, menggunakan config Cursor yang ditunjukkan di bagian instalasi di atas.
Bagaimana cara melakukan autentikasi dengan Appwrite MCP server?
Anda melakukan autentikasi melalui browser via layar persetujuan Appwrite. Tidak ada key yang perlu disalin untuk versi hosted.
Apakah saya bisa menggunakan ini dengan instance Appwrite self-hosted?
Ya, Anda bisa menjalankan MCP server secara lokal melalui stdio dan melakukan autentikasi menggunakan project API key.
Bagaimana cara melacak perubahan yang dilakukan oleh AI agent?
Setiap aksi penulisan menyertakan alasan singkat yang akan dicatat dalam audit log Appwrite proyek Anda untuk ditinjau di tab Activity.