
Expose l'API d'Appwrite pour les bases de données, les utilisateurs, les fonctions, les équipes et le stockage en tant qu'outils pour permettre aux clients IA de gérer vos backends.
Aussi connu sous appwrite/mcp, mcp-server-appwrite
- Étoiles
- 72
- Outils
- —
- Téléchargements, 30 jours
- 334 841
- Dernière version
- 2.6.2
- Dernier commit
- 13 nov. 2026
- Licence
- MIT
Qu'est-ce que Appwrite MCP ?
Appwrite est un serveur MCP. Expose l'API d'Appwrite pour les bases de données, les utilisateurs, les fonctions, les équipes et le stockage en tant qu'outils pour permettre aux clients IA de gérer vos backends.
Résumé généré à partir du README du projet
À propos du MCP server Appwrite
La gestion de l'infrastructure backend via des clients IA est possible grâce à ce serveur, qui expose l'API Appwrite sous forme de série d'outils. Les développeurs peuvent l'utiliser pour interagir directement avec les bases de données, les utilisateurs, les fonctions, les équipes et le stockage depuis leur environnement de développement préféré. Il est compatible avec une large gamme de clients, notamment Claude Desktop, Cursor, VS Code, Zed et Windsurf.
La connexion au serveur Appwrite Cloud hébergé utilise un flux OAuth via navigateur, ce qui signifie que vous n'avez pas besoin de copier et coller des clés API pour commencer. Pour les utilisateurs exploitant des instances Appwrite auto-hébergées, le serveur peut être exécuté localement via stdio en utilisant une clé API de projet. Chaque action effectuée par un agent est enregistrée avec un motif dans le journal d'audit du projet Appwrite, vous permettant de consulter les modifications dans l'onglet Activity.
Cette intégration prend en charge des workflows complexes sur différents environnements, comme le staging, en utilisant des IDs d'environnement spécifiques. Elle inclut également un outil de recherche dans la documentation pour aider le modèle à comprendre votre configuration spécifique.
Ce que vous pouvez faire avec
- 1Gérer les ressources backendUn agent IA peut créer ou modifier des bases de données, des utilisateurs et des paramètres de stockage au sein de votre projet.
- 2Auditer les actions de l'agentVous pouvez suivre les raisons pour lesquelles une IA a effectué des modifications spécifiques sur votre backend en consultant les journaux d'activité du projet.
- 3Travailler sur plusieurs environnementsLes développeurs peuvent demander à une IA d'effectuer des tâches spécifiquement dans un environnement de staging ou de production.
- 4Rechercher dans la documentation techniqueL'IA peut rechercher des informations concernant votre configuration Appwrite à l'aide d'un outil de recherche interne.
Extrait du README du projet. Chaque cas d'utilisation est vérifié par rapport à une citation du document.
Comment installer Appwrite MCP
Formats vérifiés le 10 nov. 2026Installer Appwrite MCP dans Claude Code
$ claude mcp add mcp -- uvx mcp-server-appwriteInstaller Appwrite MCP dans Cursor
~/.cursor/mcp.json
{
  "mcpServers": {
    "mcp": {
      "command": "uvx",
      "args": [
        "mcp-server-appwrite"
      ]
    }
  }
}Installer Appwrite MCP dans VS Code
.vscode/mcp.json
{
  "servers": {
    "mcp": {
      "type": "stdio",
      "command": "uvx",
      "args": [
        "mcp-server-appwrite"
      ]
    }
  }
}Installer Appwrite MCP dans Claude Desktop
claude_desktop_config.json
{
  "mcpServers": {
    "mcp": {
      "command": "uvx",
      "args": [
        "mcp-server-appwrite"
      ]
    }
  }
}Installer Appwrite MCP dans Codex
~/.codex/config.toml
[mcp_servers.mcp]
command = "uvx"
args = ["mcp-server-appwrite"]
Installer Appwrite MCP dans Gemini CLI
~/.gemini/settings.json
{
  "mcpServers": {
    "mcp": {
      "command": "uvx",
      "args": [
        "mcp-server-appwrite"
      ]
    }
  }
}Vérifications automatisées
Exécuté le 12 nov. 2026Rapport complet →A passé nos vérifications automatisées. Il ne s'agit pas d'un audit de sécurité : lisez le code et donnez au serveur l'accès le plus restreint dont il a besoin. Fonctionnement des vérifications

- Dépôt source lié et accessibleRéussi
- Licence open source (OSI)Réussi
- Commit ou version publiée au cours de l'année écouléeRéussi
- Nom du package non proche d'un package populaireRéussi
- L'endpoint distant utilise HTTPSRéussi
- Les outils destructifs sont étiquetésNon vérifié
- Aucune instruction cachée destinée au modèleRéussi
- Aucun avis critique dans le paquet ni ses dépendancesRéussi
README
Voir sur GitHubAppwrite MCP server

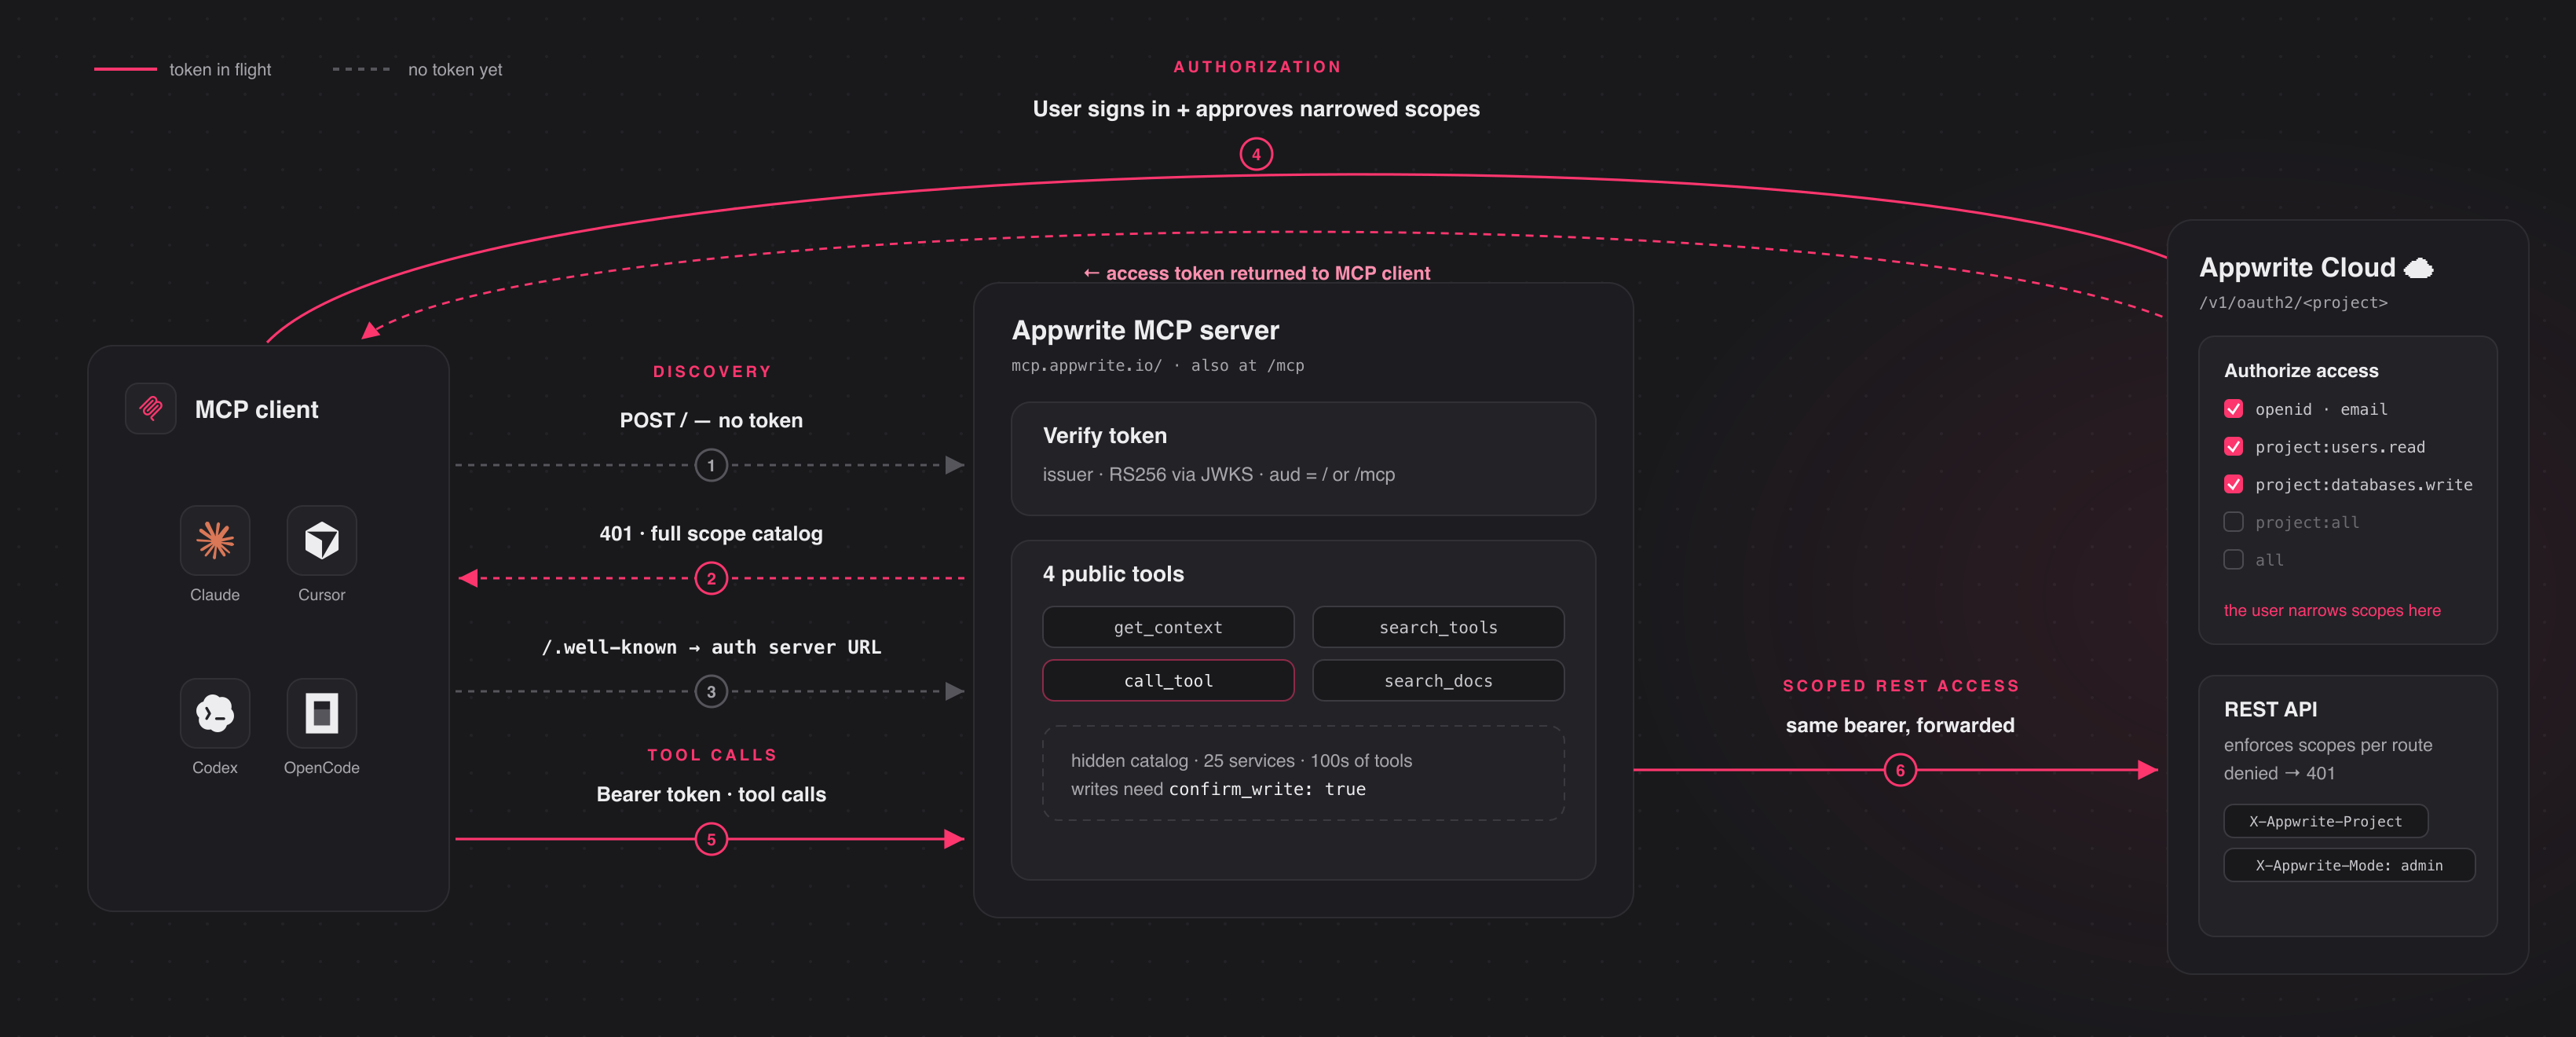
A Model Context Protocol server for Appwrite. It exposes Appwrite's API — databases, users, functions, teams, storage, and more — as tools your MCP client can call.
Connect to the hosted server at https://mcp.appwrite.io/ and authenticate
through your browser. The first time you connect, your client opens an Appwrite
consent screen; approve the scopes and you're connected. There are no keys to
copy. The conventional https://mcp.appwrite.io/mcp URL is also supported and
connects to the same server.
Connect your client
Pick your client below. Each adds the hosted Appwrite Cloud server.
claude mcp add --transport http appwrite https://mcp.appwrite.io/
Then, inside a Claude Code session, run /mcp, select appwrite, and follow
the browser prompt to authenticate.
Go to Settings → Connectors → Add custom connector and paste
https://mcp.appwrite.io/. Available on Pro and Max plans; on Team and
Enterprise plans only an organization Owner can add custom connectors.
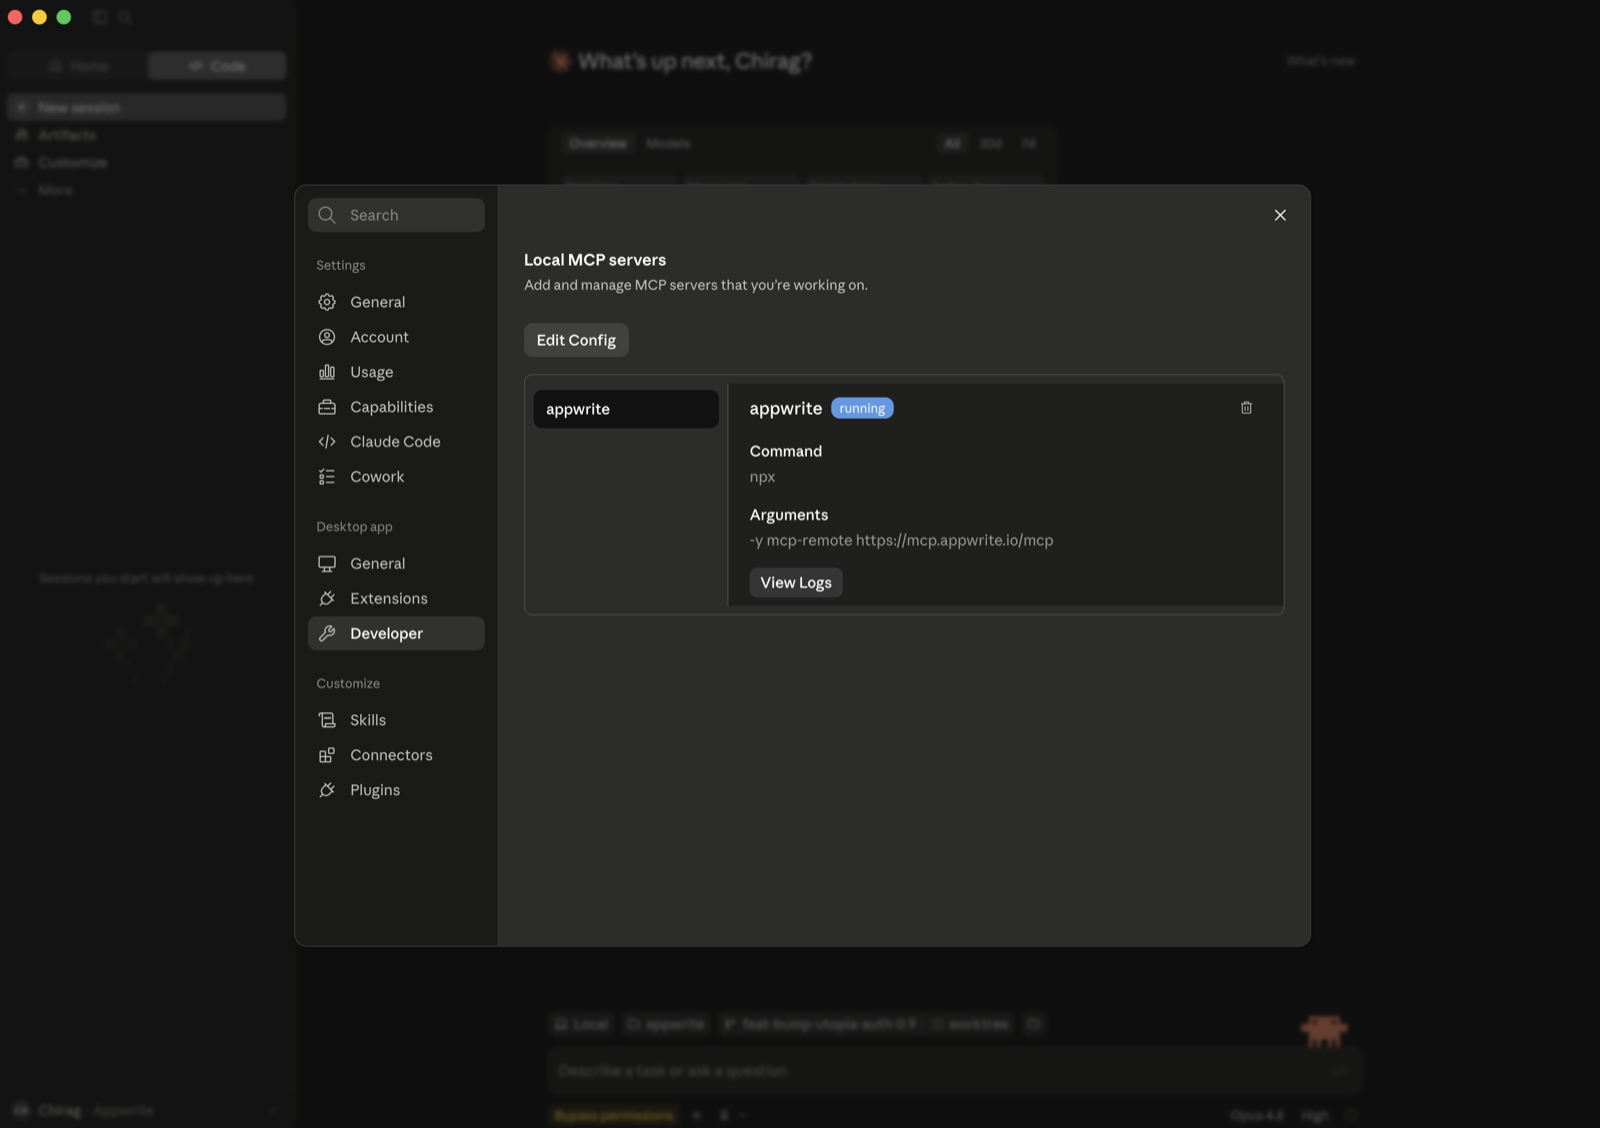
If you don't see that option (free plan, or a Team/Enterprise member), bridge the remote server through stdio instead (requires Node.js). Go to Settings → Developer → Local MCP servers, click Edit Config, and add:
{
  "mcpServers": {
    "appwrite": {
      "command": "npx",
      "args": ["-y", "mcp-remote", "https://mcp.appwrite.io/"]
    }
  }
}
Restart Claude Desktop; the server appears under Local MCP servers and a browser window opens to authenticate.
Edit ~/.cursor/mcp.json (global) or .cursor/mcp.json (project).
{
  "mcpServers": {
    "appwrite": {
      "url": "https://mcp.appwrite.io/"
    }
  }
}
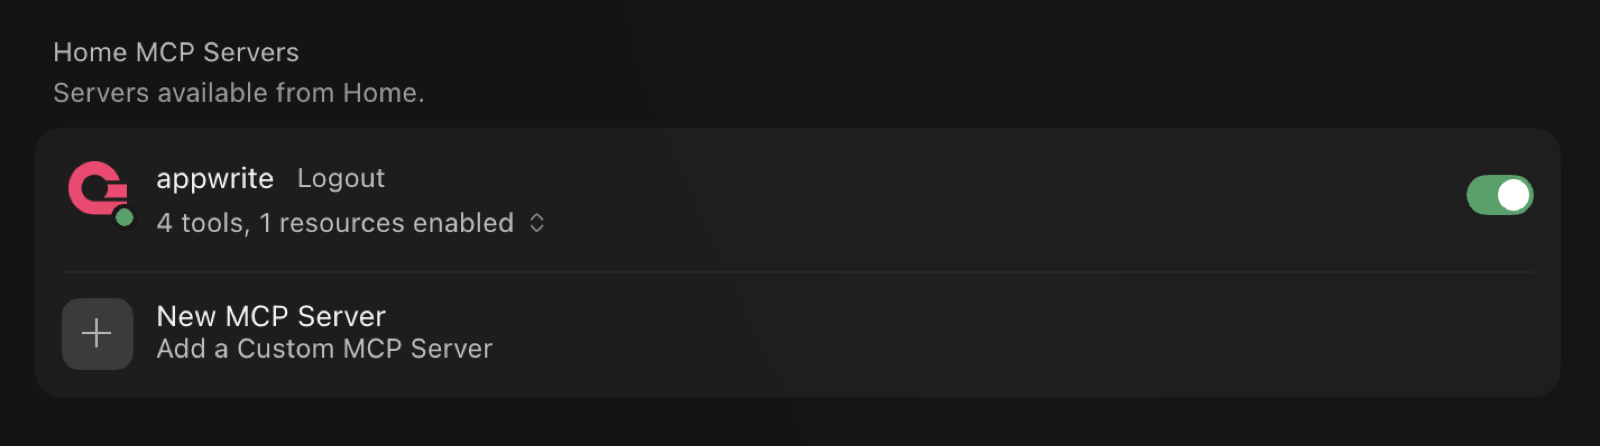
Cursor prompts you to log in through the browser; the server then shows up under Settings → MCP with its tools enabled.
Edit .vscode/mcp.json (workspace) or your user configuration via the Command
Palette → MCP: Open User Configuration.
{
  "servers": {
    "appwrite": {
      "type": "http",
      "url": "https://mcp.appwrite.io/"
    }
  }
}
Edit ~/.codex/config.toml.
[mcp_servers.appwrite]
url = "https://mcp.appwrite.io/"
Then authenticate from the terminal:
codex mcp login appwrite
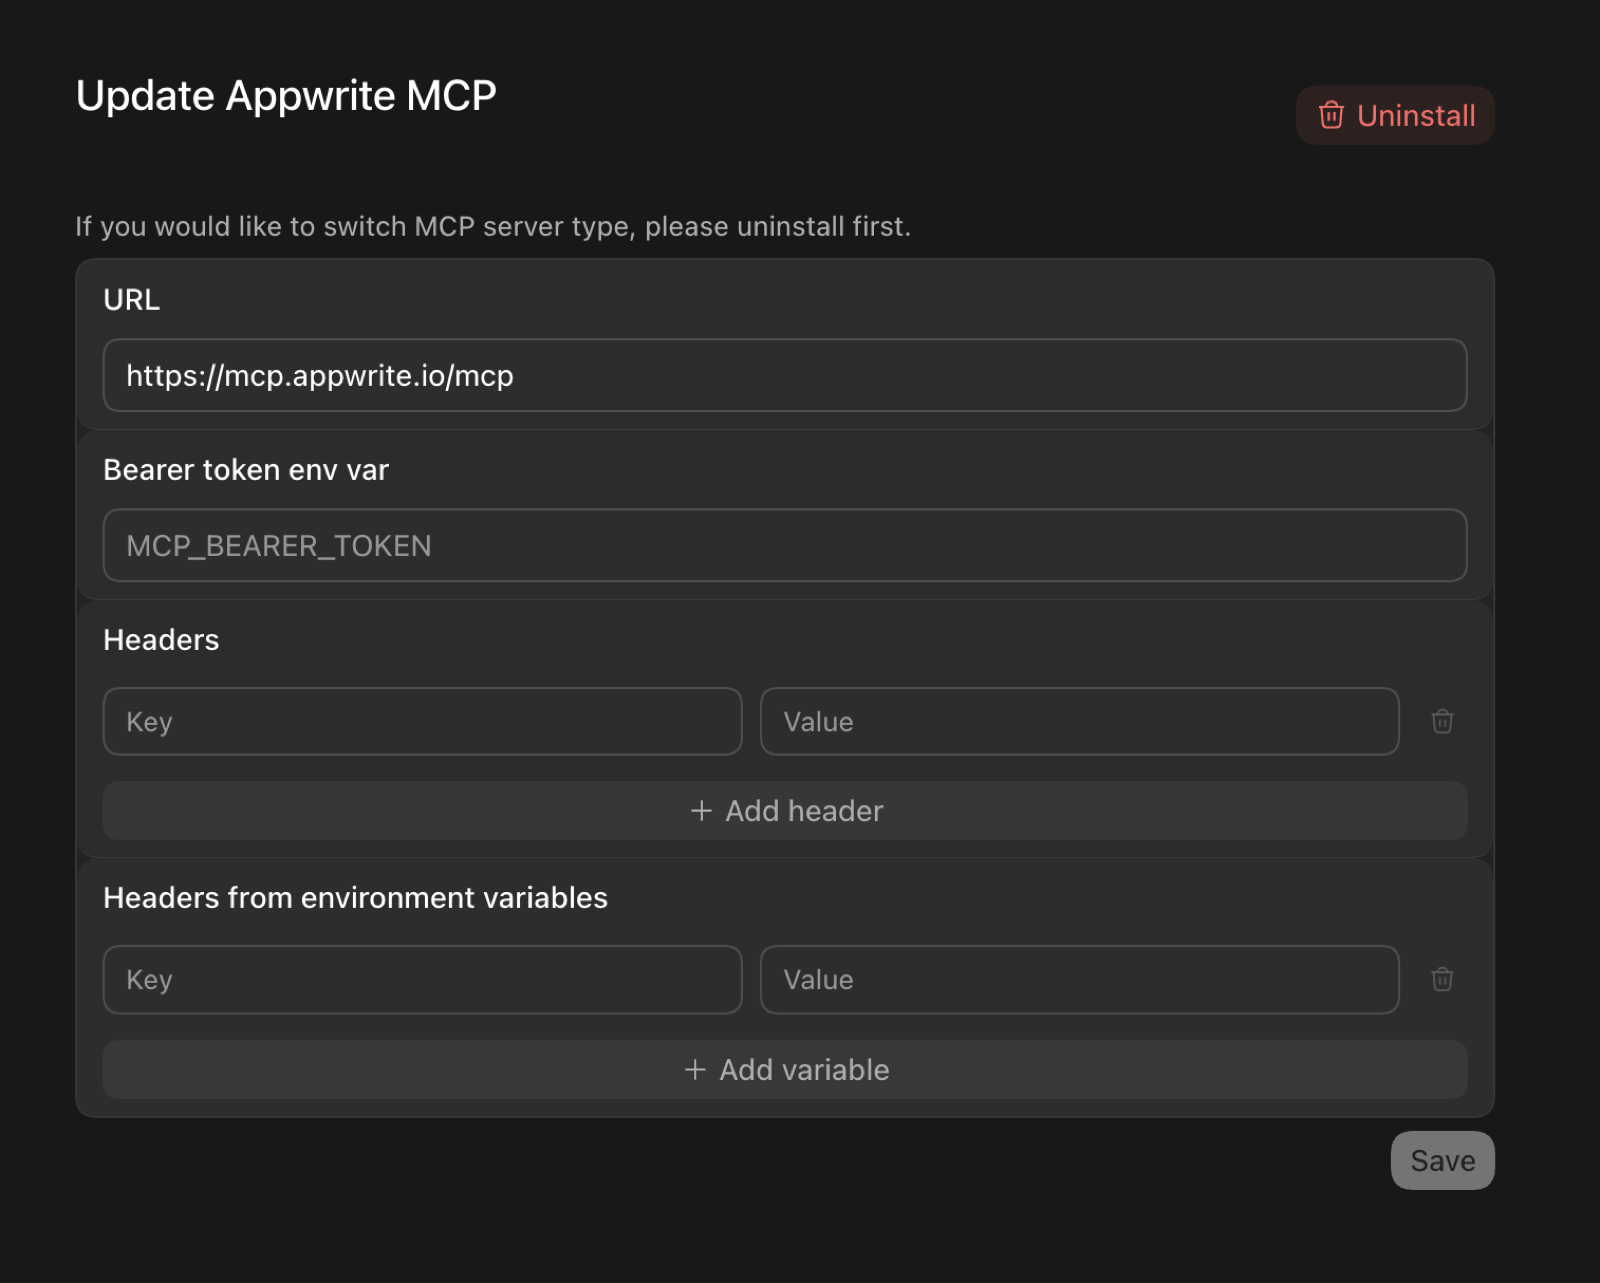
In the Codex GUI, you can instead add the server from the MCP settings —
set the URL to https://mcp.appwrite.io/ and leave the token and header
fields empty (authentication happens through the browser):
Edit opencode.json (project) or ~/.config/opencode/opencode.json (global).
{
  "$schema": "https://opencode.ai/config.json",
  "mcp": {
    "appwrite": {
      "type": "remote",
      "url": "https://mcp.appwrite.io/",
      "enabled": true
    }
  }
}
Edit ~/.codeium/windsurf/mcp_config.json.
{
  "mcpServers": {
    "appwrite": {
      "serverUrl": "https://mcp.appwrite.io/"
    }
  }
}
gemini mcp add --transport http appwrite https://mcp.appwrite.io/
Or edit ~/.gemini/settings.json (note the key is httpUrl, not url):
{
  "mcpServers": {
    "appwrite": {
      "httpUrl": "https://mcp.appwrite.io/"
    }
  }
}
Gemini CLI opens the browser OAuth flow automatically on first connect. To
re-authenticate, run /mcp auth appwrite inside a session.
Edit ~/.gemini/config/mcp_config.json (global) or .agents/mcp_config.json (project workspace).
{
  "mcpServers": {
    "appwrite": {
      "serverUrl": "https://mcp.appwrite.io/"
    }
  }
}
⚠️ Note: Antigravity strictly requires the
serverUrlkey for remote transport. Using legacy fields likeurlorhttpUrlwill cause tool registration to fail silently.
Antigravity opens the browser OAuth flow automatically on first connect. If you manually edit the JSON file, navigate to Settings → Customizations → Installed MCP Servers and click Refresh to reload the tool definitions.
copilot mcp add --transport http appwrite https://mcp.appwrite.io/
Or run /mcp add inside a session, or edit ~/.copilot/mcp-config.json:
{
  "mcpServers": {
    "appwrite": {
      "type": "http",
      "url": "https://mcp.appwrite.io/"
    }
  }
}
A browser window opens to authenticate on first connect. Check status with
/mcp.
Go to Settings → AI → MCP Servers → Add Server → Add Remote Server, or add
to your settings.json (zed: open settings):
{
  "context_servers": {
    "appwrite": {
      "url": "https://mcp.appwrite.io/"
    }
  }
}
Zed prompts you to authenticate through the browser on first connect.
Go to Settings → Agents → MCP servers → + Add, choose the URL-based
server type, and enter https://mcp.appwrite.io/.
Warp opens a browser window to authenticate on first connect.
JetBrains IDEs don't yet support OAuth for remote MCP servers, so bridge through stdio (requires Node.js). Go to Settings → Tools → AI Assistant → Model Context Protocol (MCP) → Add, switch to the JSON view, and paste:
{
  "mcpServers": {
    "appwrite": {
      "command": "npx",
      "args": ["-y", "mcp-remote", "https://mcp.appwrite.io/"]
    }
  }
}
A browser window opens to authenticate on first connect.
Cline doesn't yet support OAuth for remote MCP servers, so bridge through stdio (requires Node.js). In the Cline panel, open the MCP Servers icon → Configure tab → Configure MCP Servers, and add:
{
  "mcpServers": {
    "appwrite": {
      "command": "npx",
      "args": ["-y", "mcp-remote", "https://mcp.appwrite.io/"]
    }
  }
}
A browser window opens to authenticate on first connect.
Reasons and environments
Every write the agent makes carries a short reason (why it made the change).
Appwrite records it on the project's audit log, so you can review what your
agent changed, and why, in the project's Activity tab.
On Appwrite Cloud, the agent can act in a project's environments (for example
staging): appwrite_get_context lists them, and each call takes the
environment's ID as environment_id next to the project's project_id. See
Tool surface.
Self-hosted Appwrite
Running your own Appwrite instance? Run the MCP server locally over stdio and
authenticate with a project API key. See docs/self-hosted.md
for per-client setup.
Documentation
- Tool surface — the tools exposed to the model and the internal Appwrite catalog.
- How Cloud authentication works — the OAuth 2.1 flow.
- Documentation search — the in-process
appwrite_search_docstool and how to rebuild its index. - Events — MCP Events: webhook subscriptions to changes in your Appwrite project (in development, not available yet).
- Self-hosted Appwrite — run the server locally with a project API key.
- Local development — running, testing, and debugging the server locally.
- AGENTS.md — full contributor guide and pre-PR checklist.
License
This MCP server is licensed under the MIT License. See the LICENSE file for details.
Questions sur Appwrite MCP
Comment ajouter Appwrite MCP à Claude Code ?
Exécutez claude mcp add mcp -- uvx mcp-server-appwrite dans votre terminal. Ajoutez --scope user pour le rendre disponible dans tous les projets.
Comment ajouter Appwrite MCP à Cursor ?
Ouvrez ~/.cursor/mcp.json et ajoutez le serveur sous mcpServers, avec la configuration Cursor indiquée dans la section d'installation ci-dessus.
Comment s'authentifier avec le MCP server d'Appwrite ?
L'authentification se fait via votre navigateur grâce à un écran de consentement Appwrite. Il n'y a pas de clés à copier pour la version hébergée.
Puis-je utiliser cela avec une instance Appwrite auto-hébergée ?
Oui, vous pouvez exécuter le MCP server localement via stdio et vous authentifier à l'aide d'une clé API de projet.
Comment puis-je suivre les modifications effectuées par l'agent IA ?
Chaque opération d'écriture inclut un court motif que Appwrite enregistre dans le journal d'audit du projet, consultable dans l'onglet Activity.