
Expone la API de Appwrite, incluyendo bases de datos, usuarios, funciones, equipos y almacenamiento, como herramientas para clientes de IA.
También conocido como appwrite/mcp-for-api, mcp-server-appwrite
- Stars
- 72
- Herramientas
- —
- Descargas, 30 días
- 334.841
- Última versión
- 0.2.8
- Último commit
- 13 nov 2026
- Licencia
- MIT
¿Qué es Appwrite MCP?
Appwrite es un MCP server. Expone la API de Appwrite, incluyendo bases de datos, usuarios, funciones, equipos y almacenamiento, como herramientas para clientes de IA.
Resumen generado a partir del README del proyecto
Acerca del MCP server de Appwrite
Este servidor permite a los desarrolladores gestionar los servicios de backend de Appwrite a través de un cliente de IA. Expone las funcionalidades principales de la API de Appwrite, como bases de datos, usuarios, funciones, equipos y almacenamiento, como herramientas accionables. Al conectar este servidor, un agente de IA puede interactuar directamente con tu proyecto de Appwrite para realizar tareas administrativas o de desarrollo.
Los usuarios pueden conectarse al servidor de Appwrite Cloud alojado mediante una URL remota y autenticarse usando un flujo OAuth basado en el navegador, lo que elimina la necesidad de copiar manualmente las API keys. Para quienes utilizan instancias de Appwrite self-hosted, el servidor se puede ejecutar localmente sobre stdio usando una API key de proyecto. Es compatible con una amplia gama de clientes como Claude Desktop, Cursor, VS Code, Windsurf y Zed. Cada cambio realizado por un agente se registra con un motivo en el log de auditoría de Appwrite para facilitar su revisión.
Qué puedes hacer con él
- 1Gestionar recursos de backendUn agente de IA puede interactuar directamente con tus bases de datos, usuarios, funciones, equipos y almacenamiento.
- 2Auditar la actividad del agentePuedes rastrear por qué una IA realizó cambios específicos revisando el log de actividad del proyecto.
- 3Operar en diferentes entornosEl agente puede realizar acciones dentro de entornos de proyecto específicos, como staging.
- 4Buscar documentación técnicaLos desarrolladores pueden usar el agente para encontrar información dentro de la documentación de Appwrite.
Escrito a partir del README del proyecto. Cada caso de uso se verifica con una cita del mismo.
Cómo instalar Appwrite MCP
Formatos verificados el 10 nov 2026Añadir a CursorAñadir a GooseInstalar Appwrite MCP en Claude Code
$ claude mcp add mcp-for-api -- uvx mcp-server-appwriteInstalar Appwrite MCP en Cursor
~/.cursor/mcp.json
{
  "mcpServers": {
    "mcp-for-api": {
      "command": "uvx",
      "args": [
        "mcp-server-appwrite"
      ]
    }
  }
}Instalar Appwrite MCP en VS Code
.vscode/mcp.json
{
  "servers": {
    "mcp-for-api": {
      "type": "stdio",
      "command": "uvx",
      "args": [
        "mcp-server-appwrite"
      ]
    }
  }
}Instalar Appwrite MCP en VS Code CLI
$ code --add-mcp '{"name":"mcp-for-api","type":"stdio","command":"uvx","args":["mcp-server-appwrite"]}'Instalar Appwrite MCP en Claude Desktop
claude_desktop_config.json
{
  "mcpServers": {
    "mcp-for-api": {
      "command": "uvx",
      "args": [
        "mcp-server-appwrite"
      ]
    }
  }
}Instalar Appwrite MCP en Codex
$ codex mcp add mcp-for-api -- uvx mcp-server-appwriteInstalar Appwrite MCP en Codex config.toml
~/.codex/config.toml
[mcp_servers.mcp-for-api]
command = "uvx"
args = ["mcp-server-appwrite"]
Instalar Appwrite MCP en Gemini CLI
$ gemini mcp add -s user mcp-for-api uvx -- mcp-server-appwriteInstalar Appwrite MCP en Gemini settings.json
~/.gemini/settings.json
{
  "mcpServers": {
    "mcp-for-api": {
      "command": "uvx",
      "args": [
        "mcp-server-appwrite"
      ]
    }
  }
}Verificaciones automáticas
Ejecutado 12 nov 2026Informe completo →Pasó nuestras verificaciones automáticas. Esto no es una auditoría de seguridad: lee el código y dale al servidor el acceso más limitado que necesite. Cómo funcionan las verificaciones

- Repositorio de origen vinculado y accesibleAprobado
- Licencia de código abierto (OSI)Aprobado
- Commit o lanzamiento en el último añoAprobado
- El nombre del paquete no es similar a un paquete popularAprobado
- El endpoint remoto usa HTTPSNo verificado
- Las herramientas destructivas están etiquetadasNo verificado
- Sin instrucciones ocultas para el modeloAprobado
- No hay avisos críticos en el paquete ni en sus dependenciasAprobado
README
Ver en GitHubAppwrite MCP server

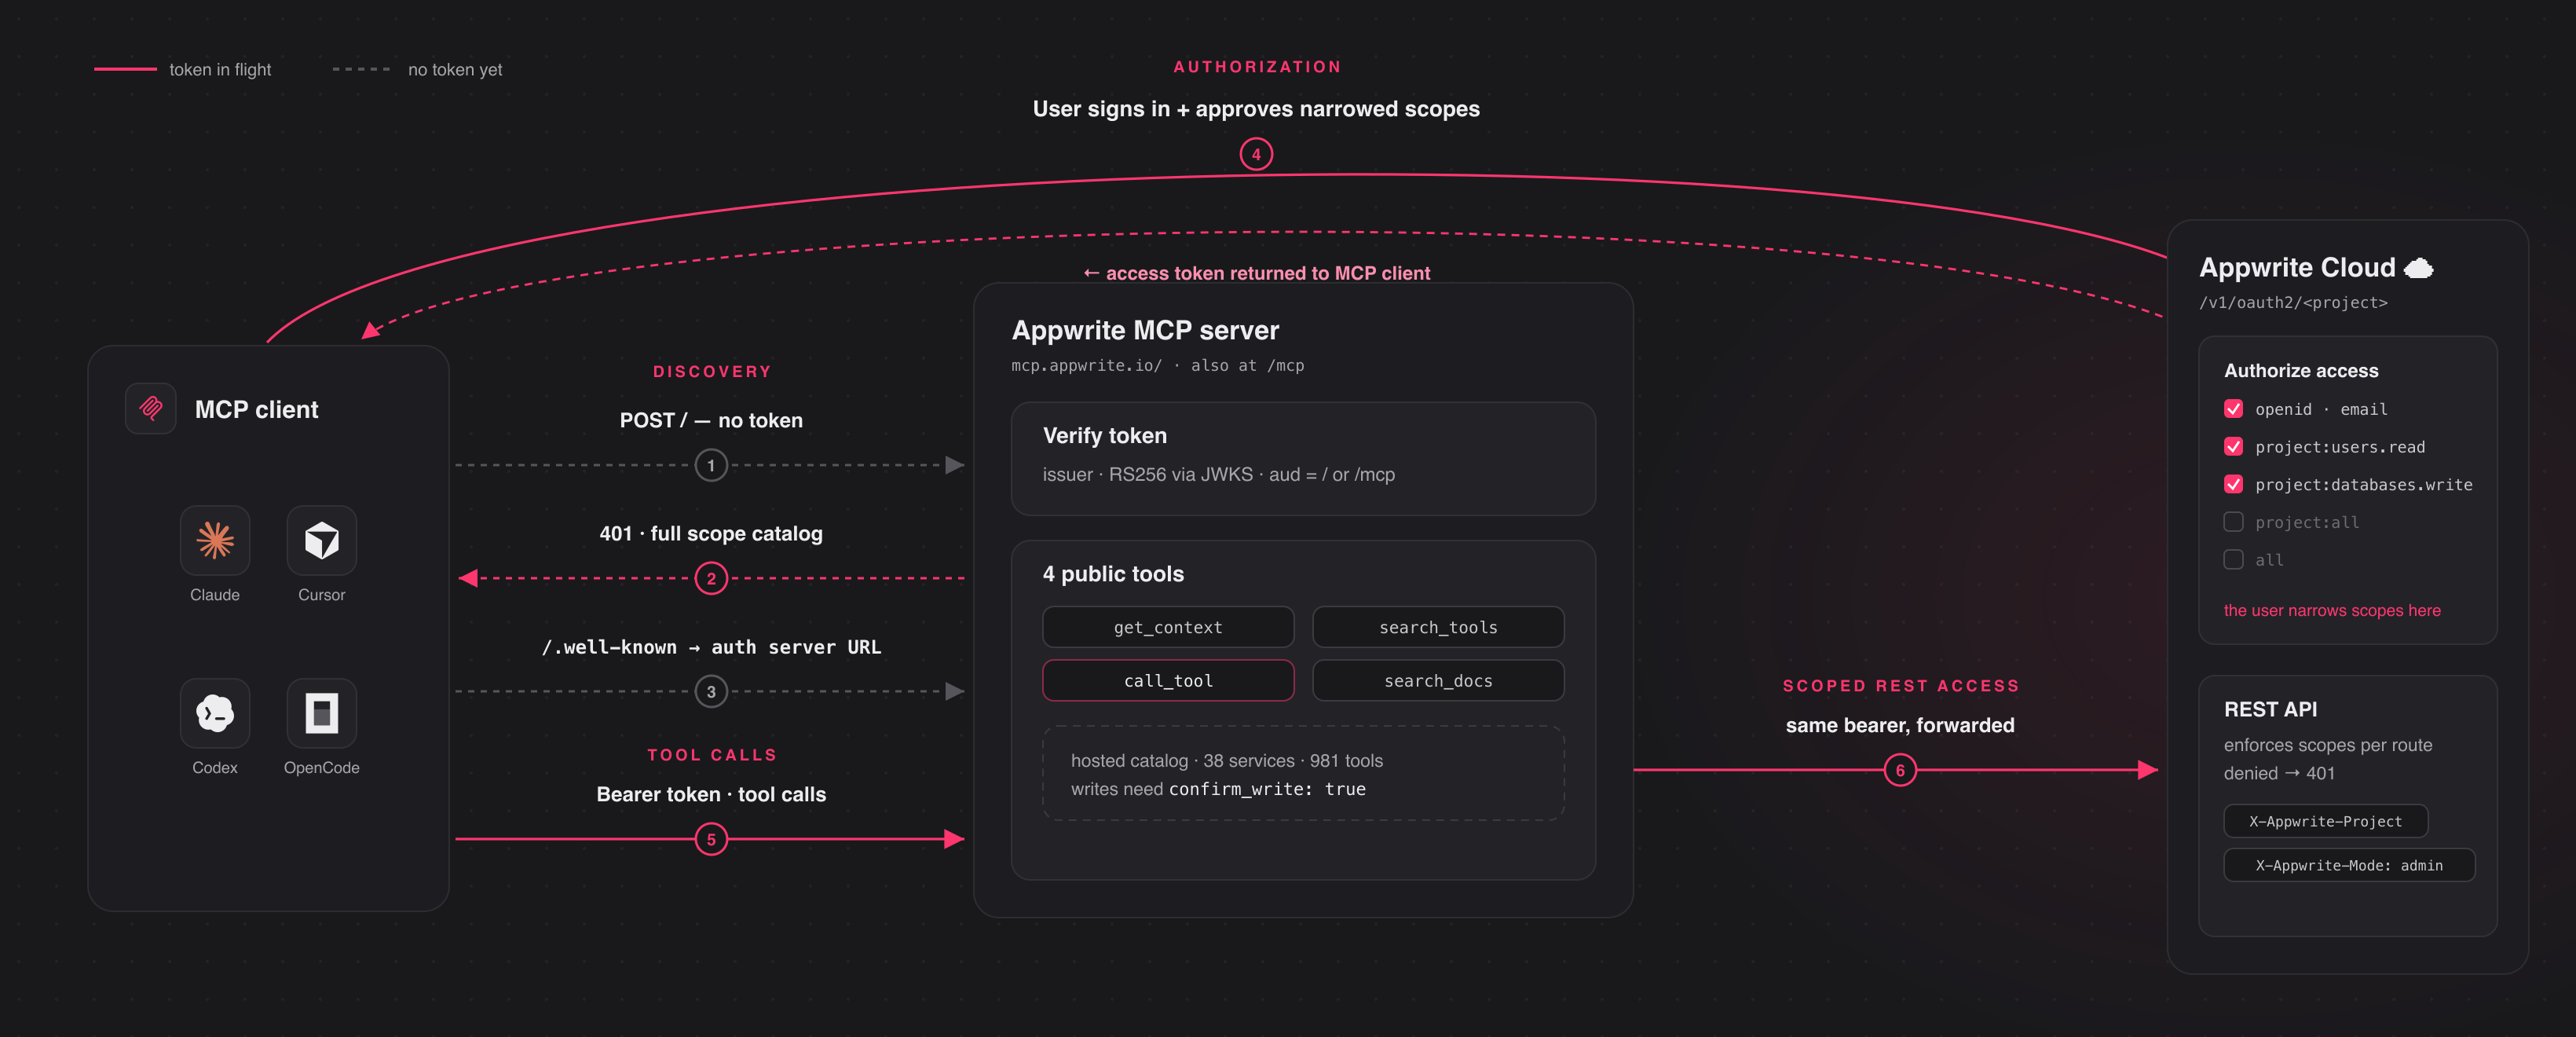
A Model Context Protocol server for Appwrite. It exposes Appwrite's API — databases, users, functions, teams, storage, and more — as tools your MCP client can call.
Connect to the hosted server at https://mcp.appwrite.io/ and authenticate
through your browser. The first time you connect, your client opens an Appwrite
consent screen; approve the scopes and you're connected. There are no keys to
copy. The conventional https://mcp.appwrite.io/mcp URL is also supported and
connects to the same server.
Connect your client
Pick your client below. Each adds the hosted Appwrite Cloud server.
claude mcp add --transport http appwrite https://mcp.appwrite.io/
Then, inside a Claude Code session, run /mcp, select appwrite, and follow
the browser prompt to authenticate.
Go to Settings → Connectors → Add custom connector and paste
https://mcp.appwrite.io/. Available on Pro and Max plans; on Team and
Enterprise plans only an organization Owner can add custom connectors.
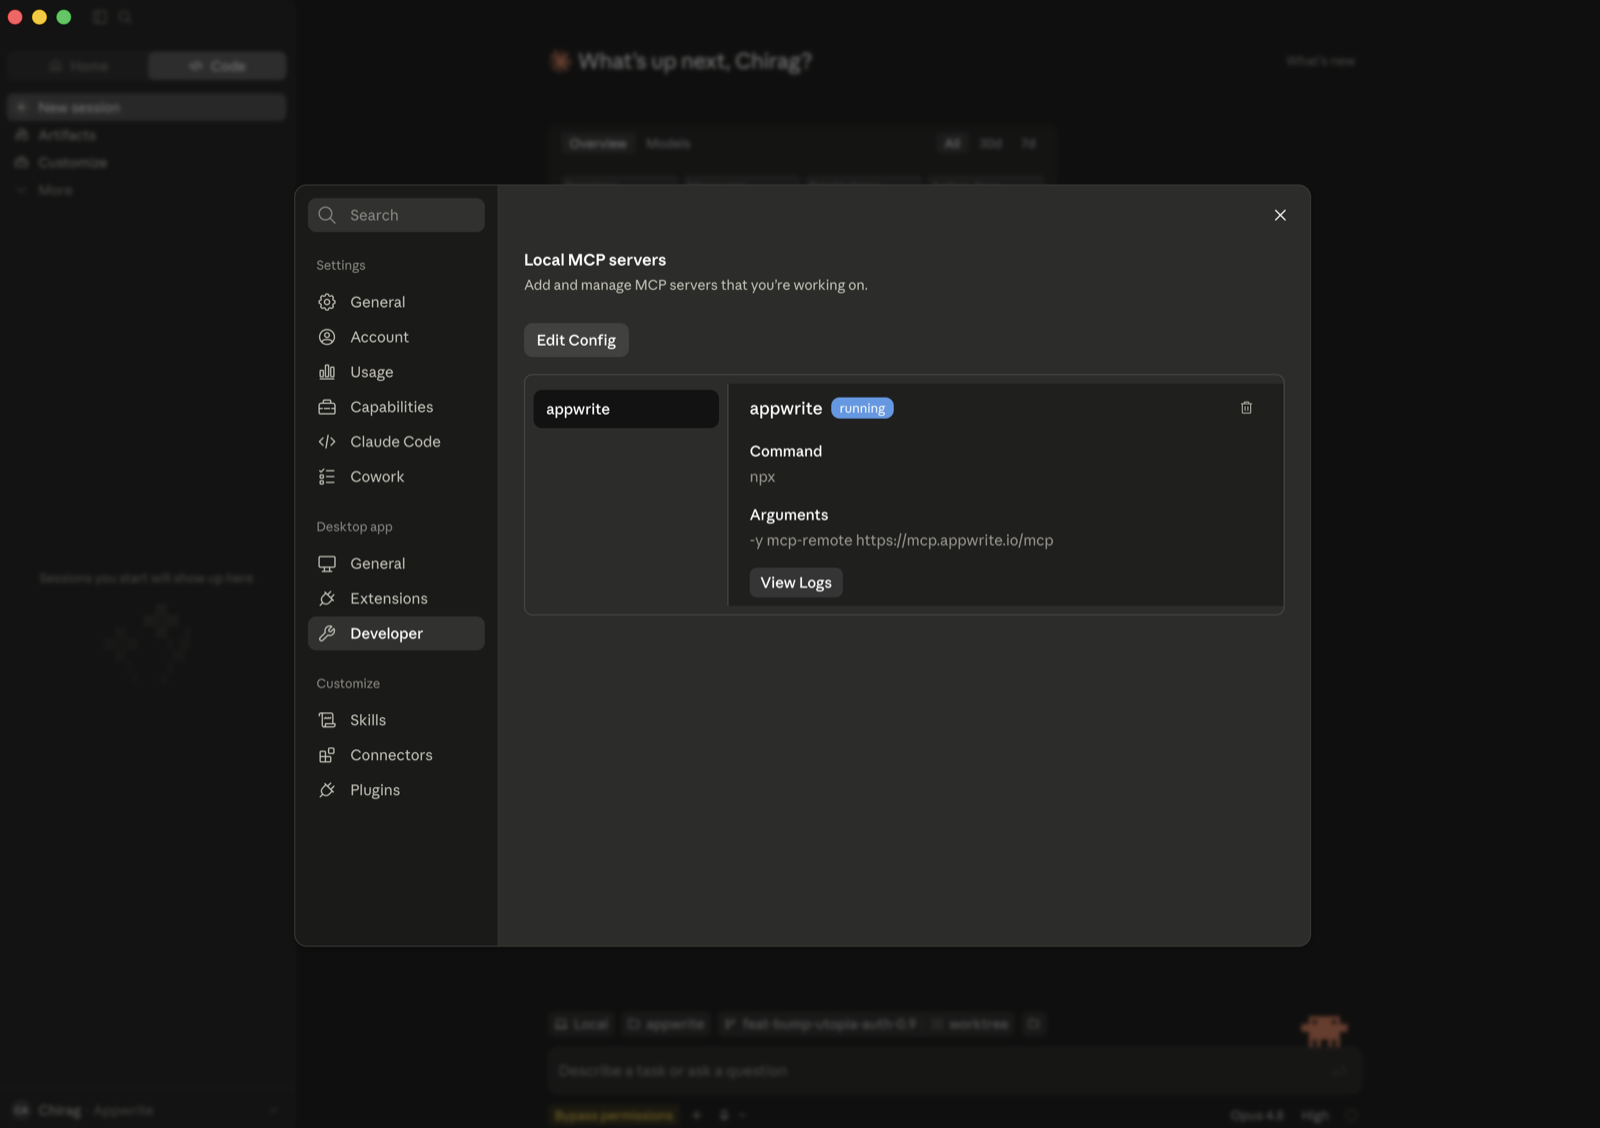
If you don't see that option (free plan, or a Team/Enterprise member), bridge the remote server through stdio instead (requires Node.js). Go to Settings → Developer → Local MCP servers, click Edit Config, and add:
{
  "mcpServers": {
    "appwrite": {
      "command": "npx",
      "args": ["-y", "mcp-remote", "https://mcp.appwrite.io/"]
    }
  }
}
Restart Claude Desktop; the server appears under Local MCP servers and a browser window opens to authenticate.
Edit ~/.cursor/mcp.json (global) or .cursor/mcp.json (project).
{
  "mcpServers": {
    "appwrite": {
      "url": "https://mcp.appwrite.io/"
    }
  }
}
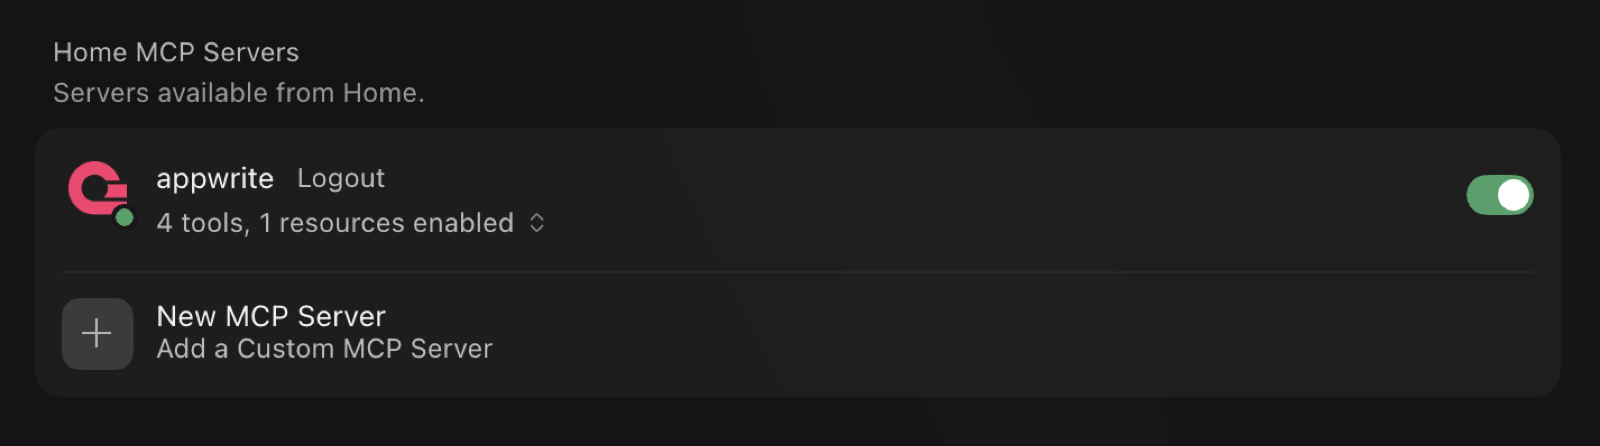
Cursor prompts you to log in through the browser; the server then shows up under Settings → MCP with its tools enabled.
Edit .vscode/mcp.json (workspace) or your user configuration via the Command
Palette → MCP: Open User Configuration.
{
  "servers": {
    "appwrite": {
      "type": "http",
      "url": "https://mcp.appwrite.io/"
    }
  }
}
Edit ~/.codex/config.toml.
[mcp_servers.appwrite]
url = "https://mcp.appwrite.io/"
Then authenticate from the terminal:
codex mcp login appwrite
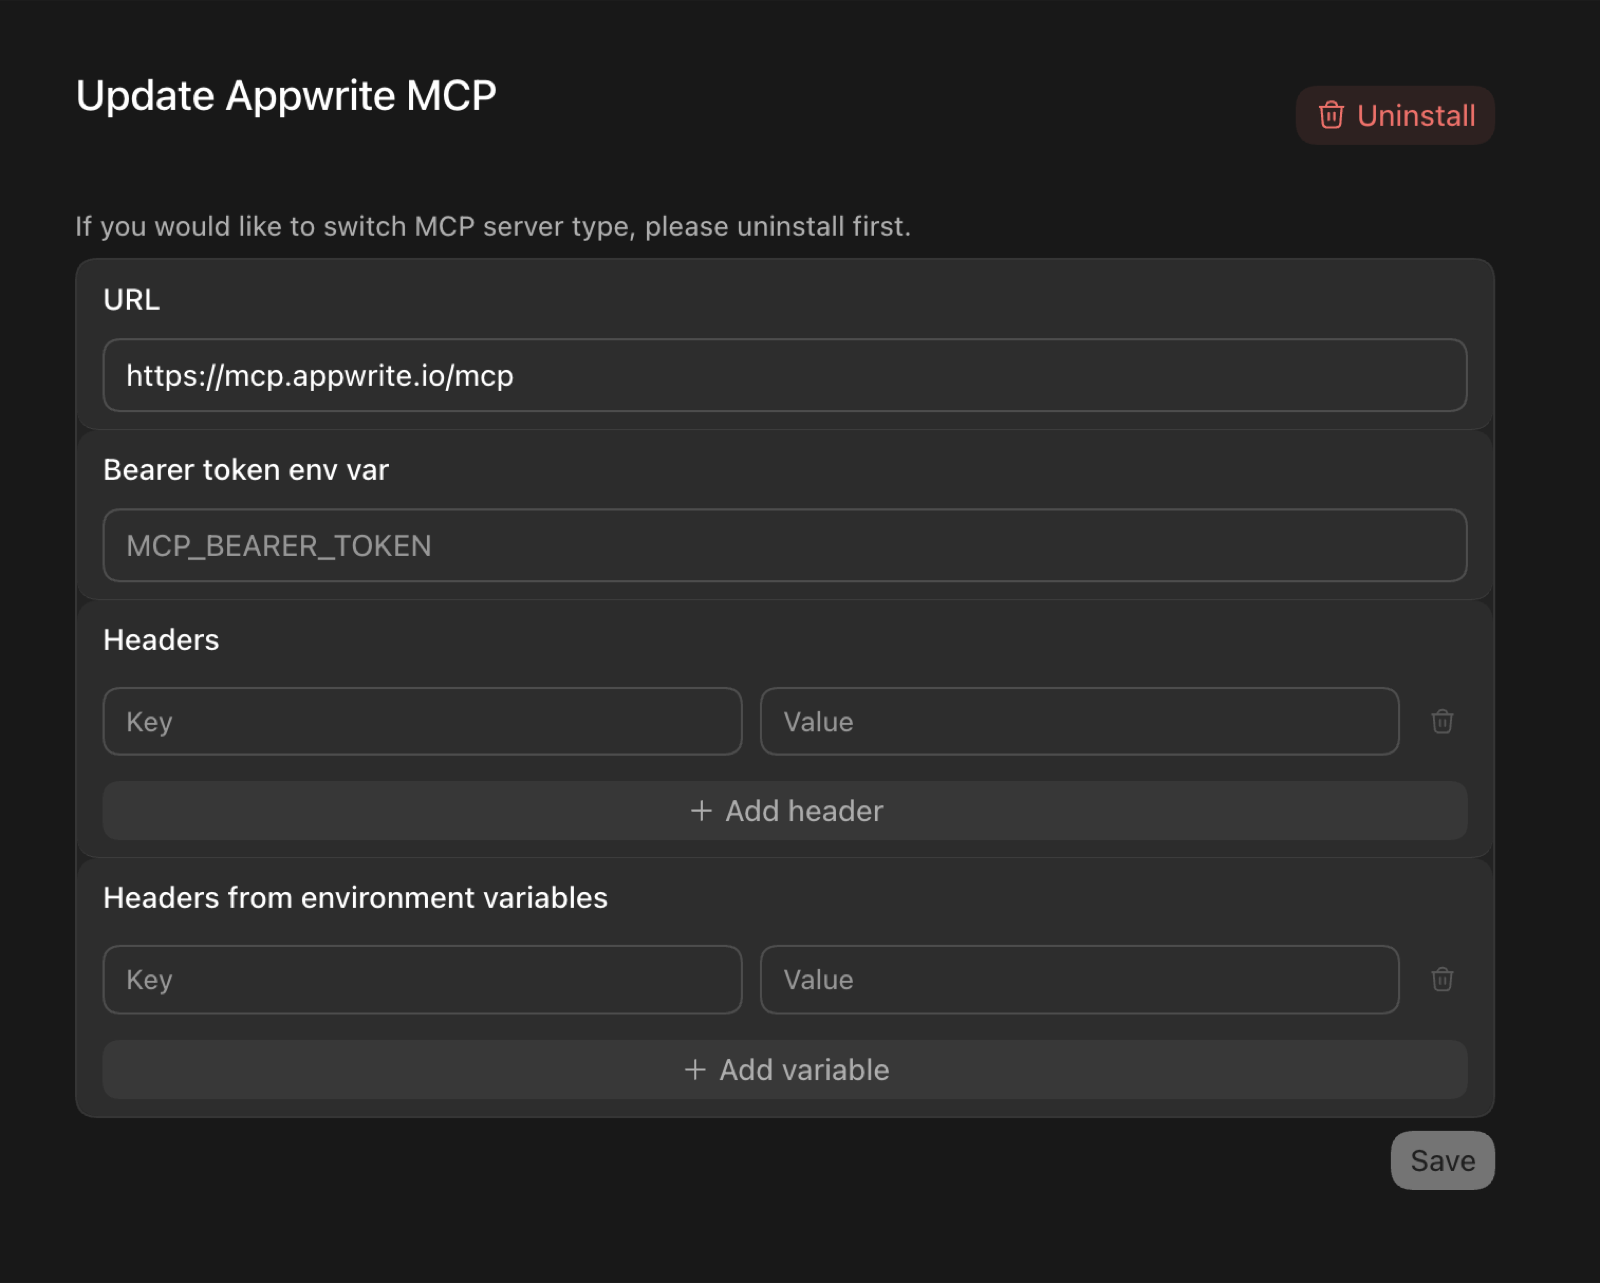
In the Codex GUI, you can instead add the server from the MCP settings —
set the URL to https://mcp.appwrite.io/ and leave the token and header
fields empty (authentication happens through the browser):
Edit opencode.json (project) or ~/.config/opencode/opencode.json (global).
{
  "$schema": "https://opencode.ai/config.json",
  "mcp": {
    "appwrite": {
      "type": "remote",
      "url": "https://mcp.appwrite.io/",
      "enabled": true
    }
  }
}
Edit ~/.codeium/windsurf/mcp_config.json.
{
  "mcpServers": {
    "appwrite": {
      "serverUrl": "https://mcp.appwrite.io/"
    }
  }
}
gemini mcp add --transport http appwrite https://mcp.appwrite.io/
Or edit ~/.gemini/settings.json (note the key is httpUrl, not url):
{
  "mcpServers": {
    "appwrite": {
      "httpUrl": "https://mcp.appwrite.io/"
    }
  }
}
Gemini CLI opens the browser OAuth flow automatically on first connect. To
re-authenticate, run /mcp auth appwrite inside a session.
Edit ~/.gemini/config/mcp_config.json (global) or .agents/mcp_config.json (project workspace).
{
  "mcpServers": {
    "appwrite": {
      "serverUrl": "https://mcp.appwrite.io/"
    }
  }
}
⚠️ Note: Antigravity strictly requires the
serverUrlkey for remote transport. Using legacy fields likeurlorhttpUrlwill cause tool registration to fail silently.
Antigravity opens the browser OAuth flow automatically on first connect. If you manually edit the JSON file, navigate to Settings → Customizations → Installed MCP Servers and click Refresh to reload the tool definitions.
copilot mcp add --transport http appwrite https://mcp.appwrite.io/
Or run /mcp add inside a session, or edit ~/.copilot/mcp-config.json:
{
  "mcpServers": {
    "appwrite": {
      "type": "http",
      "url": "https://mcp.appwrite.io/"
    }
  }
}
A browser window opens to authenticate on first connect. Check status with
/mcp.
Go to Settings → AI → MCP Servers → Add Server → Add Remote Server, or add
to your settings.json (zed: open settings):
{
  "context_servers": {
    "appwrite": {
      "url": "https://mcp.appwrite.io/"
    }
  }
}
Zed prompts you to authenticate through the browser on first connect.
Go to Settings → Agents → MCP servers → + Add, choose the URL-based
server type, and enter https://mcp.appwrite.io/.
Warp opens a browser window to authenticate on first connect.
JetBrains IDEs don't yet support OAuth for remote MCP servers, so bridge through stdio (requires Node.js). Go to Settings → Tools → AI Assistant → Model Context Protocol (MCP) → Add, switch to the JSON view, and paste:
{
  "mcpServers": {
    "appwrite": {
      "command": "npx",
      "args": ["-y", "mcp-remote", "https://mcp.appwrite.io/"]
    }
  }
}
A browser window opens to authenticate on first connect.
Cline doesn't yet support OAuth for remote MCP servers, so bridge through stdio (requires Node.js). In the Cline panel, open the MCP Servers icon → Configure tab → Configure MCP Servers, and add:
{
  "mcpServers": {
    "appwrite": {
      "command": "npx",
      "args": ["-y", "mcp-remote", "https://mcp.appwrite.io/"]
    }
  }
}
A browser window opens to authenticate on first connect.
Reasons and environments
Every write the agent makes carries a short reason (why it made the change).
Appwrite records it on the project's audit log, so you can review what your
agent changed, and why, in the project's Activity tab.
On Appwrite Cloud, the agent can act in a project's environments (for example
staging): appwrite_get_context lists them, and each call takes the
environment's ID as environment_id next to the project's project_id. See
Tool surface.
Self-hosted Appwrite
Running your own Appwrite instance? Run the MCP server locally over stdio and
authenticate with a project API key. See docs/self-hosted.md
for per-client setup.
Documentation
- Tool surface — the tools exposed to the model and the internal Appwrite catalog.
- How Cloud authentication works — the OAuth 2.1 flow.
- Documentation search — the in-process
appwrite_search_docstool and how to rebuild its index. - Events — MCP Events: webhook subscriptions to changes in your Appwrite project (in development, not available yet).
- Self-hosted Appwrite — run the server locally with a project API key.
- Local development — running, testing, and debugging the server locally.
- AGENTS.md — full contributor guide and pre-PR checklist.
License
This MCP server is licensed under the MIT License. See the LICENSE file for details.
Preguntas sobre Appwrite MCP
¿Cómo agrego Appwrite MCP a Claude Code?
Ejecuta claude mcp add mcp-for-api -- uvx mcp-server-appwrite en tu terminal. Añade --scope user para que esté disponible en todos los proyectos.
¿Cómo agrego Appwrite MCP a Cursor?
Abre ~/.cursor/mcp.json y añade el servidor en mcpServers, usando la configuración de Cursor que se muestra en la sección de instalación de arriba.
¿Cómo me autentico con el MCP server de Appwrite?
Te autenticas a través de tu navegador mediante una pantalla de consentimiento de Appwrite. No es necesario copiar claves en la versión alojada.
¿Puedo usar esto con una instancia de Appwrite self-hosted?
Sí, puedes ejecutar el MCP server localmente a través de stdio y autenticarte usando una API key de proyecto.
¿Cómo puedo rastrear los cambios realizados por el agente de IA?
Cada acción de escritura incluye un motivo breve que se registra en el log de auditoría de Appwrite del proyecto para que puedas revisarlo en la pestaña Activity.